首先,我們明確目標,做Tomcat集群的目的是為了提供更高的負載能力,把訪問均攤到不同的服務器上。
直觀地來說,就是訪問test.localhost.com時,nignx會隨機將訪問請求分發到tomcat1,tomcat2,為了保持session同步,使用memcached去管理session。
為此我們準備的配置清單是: windows x 1 nginx x 1 memcached x 1 tomcat x 2 mysql x 1
部署的架構圖如下:

首先,我準備了一個Java Web項目、tomcat 6、jdk6。
Step1 配置tomcat
先將項目部署到tomcat,因為要用到兩個tomcat,當然地要把其中一個tomcat的端口修改一下。
Step2 配置nginx
下載安裝nginx,http://kevinworthington.com/nginx-for-windows/。
在host里準備一個測試域名。打開C:\Windows\System32\drivers\etc\host, 添加域名映射
127.0.0.1 test.local.com
打開nginx的根目錄,在conf里添加test.conf,內容大概如下。
upstream test.local.com { server 127.0.0.1:8080 weight=1; server 127.0.0.1:8083 weight=1; } server { listen 80; server_name test.local.com; error_page 500 502 503 504 /50x.html; location = /50x.html { root html; } root /data/projects/ycp/bill; # - rewrite: if( path ~ "^/assets/(.*)" ) goto "/public/assets/$1" # location ~ ^/static/assets/(.*)$ # { #alias /data/projects/payment/web/public/assets/$1; # access_log off; # #expires 3d; # } location / { index index.html index.htm index.jsp; } location ~ .* { # proxy_pass_header Server; proxy_set_header Host $http_host; # proxy_redirect off; proxy_set_header X-Real-IP $remote_addr; proxy_set_header X-Scheme $scheme; proxy_set_header X-Forwarded-For $proxy_add_x_forwarded_for; add_header Pragma "no-cache"; proxy_pass http://test.local.com; } rewrite ^/admin/?$ /admin/login redirect; # for rewrite rewrite ^/(channel|admin|mobile|api|web)/(.*)$ /public/index.php/$2 last; #redirect to mobile wap #rewrite ^$ /m redirect; #rewrite ^/$ /mobile/user redirect; }
然后將test.conf引入到nginx.conf里面
include ycp-test.conf;
此時,我們可以啟動nginx和tomcat,訪問http://test.local.com,試試效果。
Step3 配置和調試memcached
上一步,我們配好了nginx集群,但是tomcat的session還沒有集到一起。接下來我們會用memcached管理session。
下載安裝memcached。http://blog.couchbase.com/memcached-windows-64-bit-pre-release-available
點擊這里直接下載
ps: memcached官網
解壓放某個盤下面,比如在c:\memcached
在CMD下輸入 "c:\memcached\memcached.exe -d install" 安裝。
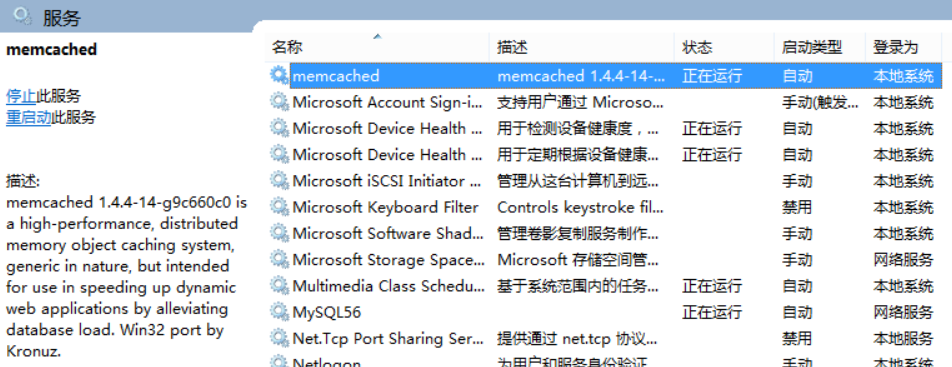
再輸入:"c:\memcached\memcached.exe -d start" 啟動。NOTE: 以后memcached將作為windows的一個服務每次開機時自動啟動。
如圖:
啟動時可添加其他參數
-p 監聽的端口
-l 連接的IP地址, 默認是本機
-d start 啟動memcached服務
-d restart 重起memcached服務
-d stop|shutdown 關閉正在運行的memcached服務
-d install 安裝memcached服務
-d uninstall 卸載memcached服務
-u 以的身份運行 (僅在以root運行的時候有效)
-m 最大內存使用,單位MB。默認64MB
-M 內存耗盡時返回錯誤,而不是刪除項
-c 最大同時連接數,默認是1024
-f 塊大小增長因子,默認是1.25
-n 最小分配空間,key+value+flags默認是48
-h 顯示幫助
另外,我們可以用telnet操作memcached
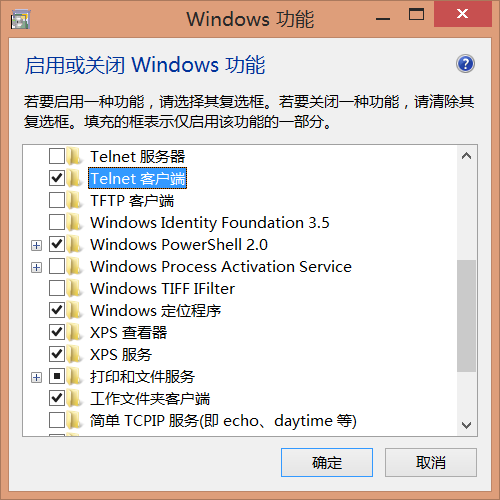
windows如果本來沒有telnet命令的話,可以在控制面板-程序和功能-啟動或關閉Windows功能里面勾選telnet客戶端
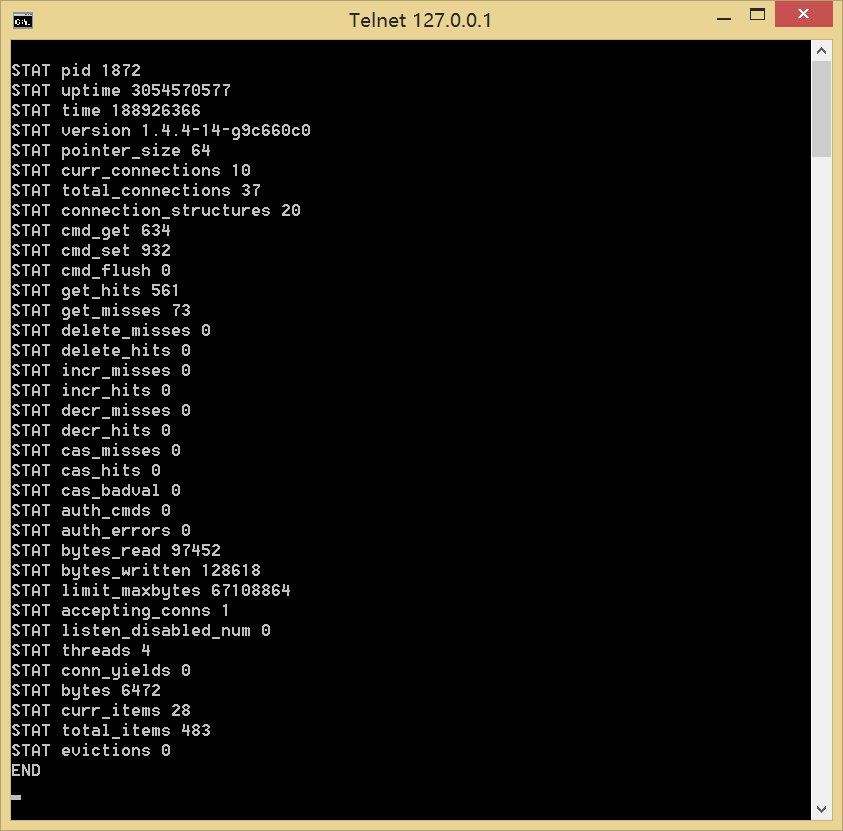
telnet 127.0.0.1 11211 stats
可得到描述Memcached服務器運行情況的參數。如下圖:
ps:網上給出的一些參數解釋
- pid: memcached服務進程的進程ID
- uptime: memcached服務從啟動到當前所經過的時間,單位是秒。
- time: memcached服務器所在主機當前系統的時間,單位是秒。
- version: memcached組件的版本。這里是我當前使用的1.2.6。
- pointer_size:服務器所在主機操作系統的指針大小,一般為32或64.
- curr_items:表示當前緩存中存放的所有緩存對象的數量。不包括目前已經從緩存中刪除的對象。
- total_items:表示從memcached服務啟動到當前時間,系統存儲過的所有對象的數量,包括目前已經從緩存中刪除的對象。
- bytes:表示系統存儲緩存對象所使用的存儲空間,單位為字節。
- curr_connections:表示當前系統打開的連接數。
- total_connections:表示從memcached服務啟動到當前時間,系統打開過的連接的總數。
- connection_structures:表示從memcached服務啟動到當前時間,被服務器分配的連接結構的數量,這個解釋是協議文檔給的,具體什么意思,我目前還沒搞明白。
- cmd_get:累積獲取數據的數量,這里是3,因為我測試過3次,第一次因為沒有序列化對象,所以獲取數據失敗,是null,后邊有2次是我用不同對象測試了2次。
- cmd_set:累積保存數據的樹立數量,這里是2.雖然我存儲了3次,但是第一次因為沒有序列化,所以沒有保存到緩存,也就沒有記錄。
- get_hits:表示獲取數據成功的次數。
- get_misses:表示獲取數據失敗的次數。
- evictions:為了給新的數據項目釋放空間,從緩存移除的緩存對象的數目。比如超過緩存大小時根據LRU算法移除的對象,以及過期的對象。
- bytes_read:memcached服務器從網絡讀取的總的字節數。
- bytes_written:memcached服務器發送到網絡的總的字節數。
- limit_maxbytes:memcached服務緩存允許使用的最大字節數。這里為67108864字節,也就是是64M.與我們啟動memcached服務設置的大小一致。
- threads:被請求的工作線程的總數量。
我們還可以用Java操作memcached
首先下載相關的jar包 Memcached-Java-Client
然后編寫客戶端OCSUtil.java
package net.bill.commons.util; import org.springframework.stereotype.Component; import com.danga.MemCached.MemCachedClient; import com.danga.MemCached.SockIOPool; @Component public class OCSUtil { private static OCSUtil session; public static OCSUtil getSession() { if (session == null) { synchronized(OCSUtil.class){ if(session==null){ session=new OCSUtil(); } } } return session; } /** * memcached客戶端 */ private MemCachedClient memcache = null; public OCSUtil(){ if (memcache == null) { memcache =new MemCachedClient(); String [] addr ={"127.0.0.1:11211"}; Integer [] weights = {3}; SockIOPool pool = SockIOPool.getInstance(); pool.setServers(addr); pool.setWeights(weights); pool.setInitConn(5); pool.setMinConn(5); pool.setMaxConn(200); pool.setMaxIdle(1000*30*30); pool.setMaintSleep(30); pool.setNagle(false); pool.setSocketTO(30); pool.setSocketConnectTO(0); pool.initialize(); } } public void setAttribute(String key, Object value){ memcache.set(key, value, 1000); } public Object getAttribute(String key){ return memcache.get(key); } public void removeAttribute(String key){ memcache.delete(key); } }
再編寫測試代碼BaseTest.java和OCSTest.java
package net.test.modules; import org.junit.Before; import org.junit.runner.RunWith; import org.springframework.beans.BeansException; import org.springframework.context.ApplicationContext; import org.springframework.context.ApplicationContextAware; import org.springframework.test.context.ContextConfiguration; import org.springframework.test.context.junit4.SpringJUnit4ClassRunner; @RunWith(SpringJUnit4ClassRunner.class) @ContextConfiguration(locations="/applicationContext.xml") public class BaseTest implements ApplicationContextAware{ public ApplicationContext ctxt; public void setApplicationContext(ApplicationContext arg0) throws BeansException { this.ctxt = arg0; } @Before public void setUp() throws Exception { } }
package net.test.modules; import net.bill.commons.util.OCSUtil; import net.bill.modules.pojo.User; import org.junit.Test; import org.springframework.beans.factory.annotation.Autowired; public class OCSTest extends BaseTest { @Autowired OCSUtil session; /** * 通過spring注入獲得客戶端 */ @Test public void test1() { session.setAttribute("user", new User("13355558888")); System.out.println(session.getAttribute("user")); } /** * 通過靜態方法獲得客戶端(單例) */ @Test public void test2() { OCSUtil session = OCSUtil.getSession(); System.out.println(session.getAttribute("user")); } }
要注意的是,User類必須實現Serializable接口,進行序列化。因為memcached的value類型是String。
接下來我要用memcached替換tomcat的session
在這之前,可以先看一下memcached-session-manager(google的),或中文翻譯的memcached-session-manager配置。
session的序列化方案官方推薦的有4種:
- kryo-serializer
- javolution-serializer
- xstream-serializer
- flexjson-serializer
我使用的是最簡單的一種,就是 java serialization。這個只要Java中存入session的對象實現Serializable就可以了。 然后下載以下jar包,并放在tomcat\lib\里
- memcached-session-manager-1.8.3.jar
- memcached-session-manager-tc6-1.8.3.jar
- spymemcached-2.11.1.jar
在tomcat\conf\context.xml,<Context>里加上以下配置:
<Manager className="de.javakaffee.web.msm.MemcachedBackupSessionManager" memcachedNodes="n1:127.0.0.1:11211" username="root" password="" sticky="false" sessionBackupAsync="false" lockingMode="uriPattern:/path1|/path2" requestUriIgnorePattern=".*\.(ico|png|gif|jpg|css|js)$" />
啟動tomcat,可以看見日志輸出以下信息:
信息: -------- - MemcachedSessionService finished initialization: - sticky: false - operation timeout: 1000 - node ids: [n1] - failover node ids: [] - storage key prefix: null --------
Step4 整體測試
現在可以測一下是否成功。
- 啟動tomcat1
- 訪問test.local.com,并登錄
- 啟動tomcat2,關閉tomcat1
- 查看登錄信息是否還在
測試通過的話,就基本上沒問題了。