準備
安裝好 GWT 開發(fā)環(huán)境(還沒安裝好?參考本博客文章
GWT 環(huán)境搭建、
GWT Debug 環(huán)境搭建)。下載 GXT 并解壓(
點擊下載 gxt-2.3.1)
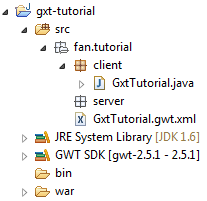
創(chuàng)建 GWT Java Project
( 還不會創(chuàng)建?參考本博客文章
GWT 環(huán)境搭建 中 HelloWorld 的創(chuàng)建過程。)
安裝 GXT
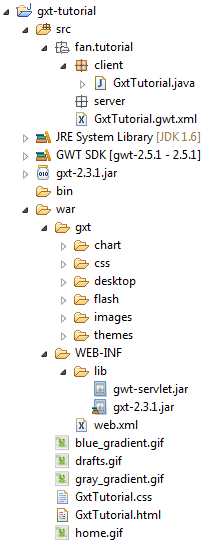
將解壓得到的 gxt-2.3.1.jar 拷貝到項目的 war/WEB-INF/lib 下,選中 gxt-2.3.1.jar 右鍵 Build Path --> Add to Build Path。
在 war 目錄下創(chuàng)建一個 gxt 文件夾,將解壓縮得到的 gxt-2.3.1/resources 目錄下的子目錄全部拷貝到 war/gxt 目錄下。
編輯 GxtTutorial.gwt.xml 文件,在里面添加一行 <inherits name='com.extjs.gxt.ui.GXT'/>
<module>
<inherits name="com.google.gwt.user.User"/>
<inherits name='com.extjs.gxt.ui.GXT'/>
<inherits name="com.google.gwt.user.theme.clean.Clean"/>
<entry-point class="fan.tutorial.client.GxtTutorial"/>
<source path="" />
<set-property name="user.agent" value="gecko1_8" />
</module>
編輯 GxtTutorial.html,在里面添加一行 <link rel="stylesheet" type="text/css" href="gxt/css/gxt-all.css" />
......
<link type="text/css" rel="stylesheet" href="GxtTutorial.css">
<link rel="stylesheet" type="text/css" href="gxt/css/gxt-all.css" />
......
編寫 GXT Hello World
package fan.tutorial.client;
import com.extjs.gxt.ui.client.widget.Html;
import com.extjs.gxt.ui.client.widget.Window;
import com.google.gwt.core.client.EntryPoint;
import com.google.gwt.user.client.ui.RootPanel;
public class GxtTutorial implements EntryPoint {
@Override
public void onModuleLoad() {
Window window = new Window();
window.setHeadingText("System Message");
window.add(new Html("<p style='font-size:28px;padding:15px;'>Hello World!</p>"));
window.setWidth(450);
window.setHeight(400);
window.setShadow(false);
window.show();
RootPanel.get().add(window);
}
}
配置 Tomcat server.xml

(沒看明白?參考本博客文章
GWT Debug 環(huán)境搭建)
開啟 GWT Debug
在 eclipse 中啟動 Tomcat,啟動 GWT Debug(參考本博客文章
GWT Debug 環(huán)境搭建)。
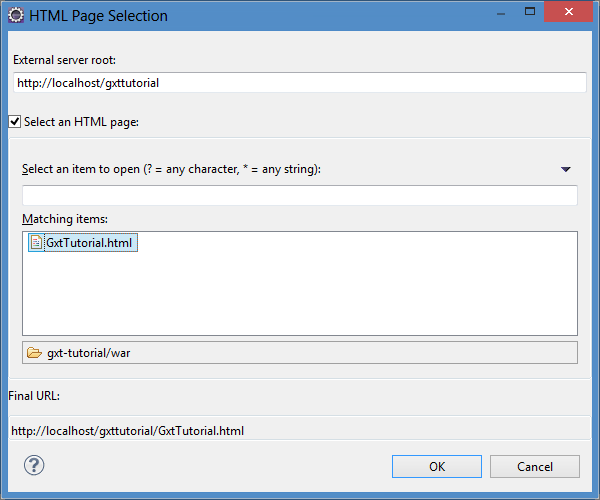
訪問 http://localhost/gxttutorial/GxtTutorial.html?gwt.codesvr=127.0.0.1:9997
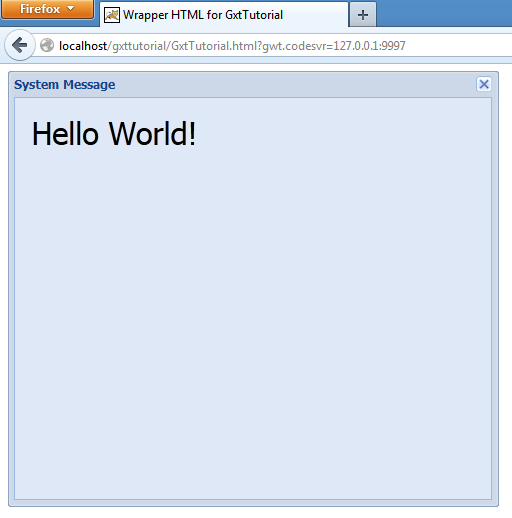
至此,我們的第一個 GXT 程序跑起來了,是不是很簡單呢 : )
posted on 2014-05-20 09:00
fancydeepin 閱讀(3087)
評論(4) 編輯 收藏