|
|
Posted on 2009-11-10 14:02 瘋狂 閱讀(4181) 評論(2) 編輯 收藏 所屬分類: android

本文通過一個實例來學習intent的部分功能。
網上也有很多文章講解了intent的用法,自己感覺他的字面意義說到了他的精髓: “目的、意向”,也就是說通過它來告訴應用程序將要做什么,intent正是這樣,android通過Intent機制來協助應用間的交互與通訊,網上的一句話來理解:Intent有兩種基本用法:一種是顯式的Intent,即在構造Intent對象時就指定接收者,這種方式與普通的函數調用類似,只是復用的粒度有所差別;另一種是隱式的Intent,即Intent的發送者在構造Intent對象時,并不知道也不關心接收者是誰,這種方式與函數調用差別比較大,有利于降低發送者和接收者之間的耦合。另外Intent除了發送外,還可用于廣播。本文的例子正式介紹其中的顯示intent,隱式的Intent將在下一篇中學習。
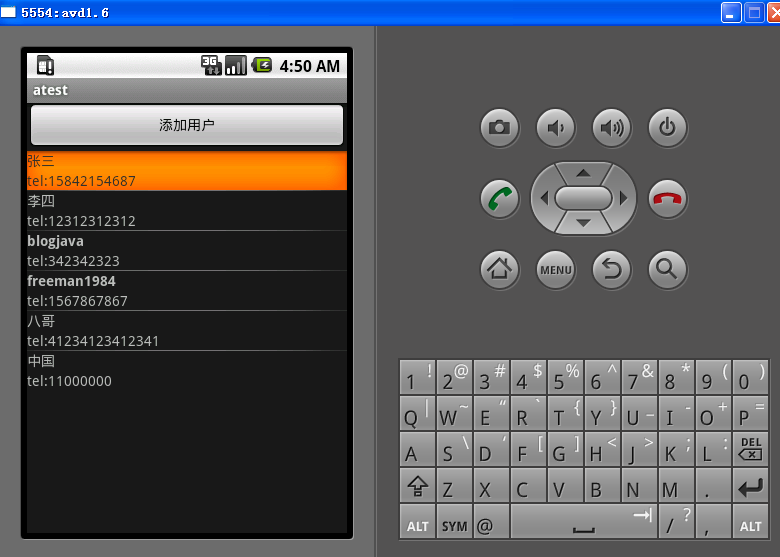
實例要達到大致的效果:一個頁面顯示用戶列表,其中有一個按鈕來添加用戶。
用戶列表界面:
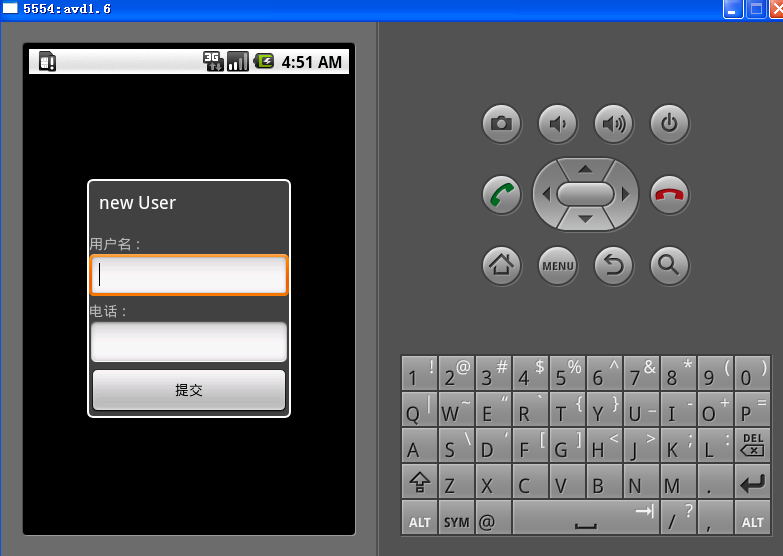
添加用戶界面:
顯示的intent需要明確他的目標Component 也就是intent必須包含具體Component的Name,什么是Component:
大致看下ComponentName源代碼:
  public final class ComponentName implements Parcelable public final class ComponentName implements Parcelable  { {
 private final String mPackage; private final String mPackage;
private final String mClass;
構造方法:
public ComponentName(String pkg, String cls)
public ComponentName(Context pkg, String cls)
public ComponentName(Context pkg, Class<?> cls)
其中有這樣的介紹:
@param pkg The name of the package that the component exists in. Can
* not be null.
* @param cls The name of the class inside of <var>pkg</var> that
* implements the component. Can not be null.
這個成員變量分別為目標的包和class的name
因此可以有三種方法夠造ComponentName 例如
new ComponentName(targetclass.class.getPackage().getName(),targetclass.class.getName()));
new ComponentName(this,targetclass.class.getName()));
new ComponentName(this,targetclass.class));
---------------------------------
這樣就構建了我們的意圖,
但是要通知目標組件實現這個意圖:
可以使用startActivity(intent)方法來啟動,但是本文使用了startActivityForResult方法,因為我們需要新打開的activity返回數據(新添加的用戶數據),
此方法的參數:startActivityForResult(Intent intent, int requestCode),
requestCode是干嘛的呢:文檔是這樣說的:
 requestCode If >= 0, this code will be returned in requestCode If >= 0, this code will be returned in
* onActivityResult() when the activity exits.
也就是說如果requestCode>0 我們就可以在目標activity返回的時候執行父窗口(官方叫做originating activity)的onActivityResult方法來處理我們的數據,我們可以使用已經定義好的requestCode,也可以自己定義,在代碼中我直接給賦值為1,正如文檔所說的,我們在用戶類表的activity里面重寫onActivityResult方法來刷新界面,以顯示新添加的用戶。
下面來看下我們的本實例的兩個activity:
首先是用戶列表activity:Test1.java:(使用到了simpleAdapter可以見于我的另外一篇文章http://www.tkk7.com/freeman1984/archive/2009/11/06/301475.html)
public class Test1 extends Activity {
ArrayList<HashMap<String, String>> users = new ArrayList<HashMap<String, String>>();
  /** *//** Called when the activity is first created. */ /** *//** Called when the activity is first created. */
@Override
public void onCreate(Bundle savedInstanceState) {
super.onCreate(savedInstanceState);
setContentView(R.layout.main);
final Button adduser = (Button)findViewById(R.id.Button01);
adduser.setOnClickListener(new OnClickListener(){
public void onClick(View v) {
Intent addnew = new Intent();
addnew.setComponent(new ComponentName(Test1.this,Test2.class));
startActivityForResult(addnew, 1);//通知打開新建用戶界面 ,requestCode>0就行
 }}); }});
initUser();//初始化界面上顯示一個用戶
updateList();//顯示列表
}
private void initUser() {
HashMap<String, String> user = new HashMap<String, String>();
user.put("name", "張三");
user.put("phonenum", "tel:15842154687");
users.add(user);
}
private void updateList() {
SimpleAdapter saImageItems = new SimpleAdapter(this,
users,// 數據來源
R.layout.user,//每一個user xml 相當ListView的一個組件
new String[] {"name", "phonenum" },
// 分別對應view 的id
new int[] { R.id.name, R.id.phonenum});
// 獲取listview
((ListView) findViewById(R.id.userlist)).setAdapter(saImageItems);
}
@Override
protected void onActivityResult(int requestCode, int resultCode, Intent data) {//重寫回調方法 將新用戶添加到列表中,并刷新界面
// TODO Auto-generated method stub
super.onActivityResult(requestCode, resultCode, data);
Bundle newuser = data.getExtras();
String name = newuser.getString("name");
String phonenum = newuser.getString("phonenum");
HashMap<String, String> user = new HashMap<String, String>();
user.put("name", name);
user.put("phonenum", "tel:"+phonenum);
Log.d("Test1", "phonenum:"+phonenum);
users.add(user);
updateList();
}
 } }
注意的不能在startActivityForResult(addnew, 1);后面finish();要不originating實例(列表activity)就不在了。
新建用戶activity Test2.java
public class Test2 extends Activity {
/** *//** Called when the activity is first created. */
EditText newname;
EditText newphone;
Button submitbn;
@Override
public void onCreate(Bundle savedInstanceState) {
setTheme(android.R.style.Theme_Dialog);
super.onCreate(savedInstanceState);
setContentView(R.layout.newuser);
setTitle("new User");
newname = (EditText)findViewById(R.id.newname);
newphone = (EditText)findViewById(R.id.newphone);
submitbn = (Button)findViewById(R.id.submitbn);
submitbn.setOnClickListener(new OnClickListener(){
public void onClick(View v) {
Intent submiti = new Intent();
submiti.setComponent(new ComponentName(Test2.this,Test1.class));
Bundle user = new Bundle();
user.putString("name", newname.getText().toString());
user.putString("phonenum", newphone.getText().toString());
submiti.putExtras(user);
setResult(RESULT_OK, submiti);//返回正確
finish();//此方法將會根據resultCode來處理如何關閉acticity
}});
}
}
本文大致介紹了下顯示的intent 將在下一篇中看看隱式的intent,也就是intent的其他成員變量的使用:intent主要的成員變量如下:
private String mAction;
private Uri mData;
private String mType;
private ComponentName mComponent;
private int mFlags;
private HashSet<String> mCategories;
private Bundle mExtras;
希望高手指點,共同學習~!
評論
# re: android學習之 intent 實例[未登錄] 回復 更多評論
2009-11-10 16:20 by
學習了!
# re: android學習之 intent 實例 回復 更多評論
2010-01-27 16:05 by
LZ通過代碼學習的方面很見功力啊! PFPF.
|