不知道大家有沒有用過農業銀行的網上銀行服務,該網上銀行登錄時,輸入密碼時,不可以直接打鍵盤輸入,要用鼠標點擊圖形小鍵盤來輸入,而小鍵盤里面的數字是隨機排列的。
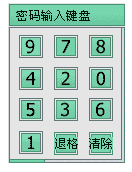
這樣一來,可以防止木馬記錄用戶鍵盤輸入的密碼被盜,確實是挻實用的功能,研究了一翻后,也大根掌握了它的工作原理,現在用Java來實現,大概是這樣的:用Struts來實現,先是用戶點擊“登錄”按鈕,將會提交到Action里,在Action里進行如下處理:生成一個隨機的不重復的數組,分別是0-9的數字,之后將該數組存放在Session里,之后Action再跳轉到 login.jsp 里面,在Jsp里面添加一個圖像標簽
<img src="/servlet/CreatePwdPad" width="150" height="190" border="0" usemap="#Map"/>
該圖像將訪問 Servlet 來讀取小鍵盤圖像,Servlet將做如下處理:獲取Session中的數組,跟據數據順序畫出小鍵盤的位置,再輸入圖片。Jsp再用Map來定位小鍵盤中的數字按鍵,在寫點擊事件,讓JavaScript去取出該按鈕的值放到密碼框中。之后提交登錄。
以下是Action的代碼:
1 import java.util.*;
2 import javax.servlet.http.HttpServletRequest;
3 import javax.servlet.http.HttpServletResponse;
4 import org.apache.struts.action.Action;
5 import org.apache.struts.action.ActionForm;
6 import org.apache.struts.action.ActionForward;
7 import org.apache.struts.action.ActionMapping;
8
9
10 public class SecuLoginAction extends Action {
11
12 public ActionForward execute(ActionMapping mapping, ActionForm form,
13 HttpServletRequest request, HttpServletResponse response) {
14
15 int[] numArr = {0,1,2,3,4,5,6,7,8,9}; //先定義一個數組
16 int[] result = new int[10]; //生成組果數組
17 Random random = new Random();
18 for(int i=10;i>0;i--){
19 int ran = random.nextInt(i); //隨機生成一個10以內的數
20 result[i-1] = numArr[ran]; //保存該數
21 numArr[ran] = numArr[i-1]; //覆蓋已抽出的數
22 }
23 request.getSession().setAttribute("result", result); //生成后放入Session
24 return mapping.getInputForward(); //轉到JSP頁面
25 }
26 }
上面Action已生成一個數組,只要放進Session,讓Servlet取出來進行跟據排列來生成圖像
以下是JSP頁面代碼:
1 <%@ page language="java" pageEncoding="utf-8"%>
2
3 <%@ taglib uri="http://struts.apache.org/tags-bean" prefix="bean" %>
4 <%@ taglib uri="http://struts.apache.org/tags-html" prefix="html" %>
5 <%@ taglib uri="http://struts.apache.org/tags-logic" prefix="logic" %>
6 <%@ taglib uri="http://struts.apache.org/tags-tiles" prefix="tiles" %>
7
8 <script type="text/javascript">
9 <!--
10 function show(a){
11 if(a=='C'){
12 window.pwd.value = "";
13 }else if(a=='B'){
14 var str = window.pwd.value;
15 var len = str.length;
16 window.pwd.value = str.substr(0,len-1);
17 }else{
18 if(window.pwd.value.length==6){
19 return;
20 }
21 window.pwd.value += a;
22 }
23 }
24 //-->
25 </script>
26 <!DOCTYPE HTML PUBLIC "-//W3C//DTD HTML 4.01 Transitional//EN">
27 <html:html lang="true">
28 <head>
29 <html:base />
30
31 <title>login.jsp</title>
32
33 <meta http-equiv="pragma" content="no-cache">
34 <meta http-equiv="cache-control" content="no-cache">
35 <meta http-equiv="expires" content="0">
36 <meta http-equiv="keywords" content="keyword1,keyword2,keyword3">
37 <meta http-equiv="description" content="This is my page">
38 <!--
39 <link rel="stylesheet" type="text/css" href="styles.css">
40 -->
41
42 </head>
43
44 <body>
45 <jsp:useBean id="result" type="int[]" scope="session"/>
46 <img src="/XBank/servlet/CreatePwdPad" width="150" height="190" border="0" usemap="#Map"/>
47 <input id="pwd" type="password" maxlength="6" readonly value="" name="abc"/>
48 <map name="Map" id="Map">
49 <area shape="rect" coords="20,20,50,50" onClick="javascript:show('${result[0]}')" />
50 <area shape="rect" coords="60,20,90,50" onClick="javascript:show('${result[1]}')" />
51 <area shape="rect" coords="100,20,130,50" onClick="javascript:show('${result[2]}')" />
52
53 <area shape="rect" coords="20,60,50,90" onClick="javascript:show('${result[3]}')" />
54 <area shape="rect" coords="60,60,90,90" onClick="javascript:show('${result[4]}')" />
55 <area shape="rect" coords="100,60,130,90" onClick="javascript:show('${result[5]}')" />
56
57 <area shape="rect" coords="20,100,50,130" onClick="javascript:show('${result[6]}')" />
58 <area shape="rect" coords="60,100,90,130" onClick="javascript:show('${result[7]}')" />
59 <area shape="rect" coords="100,100,130,130" onClick="javascript:show('${result[8]}')" />
60
61 <area shape="rect" coords="20,140,50,170" onClick="javascript:show('${result[9]}')" />
62 <area shape="rect" coords="60,140,90,170" onClick="javascript:show('C')" />
63 <area shape="rect" coords="100,140,130,170" onClick="javascript:show('B')" />
64 </map>
65 </body>
66 </html:html>
以上JSP代碼要注意的是JavaScript的取值,與圖片Map的生成。還有就是<img>的src路徑,要是Servlet的路徑。
以下是Servlet的代碼就是生成圖片的代碼:
1 import java.io.IOException;
2 import java.io.PrintWriter;
3
4 import java.io.*;
5 import java.net.*;
6 import javax.imageio.*;
7 import java.awt.*;
8 import java.awt.image.*;
9
10 import javax.servlet.*;
11 import javax.servlet.http.HttpSession;
12 import javax.servlet.http.HttpServlet;
13 import javax.servlet.http.HttpServletRequest;
14 import javax.servlet.http.HttpServletResponse;
15
16 public class CreatePwdPad extends HttpServlet {
17
18
19 public CreatePwdPad() {
20 super();
21 }
22
23
24 public void destroy() {
25 super.destroy();
26
27 }
28
29
30 public void doGet(HttpServletRequest request, HttpServletResponse response)
31 throws ServletException, IOException {
32
33 response.setContentType("image/png");
34 response.setHeader("Pragma","No-cache");
35 response.setHeader("Cache-Control","no-cache");
36 response.setDateHeader("Expires", 0);
37 HttpSession session=request.getSession();
38
39 int[] numArr = (int[])session.getAttribute("result");
40
41 final int opWidth = 150; //外框寬
42 final int opHeight = 190; //外框高
43 final int ipWidth = 130; //內框寬
44 final int ipHeight = 170; //內框高
45 final int cellWidth = 30; //格子寬
46 final int cellHeight = 30; //格子高
47 final int padding = 10; //間隔
48 final int c0x = 20; //第一格子原點X
49 final int c0y = 20; //第一格子原點Y
50
51
52 //創建一個Image圖片
53 BufferedImage image = new BufferedImage(opWidth,opHeight,BufferedImage.TYPE_INT_RGB);
54 Graphics g = image.getGraphics();
55 g.setColor(new Color(0xaa,0xaa,0xaa)); //設置外框的顏色
56 g.fillRect(0, 0, opWidth, opHeight);
57 g.setColor(new Color(0xdd,0xdd,0xdd)); //設置內框的顏色
58 g.fillRect(10, 10, ipWidth, ipHeight);
59 g.setColor(new Color(0xff,0xff,0xff)); //設置格子的顏色
60
61 //****************** 畫格子部份 *****************************
62 g.fillRect(c0x, c0y, cellWidth, cellHeight); //畫第一個格子
63 g.fillRect(c0x+cellWidth+padding, c0y, cellWidth, cellHeight); //畫第二個格子
64 g.fillRect(c0x+2*cellWidth+2*padding, c0y, cellWidth, cellHeight); //畫第三個格子
65 g.fillRect(c0x, c0y+cellHeight+padding, cellWidth, cellHeight); //畫第四個格子
66 g.fillRect(c0x+cellWidth+padding, c0y+cellHeight+padding, cellWidth, cellHeight);//畫第五個格子
67 g.fillRect(c0x+2*cellWidth+2*padding, c0y+cellHeight+padding, cellWidth, cellHeight);//畫第六個格子
68 g.fillRect(c0x, c0y+2*cellHeight+2*padding, cellWidth, cellHeight);//畫第七個格子
69 g.fillRect(c0x+cellWidth+padding, c0y+2*cellHeight+2*padding, cellWidth, cellHeight);//畫第八個格子
70 g.fillRect(c0x+2*cellWidth+2*padding, c0y+2*cellHeight+2*padding, cellWidth, cellHeight);//畫第九個格子
71 g.fillRect(c0x, c0y+3*cellHeight+3*padding, cellWidth, cellHeight);//畫第十個格子
72 g.fillRect(c0x+cellWidth+padding, c0y+3*cellHeight+3*padding, cellWidth, cellHeight);//畫第十一個格子
73 g.fillRect(c0x+2*cellWidth+2*padding, c0y+3*cellHeight+3*padding, cellWidth, cellHeight);//畫第十二個格子
74
75 Font font = new Font("Times New Roman",Font.PLAIN,18);
76 g.setFont(font);
77 g.setColor(new Color(0x00,0x00,0x00));
78
79 g.drawString(String.valueOf(numArr[0]), 32, 40); //畫第一個數字
80 g.drawString(String.valueOf(numArr[1]), 72, 40); //畫第二個數字 下同
下同
81 g.drawString(String.valueOf(numArr[2]), 112, 40);
82 g.drawString(String.valueOf(numArr[3]), 32, 80);
83 g.drawString(String.valueOf(numArr[4]), 72, 80);
84 g.drawString(String.valueOf(numArr[5]), 112, 80);
85 g.drawString(String.valueOf(numArr[6]), 32, 120);
86 g.drawString(String.valueOf(numArr[7]), 72, 120);
87 g.drawString(String.valueOf(numArr[8]), 112, 120);
88 g.drawString(String.valueOf(numArr[9]), 32, 160);
89 font = new Font("Times New Roman",Font.PLAIN,12); //設置字體
90 g.setFont(font);
91 g.drawString("Clean", 62, 160); //畫Clean按鈕
92 g.drawString("Back", 103, 160); //畫Back按鈕
93
94 g.dispose();
95 ServletOutputStream responseOutputStream =response.getOutputStream();
96 ImageIO.write(image, "PNG", responseOutputStream);
97 responseOutputStream.flush();
98 responseOutputStream.close();
99 }
100
101
102 public void doPost(HttpServletRequest request, HttpServletResponse response)
103 throws ServletException, IOException {
104 doGet(request,response);
105 }
106
107
108 public void init() throws ServletException {
109 // Put your code here
110 }
111
112 }
這里要注意的是圖片的位置,與文字的位置,還要修改輸出類型,類型為圖片。
以下給出這三個文件的源文件打包:
[down=attachments/month_0709/8200791617275.rar]點擊下載此文件[/down]
posted on 2008-07-29 12:47
姜大叔 閱讀(1232)
評論(1) 編輯 收藏 所屬分類:
Java