XFire簡介:
XFire是新一代的Java Web服務引擎,XFire使得在JavaEE應用中發布Web服務變得輕而易舉。和其他Web服務引擎相比,XFire的配置非常簡單,可以非常容易地和Spring集成,它使得Java開發人員終于可以獲得和.Net開發人員一樣的開發效率。具體內容請訪問:http://baike.baidu.com/view/920041.html
WebService簡介:
它是一種構建應用程序的普遍模型,可以在任何支持網絡通信的操作系統中實施運行;它是一種新的web

webservice
應用程序分支,是自包含、自描述、模塊 化的應用,可以發布、定位、通過web調用。Web Service是一個應用組件,它邏輯性的為其他應用程序提供數據與服務.各應用程序通過網絡協議和規定的一些標準數據格式(Http,XML,Soap)來訪問Web Service,通過Web Service內部執行得到所需結果.Web Service可以執行從簡單的請求到復雜商務處理的任何功能。一旦部署以后,其他Web Service應用程序可以發現并調用它部署的服務。
具體內容請訪問:http://baike.baidu.com/view/837392.html
使用這三種技術主要是在客戶端調用服務器端的方法,屬于遠程調用。
先看服務器端:
新建一個java project項目,按下圖建立包結構:

其實要寫的代碼非常簡單,或許你看到了會不相信,在SOAPService.java中代碼如下:

 public interface SOAPService
  {
{

 String sayHi(String x);
 int add(int x,int y);
 int sendmsm(String context,int to);
 }
}


在SOAPServiceImpl.java中代碼如下:

 public class SOAPServiceImpl implements SOAPService
  {
{


 public String sayHi(String x)
  {
{
 return("Hello my friend, " + x + "! Glad to see you!");
 }
}

 public int add(int x,int y)
 {
{
 return x+y;
 }
}

 public int sendmsm(String context, int to)
  {
{
 return 0;
 }
}
 }
}


簡單吧?重要的是配置,pom.xml是將所用到的jar包的dependency放進去,運行在dos窗口下找到這個項目然后執行這兩條語句:mvn eclipse:clean ,mvn eclipse:eclipse語句就會將文件中所需要的jar包下載下來,當然你的電腦上必須配置maven,具體怎么配置我就說了,如果你沒有配置的話你可以將所需要的jar包下載下來,然后添加到build path中。在web項目最重要的就是web.xml文件中的配置,在文件中配置如下:
 <listener>
 <listener-class>org.springframework.web.context.ContextLoaderListener</listener-class>
 </listener>

 <context-param>
 <param-name>contextConfigLocation</param-name>
 <param-value>/WEB-INF/classes/Spring-*.xml</param-value>
 </context-param>

 <!--編碼設置-->
 <filter>
 <filter-name>SetCharacterEncoding</filter-name>
 <filter-class>org.springframework.web.filter.CharacterEncodingFilter</filter-class>
 <init-param>
 <param-name>encoding</param-name>
 <param-value>UTF-8</param-value>
 </init-param>
 </filter>
 <filter-mapping>
 <filter-name>SetCharacterEncoding</filter-name>
 <url-pattern>/*</url-pattern>
 </filter-mapping>

 <!--xfire 設置WS -->
 <servlet>
 <servlet-name>xfire</servlet-name>
 <servlet-class>org.springframework.web.servlet.DispatcherServlet</servlet-class>
 </servlet>
 <servlet-mapping>
 <servlet-name>xfire</servlet-name>
 <url-pattern>*.Service</url-pattern>
 </servlet-mapping>

 對于xfire項目這個xfire-servlet.xml也是很重要的,在xfire-servlet.xml文件中配置下:

 <beans>
 <!-- 引入XFire預配置信息 -->
 <import resource="classpath:org/codehaus/xfire/spring/xfire.xml" />
 <!-- 定義訪問的url -->
 <bean class="org.springframework.web.servlet.handler.SimpleUrlHandlerMapping">
 <property name="urlMap">
 <map>
<map>
 <entry key="/Services/Hello.Service">
 <ref bean="WsHelloService" />
 </entry>
 </map>
 </property>
 </bean>
 <!-- 使用XFire導出器 -->
 <bean id="baseWebService" class="org.codehaus.xfire.spring.remoting.XFireExporter" lazy-init="false" abstract="true">
 <!-- 引用xfire.xml中定義的工廠 -->
 <property name="serviceFactory" ref="xfire.serviceFactory" />
 <!-- 引用xfire.xml中的xfire實例 -->
 <property name="xfire" ref="xfire" />
 </bean>
 <bean id="WsHelloService" parent="baseWebService">
 <!-- 業務服務bean -->
 <property name="serviceBean" ref="WsHelloImpl"/>
 <!-- 業務服務bean的窄接口類 -->
 <property name="serviceClass" value="com.cmcc.interfaces.SOAPService" />
 </bean>
 </beans>


上面的功能寫的很清楚了。
在spring-content.xml文件中的配置如下:
 <beans>
 <import resource="spring/Spring-Service.xml" />
 </beans>
它的功能連接spring-servicie.xml文件中的內容,就是一個中間橋梁的作用。在spring-service.xml文件中的配置如下:
 <beans>
 <bean id="WsHelloImpl" class="com.cmcc.impl.SOAPServiceImpl">
 <!--<property name="userService" ref="UserService"></property> -->
 </bean>
 </beans>


這個配置文件就是通過spring和實體的程序連接到一起。
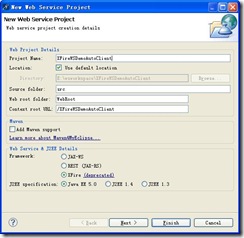
看客戶端,客戶端有兩種形式,一個是自動生成的,新建一個web service project
看下圖勾選

然后選擇finish,然后再服務器開啟的的狀態下,右擊這個項目新建一個web service client

在wsdl中寫上訪問服務器端的url,然后finish,然后就完成了客戶端的程序,你可以在客戶端的程序中調用服務器的方法。

另一種客戶端生成的形式就是自己來寫了,新建一個XFireWSDemoClient的project,然后建立如下包結構:
SOAPService.java的包路徑一定要和服務器端的包路徑相同,在WsFactory.JAVA中是用來生成service的,代碼如下:

 public class WsFactory
  {
{
 private static ArrayList l;
 private static HashMap props;
 private static ObjectServiceFactory serviceFactory;

 /** *//**
 * 上傳信息
 * */
* */

 public static SOAPService getSOAPService()
 {
{
 //調用xfire的遠程方法,將接收到的xml信息解析后發送給服務器??
 String url = "http://localhost:8080/Services/Hello.Service";
 serviceFactory = new ObjectServiceFactory();
 l = new ArrayList();
 l.add(Integer.class.getName());
 props = new HashMap();
 props.put(AegisBindingProvider.WRITE_XSI_TYPE_KEY, Boolean.TRUE);
 props.put(AegisBindingProvider.READ_XSI_TYPE_KEY, Boolean.TRUE);
 props.put(AegisBindingProvider.OVERRIDE_TYPES_KEY, l);
 Service serviceModel = serviceFactory.create(SOAPService.class,props);
 SOAPService service = null;

 try
try  {
{
 service = (SOAPService) new XFireProxyFactory().create(serviceModel,url);

 } catch (MalformedURLException e)
  {
{
 e.printStackTrace();
 }
}
 return service;
 }
}
 }
}


wstest.java只是一個簡單的測試類,代碼如下:

 public class WSTest
 {
{

 public static void main(String[]args)
  {
{
 SOAPService service = WsFactory.getSOAPService();
 System.out.println(service.sayHi("馮魁"));
 }
}
 }
}


這樣就會調用服務器端的方法了!
本人也是初學,只是會簡單的使用原理懂的不多,請各位大蝦批評指正!