關鍵字: swinghacks,swing
接著上次的進度,上次寫完了背景,
現在可以考慮標簽和按鈕了。
這個標簽是位于背景上的某個位置的靜態圖像。
例1.3:一個圖像標簽類
package org.component;
import javax.swing.ImageIcon;
import javax.swing.JLabel;
/**
*
* @author root
*/
public class ImageLabel extends JLabel {
public ImageLabel(String img) {
this(new ImageIcon(img));
System.out.print(img);
}
public ImageLabel(ImageIcon icon)
{
//得到的是圖像的長和寬
setSize(icon.getImage().getWidth(null),icon.getImage().getHeight(null));
setIcon(icon); //設置圖像
setIconTextGap(0); //設置文本間隙
setBorder(null); //設置邊框和文本為null,這樣可以消除圖像周圍的多余空間。
setText(null);
setOpaque(false); //告訴標簽不要繪制自己的背景。即可以變成透明的。
}
}
寫完上面的代碼后就可以在ImageTest 的main 方法里加入下面這段代碼:
ImageLabel2 label = new ImageLabel2(new ImageIcon(ImagePanelTest.class.getResource("/images/stop.png")));
label.setLocation(130, 40);
panel.add(label);
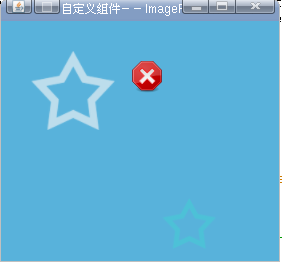
測試一個效果:(這次換個背景,原來的背景太鮮艷了,這次換個淡點的。 )
)
注意紅色的stop圖表:
既然ImageLabel 效果有了,現在開始寫ImageButton了
package org.component;
import java.awt.Insets;
import javax.swing.ImageIcon;
import javax.swing.JButton;
/**
*
* @author root
*/
public class ImageButton extends JButton {
public ImageButton(String img) {
this(new ImageIcon(img));
System.out.print(img);
}
public ImageButton(ImageIcon icon) {
setSize(icon.getImage().getWidth(null),icon.getImage().getHeight(null));
setIcon(icon);
setMargin(new Insets(0, 0, 0, 0)); //設置按鈕邊框和標簽之間的空白
setIconTextGap(0); //設置文本間隙
setBorderPainted(false); //設置是否允許繪制邊框
setBorder(null);
setText(null);
}
}
為ImageButton 添加互動和其他狀態,幸運的是,這項工作不需要自己編寫,JButton 已經為表示滾動,按下,選中,失效和失效選中狀態的圖像提供了支持。可通過普通的set方法添加各種選中狀態:
在ImageTest 的main 方法里加入
final ImageButton button = new ImageButton(new ImageIcon(ImagePanelTest.class.getResource("/images/sure1.png")));
button.setLocation(180, 80);
button.setPressedIcon(new ImageIcon(ImagePanelTest.class.getResource("/images/sure3.png")));
button.setRolloverIcon(new ImageIcon(ImagePanelTest.class.getResource("/images/sure-Rollover.png")));
button.setSelectedIcon(new ImageIcon(ImagePanelTest.class.getResource("/images/sure3.png")));
button.setRolloverSelectedIcon(new ImageIcon(ImagePanelTest.class.getResource("/images/sure-rolloverselected.png")));
button.setDisabledIcon(new ImageIcon(ImagePanelTest.class.getResource("/images/sure-disable.png")));
button.setDisabledSelectedIcon(new ImageIcon(ImagePanelTest.class.getResource("/images/sure-disable.png")));
button.addActionListener(new ActionListener() {
public void actionPerformed(ActionEvent evt) {
button.setSelected(!button.isSelected());
System.out.println("selecting");
}
});
panel.add(button);
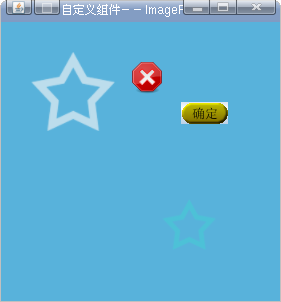
看看效果圖:
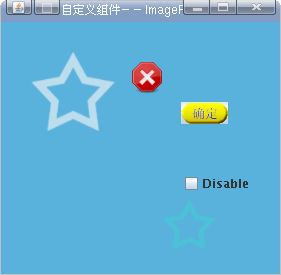
現在添加一個可以控制按鈕是否可用的方法。我們可以借助JCheckBox 來實現
在ImageTest main 方法里添加以下代碼:
final JCheckBox checkbox = new JCheckBox("Disable");
checkbox.setLocation(180,150);
checkbox.setOpaque(false);
checkbox.setSize(checkbox.getPreferredSize());
panel.add(checkbox);
checkbox.addActionListener(new ActionListener() {
public void actionPerformed(ActionEvent evt) {
button.setEnabled(!checkbox.isSelected());
}
});
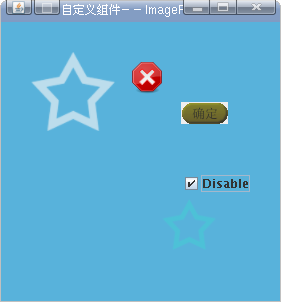
然后在進行測試 ,效果如下:
項目里的所需的圖片文件都在附件里 點擊這里下載