本章將創建一個Web Application項目,并描述如何在此應用中啟動OSGi。
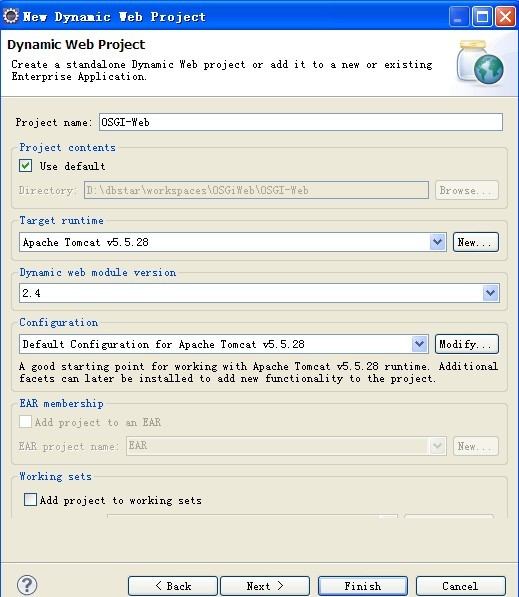
首先,在Eclipse中創建一個Dynamic Web Project,名字為OSGi-Web,Context root為osgi。
這個項目只作為部署Web Application使用,相關java代碼放在另外一個Java Project中,因此我們再創建一個新的Java Project,名字為OSGi-Web-Launcher。然后在OSGi-Web項目的Java EE Module Dependencies中設置OSGi-Web-Launcher為關聯,這樣在部署的時候,OSGi-Web-Launcher項目中的java代碼將為打包為jar存放到Web的WEB-INF/lib目錄之中。
為了啟動OSGi,我們在web中增加一個ServletContextListener監聽器實現,并且通過這個監聽器來控制OSGi容器的啟動和終止。
在OSGi-Web-Launcher項目中增加一個java類,類名為FrameworkConfigListener,實現接口ServletContextListener,package為org.dbstar.osgi.web.launcher。在contextInitialized方法中,增加啟動OSGi的代碼,在contextDestroyed方法中,增加停止OSGi的代碼,這樣我們就可以使OSGi容器的生命周期與ServletContext的生命周期保持一致了。
啟動OSGi容器:
感謝OSGi規范4.2給了我們一個簡單統一的啟動OSGi容器的方式,所有實現OSGi4.2規范的容器實力都應該實現這種啟動方式,那就是通過org.osgi.framework.launch.FrameworkFactory,同時,還必須在其實現jar中放置一個文件:META-INF/services/org.osgi.framework.launch.FrameworkFactory,這個文件中設置了實際的FrameworkFactory實現類的類名。在equinox-SDK-3.6M5的org.eclipse.osgi_3.6.0.v20100128-1430.jar中,這個文件的內容是:org.eclipse.osgi.launch.EquinoxFactory。
我們先寫一個工具類來載入這個配置文件中的內容:
1 package org.dbstar.osgi.web.launcher;
2
3 import java.io.BufferedReader;
4 import java.io.IOException;
5 import java.io.InputStream;
6 import java.io.InputStreamReader;
7
8 public abstract class ServiceLoader {
9 public final static <E> Class<E> load(Class<E> clazz) throws IOException, ClassNotFoundException {
10 return load(clazz, Thread.currentThread().getContextClassLoader());
11 }
12
13 @SuppressWarnings("unchecked")
14 public final static <E> Class<E> load(Class<E> clazz, ClassLoader classLoader) throws IOException,
15 ClassNotFoundException {
16 String resource = "META-INF/services/" + clazz.getName();
17 InputStream in = classLoader.getResourceAsStream(resource);
18 if (in == null) return null;
19
20 try {
21 BufferedReader reader = new BufferedReader(new InputStreamReader(in));
22 String serviceClassName = reader.readLine();
23 return (Class<E>) classLoader.loadClass(serviceClassName);
24 } finally {
25 in.close();
26 }
27 }
28 }
然后獲取到FrameworkFactory的實例類:
1 try {
2 frameworkFactoryClass = ServiceLoader.load(FrameworkFactory.class);
3 } catch (Exception e) {
4 throw new IllegalArgumentException("FrameworkFactory service load error.", e);
5 }
6 if (frameworkFactoryClass == null) {
7 throw new IllegalArgumentException("FrameworkFactory service not found.");
8 }
實例化FrameworkFactory:
1 FrameworkFactory frameworkFactory;
2 try {
3 frameworkFactory = frameworkFactoryClass.newInstance();
4 } catch (Exception e) {
5 throw new IllegalArgumentException("FrameworkFactory instantiation error.", e);
6 }
獲取Framework的啟動配置:
1 Map<Object, Object> configuration;
2 try {
3 // 載入Framework啟動配置
4 configuration = loadFrameworkConfig(event.getServletContext());
5 if (logger.isInfoEnabled()) {
6 logger.info("Load Framework configuration: [");
7 for (Object key : configuration.keySet()) {
8 logger.info("\t" + key + " = " + configuration.get(key));
9 }
10 logger.info("]");
11 }
12 } catch (Exception e) {
13 throw new IllegalArgumentException("Load Framework configuration error.", e);
14 }
啟動配置讀取外部配置文件,可以在此配置文件中增加OSGi容器實現類相關的配置項,例如Equinox的osgi.console:
1 // 載入Framework啟動配置
2 private static Map<Object, Object> loadFrameworkConfig(ServletContext context) throws MalformedURLException {
3 String configLocation = context.getInitParameter(CONTEXT_PARAM_OSGI_CONFIG_LOCATION);
4 if (configLocation == null) configLocation = DEFAULT_OSGI_CONFIG_LOCATION;
5 else if (!configLocation.startsWith("/")) configLocation = "/".concat(configLocation);
6
7 Properties config = new Properties();
8 try {
9 // 載入配置項
10 config.load(context.getResourceAsStream(configLocation));
11 if (logger.isInfoEnabled()) logger.info("Load Framework configuration from: " + configLocation);
12 } catch (IOException e) {
13 if (logger.isWarnEnabled()) logger.warn("Load Framework configuration error from: " + configLocation, e);
14 }
15
16 String storageDirectory = config.getProperty(PROPERTY_FRAMEWORK_STORAGE, DEFAULT_OSGI_STORAGE_DIRECTORY);
17 // 檢查storageDirectory合法性
18 if (storageDirectory.startsWith(WEB_ROOT)) {
19 // 如果以WEB_ROOT常量字符串開頭,那么相對于WEB_ROOT來定位
20 storageDirectory = storageDirectory.substring(WEB_ROOT.length());
21 storageDirectory = context.getRealPath(storageDirectory);
22 } else {
23 // 如果是相對路徑,那么相對于WEB_ROOT來定位
24 if (!new File(storageDirectory).isAbsolute()) {
25 storageDirectory = context.getRealPath(storageDirectory);
26 }
27 }
28 storageDirectory = new File(storageDirectory).toURL().toExternalForm();
29 config.setProperty(PROPERTY_FRAMEWORK_STORAGE, storageDirectory);
30 if (logger.isInfoEnabled()) logger.info("Use Framework Storage: " + storageDirectory);
31
32 return config;
33 }
然后,就可以獲取framework實例了,通過framework來初始化,啟動和停止OSGi容器:
1 try {
2 framework = frameworkFactory.newFramework(configuration);
3 framework.init();
4
5 // 初始化Framework環境
6 initFramework(framework, event);
7
8 // 啟動Framework
9 framework.start();
10
11 succeed = true;
12 } catch (BundleException e) {
13 throw new OSGiStartException("Start OSGi Framework error!", e);
14 } catch (IOException e) {
15 throw new OSGiStartException("Init OSGi Framework error", e);
16 }
在initFramework方法中,主要做兩件事情,一是將當前的ServletContext作為一個service注冊到OSGi容器中去:
1 private static void registerContext(BundleContext bundleContext, ServletContext servletContext) {
2 Properties properties = new Properties();
3 properties.setProperty("ServerInfo", servletContext.getServerInfo());
4 properties.setProperty("ServletContextName", servletContext.getServletContextName());
5 properties.setProperty("MajorVersion", String.valueOf(servletContext.getMajorVersion()));
6 properties.setProperty("MinorVersion", String.valueOf(servletContext.getMinorVersion()));
7 bundleContext.registerService(ServletContext.class.getName(), servletContext, properties);
8 }
第二件事就是:在第一次初始化容器時,加載并啟動指定目錄中的bundle:
1 // 初始化Framework環境
2 private static void initFramework(Framework framework, ServletContextEvent event) throws IOException {
3 BundleContext bundleContext = framework.getBundleContext();
4 ServletContext servletContext = event.getServletContext();
5
6 // 將ServletContext注冊為服務
7 registerContext(bundleContext, servletContext);
8
9 File file = bundleContext.getDataFile(".init");
10 if (!file.isFile()) { // 第一次初始化
11 if (logger.isInfoEnabled()) logger.info("Init Framework ");
");
12
13 String pluginLocation = servletContext.getInitParameter(CONTEXT_PARAM_OSGI_PLUGINS_LOCATION);
14 if (pluginLocation == null) pluginLocation = DEFAULT_OSGI_PLUGINS_LOCATION;
15 else if (!pluginLocation.startsWith("/")) pluginLocation = "/".concat(pluginLocation);
16
17 // 安裝bundle
18 File bundleRoot = new File(servletContext.getRealPath(pluginLocation));
19 if (bundleRoot.isDirectory()) {
20 if (logger.isInfoEnabled()) logger.info("Load Framework bundles from: " + pluginLocation);
21
22 File bundleFiles[] = bundleRoot.listFiles(new FilenameFilter() {
23 public boolean accept(File dir, String name) {
24 return name.endsWith(".jar");
25 }
26 });
27
28 if (bundleFiles != null && bundleFiles.length > 0) {
29 for (File bundleFile : bundleFiles) {
30 try {
31 bundleContext.installBundle(bundleFile.toURL().toExternalForm());
32 if (logger.isInfoEnabled()) logger.info("Install bundle success: " + bundleFile.getName());
33 } catch (Throwable e) {
34 if (logger.isWarnEnabled()) logger.warn("Install bundle error: " + bundleFile, e);
35 }
36 }
37 }
38
39 for (Bundle bundle : bundleContext.getBundles()) {
40 if (bundle.getState() == Bundle.INSTALLED || bundle.getState() == Bundle.RESOLVED) {
41 if (bundle.getHeaders().get(Constants.BUNDLE_ACTIVATOR) != null) {
42 try {
43 bundle.start(Bundle.START_ACTIVATION_POLICY);
44 if (logger.isInfoEnabled()) logger.info("Start bundle: " + bundle);
45 } catch (Throwable e) {
46 if (logger.isWarnEnabled()) logger.warn("Start bundle error: " + bundle, e);
47 }
48 }
49 }
50 }
51 }
52
53 new FileWriter(file).close();
54 if (logger.isInfoEnabled()) logger.info("Framework inited.");
55 }
56 }
以上就是啟動OSGi容器的過程,相比較而言,停止容器就簡單多了:
1 public void contextDestroyed(ServletContextEvent event) {
2 if (framework != null) {
3 if (logger.isInfoEnabled()) logger.info("Stopping OSGi Framework");
4
5 boolean succeed = false;
6 try {
7 if (framework.getState() == Framework.ACTIVE) framework.stop();
8 framework.waitForStop(0);
9 framework = null;
10
11 succeed = true;
12 } catch (BundleException e) {
13 throw new OSGiStopException("Stop OSGi Framework error!", e);
14 } catch (InterruptedException e) {
15 throw new OSGiStopException("Stop OSGi Framework error!", e);
16 } finally {
17 if (logger.isInfoEnabled()) {
18 if (succeed) logger.info("OSGi Framework Stopped!");
19 else logger.info("OSGi Framework not stop!");
20 }
21 }
22 }
23 }
最后,還有一件事情,就是將FrameworkConfigListener配置到web.xml中:
1 <!-- Init OSGi framework -->
2 <listener>
3 <listener-class>org.dbstar.osgi.web.launcher.FrameworkConfigListener</listener-class>
4 </listener>
讓我們來測試一下吧,在Eclipse中新建一個Server:


另外,在OSGi-Web-Launcher項目的classpath中增加org.eclipse.osgi_3.6.0.v20100128-1430.jar,并且在Java EE Module Dependencies中勾選這個jar,這樣可以保證這個jar最終部署到Web Application的WEB-INF/lib目錄下去。同樣,還需要增加commons-logging.jar。
然后就可以啟動這個Server查看效果了。
附上本文中提到的
源代碼。