private ServletContext servletContext;
public void setServletContext(ServletContext sc) {
this.servletContext=sc;
System.out.println("項目應用的絕對路徑為:"+servletContext.getRealPath("/"));
}
}
]]>
在修改好相應的文字與圖象之后,我們就將PSD文件輸出(X)HTML文件。
首先得先對PSD文件做切片,有兩種方法:
①使用工具欄上的“切片工具”,
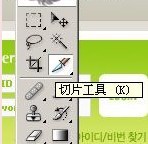
然后在圖象上劃出一塊一塊的區域。

②使用基于參考線的切片,按ctrl+R調出標尺欄,
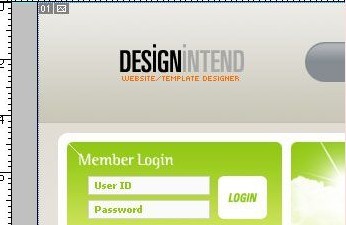
把鼠標移動到標尺上,按住鼠標左鍵,移動到圖象上,將會看到一條綠色的參考線,如圖

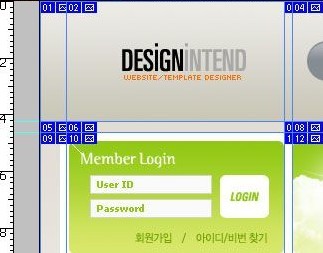
將參考線;排好,然后點一下工具欄上的切片工具圖表,然后點上面
選項欄里的“基于參考線的切片”。于是在原來的參考線上就變成了一塊一塊的切片了。
********************************************************************************
接下來就可以輸出了:
①依次選擇菜單欄上的“文件”→“存儲為Web所用格式”→“存儲”。
②接下來就會彈出一個“將優化結果存儲為”的窗口。
在“保存類型”處有個下拉列框可以選擇,因為我們要存儲為網頁的格式,所以選擇“HTML和圖象(* html)”,再選擇“保存”就可以輸出一個網頁格式的HTML文件與一個包含圖象的名為“images”的文件夾。
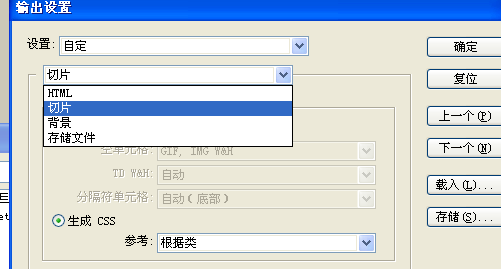
③如果我們需要輸出“div+css的網頁”我們還可以這么做:
在“設置”處的下拉列框,選擇“其他”
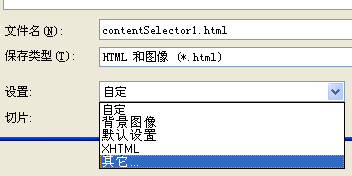
就會彈出一個“輸出設置”的窗口
在第2個下拉列框處選擇“切片”,選擇“生成CSS”,單擊“好”→“保存”,就可以輸出一個目前流行的“div+css”的HTML網頁。
]]>
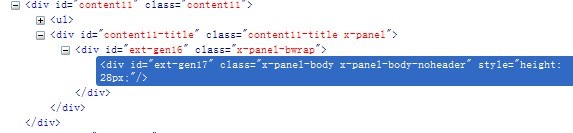
renderTo:"content11",
el: "content11-title"
********************************************************
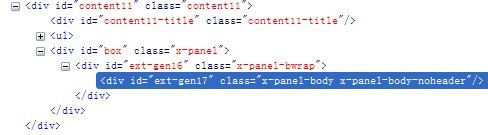
id:"box",
renderTo:"content11",
//el: "content11-title"
********************************************************
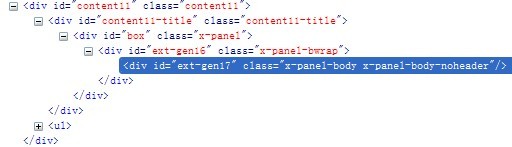
id : "box",
renderTo : "content11-title"http://,
// el: "content11-title"
********************************************************
id : "box",
contentEl: "content11-title",
renderTo : "content11"http://,

id : "box",
contentEl: "content11-title",
renderTo : "content11"http://,

]]>
除非指定元素定位屬性,否則所有元素框都在文檔流中定位。也就是說,文檔流中的元素位置由元素在 X(HTML) 中的位置決定。
二 CSS定位相關的兩屬性 position 和 float
(1)position:定位時,使用 left,right,top,bottom 中至少一個值定位。
值:
static:正常文檔流布局,默認值。
relative(相對):不脫離文檔流,其“相對于”它在文檔流中原位置進行垂直水平偏移,所有后序元素原位置不變,但可能覆蓋后序元素,但不算層疊,不可通過 z-index 屬性定義。
absolute(絕對):脫離文檔流,不占據空間,所有后序元素自動前移,絕對定位元素的起點位置相對于最近已定位(只需指定一個position屬性)祖先元素(從父元素開始搜索)以外邊距后為起點(可存在內邊距里,如圖:
 ),如果元素沒有已定位的祖先元素,那么它的位置相對于最初的包含塊(body)。可多重層疊,通過 z-index 屬性定義。 定位后生成一個塊級框,而不論原來它在文檔流中是何種類型的框。
文檔流中其它元素的布局就像絕對定位的元素不存在一樣:

(2)float:浮動的框可以向左或向右移動,直到它的外邊緣碰到包含框或另一個浮動框的邊框為止。由于浮動框脫離文檔流,所以文檔流中的其它元素塊框表現得就像浮動框不存在一樣。定位時,與margin與padding相關。


(3)clear
定義和用法
clear 屬性
設置元素的側面是否允許其他的浮動元素。
說明
clear 屬性定義了元素的哪邊上不允許出現浮動元素。在 CSS1 和 CSS2 中,這是通過自動為清除元素(即設置了 clear 屬性的元素)增加上外邊距實現的。
在 CSS2.1 中,會在元素上外邊距之上增加清除空間,而外邊距本身并不改變。不論哪一種改變,最終結果都一樣,如果聲明為左邊或右邊清除,會使元素的上外邊框邊界剛好在該邊上浮動元素的下外邊距邊界之下。
值 描述
left 在左側不允許浮動元素。
right 在右側不允許浮動元素。
both 在左右兩側均不允許浮動元素。
none 默認值。允許浮動元素出現在兩側。
圖像的左側和右側均不允許出現浮動元素:img{float:left;clear:both;}
]]>
var store = new Ext.data.JsonStore({
url: 'get-images.php',
root: 'images',
fields: [
'name', 'url',
{name:'size', type: 'float'},
{name:'lastmod', type:'date', dateFormat:'timestamp'}
]
});
store.load();
var tpl = new Ext.XTemplate(
'<tpl for=".">',
'<div class="thumb-wrap" id="{name}">',
'<div class="thumb"><img src="{url}" title="{name}"></div>',
'<span class="x-editable">{shortName}</span></div>',
'</tpl>',
'<div class="x-clear"></div>'
);
var panel = new Ext.Panel({
id:'images-view',
frame:true,
width:535,
autoHeight:true,
collapsible:true,
layout:'fit',
title:'Simple DataView',

items: new Ext.DataView({
store: store,
tpl: tpl,
autoHeight:true,
multiSelect: true,
overClass:'x-view-over',              //鼠標懸停item時的類樣式,defaults to undefined
itemSelector:'div.thumb-wrap',        //必須項,值為item選擇器,此值也可為.thumb-wrap  e.g. div.some-class

//      //(默認名)defaults to 'x-view-selected',但仍必須寫此類的CSS內容

emptyText: 'No images to display'

/*

            plugins: [

                new Ext.DataView.DragSelector(),

                new Ext.DataView.LabelEditor({dataIndex: 'name'})

            ],*/
            prepareData: function(data){       //數據預處理,即數據處理前.data為原始數據,類型為對象.

                data.shortName = Ext.util.Format.ellipsis(data.name, 15);   //指定字符串為15個字符,超出部分用三個圓點代替.

            //  data.sizeString = Ext.util.Format.fileSize(data.size);

            //  data.dateString = data.lastmod.format("m/d/Y g:i a");

                return data;

            },


           listeners: {

             selectionchange: {        //結點的選擇發生改變時,即重新選擇結點時,可以更改為selectionchange:function(dv,nodes)...

              fn: function(dv,nodes){

               var l = nodes.length;

               var s = l != 1 ? 's' : '';

               panel.setTitle('Simple DataView ('+l+' item'+s+' selected)');

              }

             }

})
});
panel.render(document.body);
DataView 用store提供的數據流,采用tpl的格式顯示,itemSelector的值為數據流中塊的CSS類選擇器,對塊操作時更換其CSS類樣式,如鼠標懸停在塊上和塊被選定時的CSS類樣式;簡單點說,就是有利于對數據流中的塊好控制操作.
tpl定義的塊:<div id="zack_hat.jpg" class="thumb-wrap">
鼠標懸停時的塊(overClass):<div id="zack_hat.jpg" class="thumb-wrap x-view-over">
點擊被選中的塊(selectedClass):<div id="kids_hug2.jpg" class="thumb-wrap x-view-selected">
1.當鼠標點擊數據流中某一塊時,塊增加selectedClass定義的類樣式,如沒定義類名,即采用默認的類名'x-view-selected'(CSS內容依然為空,仍需手寫,只是類名必須為此);
2.用overClass定義的CSS類樣式,鼠標懸停在塊(div)上,更換其CSS類樣式.
3.dataView.store.filter(f1,f2):從store中查找f1字段,與f2匹配(不完全匹配相同)過濾,重新本地加載數據.
4.dataView.store.store(f1,'asc'/'desc'):store的內容按f1的值排序.
5.dataView.store.clearFilter():清除過濾狀態.還原初始.
6.dataView.select(n):更換第n個塊的CSS類樣式.
(二)html:
<html>
<head>
</head>
<body id="ext-gen6" class=" ext-gecko ext-gecko3">
-->
<h1>DataView Example</h1>
<p>
</p>
<div id="images-view" class="x-panel" style="width: 535px;">
<div class="x-panel-tl">
</div>
<div id="ext-gen8" class="x-panel-bwrap">
<div class="x-panel-ml">
<div class="x-panel-mr">
<div class="x-panel-mc">
<div id="ext-gen9" class="x-panel-body" style="width: 523px; height: auto;">
<div id="ext-comp-1001" style="height: auto;">
<div id="kids_hug2.jpg" class="thumb-wrap x-view-selected ">
<div class="thumb">
<img title="kids_hug2.jpg" src="images/thumbs/kids_hug2.jpg"/>
</div>
<span class="x-editable"/>
</div>
<div id="zack_hat.jpg" class="thumb-wrap ">
</div>
<div id="zack.jpg" class="thumb-wrap ">
</div>
<div id="zack_sink.jpg" class="thumb-wrap ">
</div>
<div id="sara_pink.jpg" class="thumb-wrap">
</div>
<div id="dance_fever.jpg" class="thumb-wrap ">
<div class="thumb">
<img title="dance_fever.jpg" src="images/thumbs/dance_fever.jpg"/>
</div>
<span class="x-editable"/>
</div>
<div id="gangster_zack.jpg" class="thumb-wrap ">
</div>
<div id="zacks_grill.jpg" class="thumb-wrap">
</div>
<div id="kids_hug.jpg" class="thumb-wrap ">
</div>
<div id="zack_dress.jpg" class="thumb-wrap ">
</div>
<div id="sara_pumpkin.jpg" class="thumb-wrap">
</div>
<div id="sara_smile.jpg" class="thumb-wrap ">
</div>
<div id="up_to_something.jpg" class="thumb-wrap ">
</div>
<div class="x-clear"/>
</div>
</div>
</div>
</div>
</div>
<div class="x-panel-bl x-panel-nofooter">
</div>
</div>
</div>
</body>
<div id="_firebugConsole" style="display: none;" FirebugVersion="1.4.2"/>
</html>
(三)css
#images-view .x-panel-body {
-moz-background-clip:border;
-moz-background-inline-policy:continuous;
-moz-background-origin:padding;
-x-system-font:none;
background:white none repeat scroll 0 0;
font-family:Arial,Helvetica,sans-serif;
font-size:11px;
font-size-adjust:none;
font-stretch:normal;
font-style:normal;
font-variant:normal;
font-weight:normal;
line-height:normal;
}
#images-view .thumb {
-moz-background-clip:border;
-moz-background-inline-policy:continuous;
-moz-background-origin:padding;
background:#DDDDDD none repeat scroll 0 0;
padding:3px;
}
#images-view .thumb img {
height:60px;
width:80px;
}
#images-view .thumb-wrap {
float:left;
margin:4px 0 4px 4px;
padding:5px;
}
#images-view .thumb-wrap span {
display:block;
overflow:hidden;
text-align:center;
}
#images-view .x-view-over {
-moz-background-clip:border;
-moz-background-inline-policy:continuous;
-moz-background-origin:padding;
background:#EFEFEF url(../../resources/images/default/grid/row-over.gif) repeat-x scroll left top;
border:1px solid #DDDDDD;
padding:4px;
}
#images-view .x-view-selected {
-moz-background-clip:border;
-moz-background-inline-policy:continuous;
-moz-background-origin:padding;
background:#EFF5FB url(images/selected.gif) no-repeat scroll right bottom;
border:1px solid #99BBE8;
padding:4px;
}
#images-view .x-view-selected .thumb {
-moz-background-clip:border;
-moz-background-inline-policy:continuous;
-moz-background-origin:padding;
background:transparent none repeat scroll 0 0;
}
#images-view .loading-indicator {
background-image:url(../../resources/images/default/grid/loading.gif);
background-position:left center;
background-repeat:no-repeat;
font-size:11px;
margin:10px;
padding-left:20px;
}
]]>
<f:view> //JSF標簽必須放在里面
名稱1: ${user.name} //正確
//#{user.name} //報錯
名稱2: <h:inputText value="#{user.name}"/> //正確
//<h:inputText value="${user.name}"/> //報錯
//<input value="#{user.name}"/> //報錯
名稱3: <input value="${user.name}"/> //正確,而且仍然可以使用JSF的ManagedBean
</f:view>
JSF表達式只能用在JSF標簽里,JSP表達式也只能用JSP里.
JSP EL的語法格式:${...} 不能放在<%...%>中.
]]>
(1)箭頭樣式
(2)treenode 自定義樣式
(3)Ext.tree.TreePanel 的title,root 配置項必須指定,不然圖像在IE中顯示混亂; loader配置項不指定,不顯示圖像.
(4)Extjs 日期的使用方法(顯示,接收,定義,提交)
(5)Extjs 三個主要文件錯誤的引用, 瀏覽器無法顯示Extjs效果.
(6)gridpanel加態重新加載columnModel和store
(7)tabpanel判斷tab頁在不在
(8)panel動態加載tbar(可擴展進行延伸控制任何DIV)
(9)Extjs 擴展繼承子類(Ext.extend())
(10)Ext.data.Record 類 引用和賦值問題
(11)Ext.apply 無法復制 Ext.data.JsonStore 等數據源相關的類型
(12)TabPanel子窗口(如Ext.Panel等)隱藏屬性closable
(13)Panel 的 tools 配置項
(14)Extjs 首頁 "load..." 制作方法
(15)Extjs 漂亮的Panel折疊伸縮控件 layout:'accordion'
(16)Ext.grid.GridPanel 的columns屬性和Ext.data.Store的fields屬性均可為數組
(17)使用XTemplate動態加載panel等組件內容
(1)箭頭樣式
new Ext.tree.TreePanel({
useArrows : true,//是否使用箭頭樣式

loader : new Ext.tree.TreeLoader({ url : "tree-data.json"}),
root : new Ext.tree.AsyncTreeNode()
(2)treenode 自定義樣式
json:
[{
text:'Basic Ext Layouts',
expanded: true,
children:[{
text:'Absolute', //也可以使用HTML標簽
id:'absolute',
//icon:.... //自定義圖標
cls:"tem", //<link rel="stylesheet" href="css/tem.css" type="text/css"></link>
leaf:true
(3)Ext.tree.TreePanel 的title,root 配置項必須指定,不然圖像在IE中顯示混亂; loader配置項不指定,不顯示圖像.
三個必須項: title,root ,loader
new Ext.tree.TreePanel({
rootVisible : false,
useArrows : true,// 是否使用箭頭樣式
loader : new Ext.tree.TreeLoader({
url : "tree-data.json"
}),
title : "tool1",
root : new Ext.tree.AsyncTreeNode()
}), {
title : "tool2"
(5)Extjs 三個主要文件錯誤的引用, 瀏覽器無法顯示Extjs效果.
正確: <script type="text/javascript" src="script/ext/ext-all.js"></script>
錯誤: <script type="text/javascript" src="/script/ext/ext-all.js"></script>
<script type="text/javascript" src="../script/ext/ext-all.js"></script>
(6)gridpanel加態重新加載columnModel和store
//重新綁定grid
this.grid.reconfigure(newStore, new Ext.grid.ColumnModel(cm1));
//重新綁定分頁工具欄
this.pagingBar.bind(newStore);
//重新加載數據集
newStore.load({params:{start:0,limit:10}});
(7)tabpanel判斷tab頁在不在
var tem=tabpanel.getItem("tabpage"); //判斷tab頁在不在.
if(tem)
Ext.Msg.alert("ok");
else
Ext.Msg.alert("not");
(8)panel動態加載tbar(可擴展進行延伸控制任何DIV)
var pan=new Ext.Panel({tbar:new Ext.Toolbar({})....); //定義空對象容易在PANEL加載時沒加載tbar,所以會出現沒有高度或隱藏起來
var t=new Ext.Toolbar({...});
document.getElementById(pan.tbar.id).innerHTML = ""; //清空panel.tbar下的所有內容
t.render(pan.tbar); //toolpanel顯示到panel.tbar(div)下
(9)Extjs 擴展繼承子類(Ext.extend())
var subclass=Ext.extend(XX,{ //繼承Extjs類,可覆蓋或添加其子類的屬性或方法
xx:...,
xx:...
});
var tem=new subclass({});
(10)Ext.data.Record 類 引用和賦值問題
var record=new Ext.data.Record({});
......
store.insert(0,record); //record值勤改變.store中的值也改變.
store.insert(0,record.copy); //record值改變,store中的值不變.record.copy()復制返回另一個記錄.
(11)Ext.apply 無法復制 Ext.data.JsonStore 等數據源相關的類型
var store2 = new Ext.data.JsonStore({});
var store3={};
Ext.apply(store2,magazine_store); //效果無用.store2仍引用magazine_store,無法獨立使用.
Ext.apply(store3,magazine_store); //效果同上.
store3=Ext.apply(store2,magazine_store); //效果同上.
(12)TabPanel子窗口(如Ext.Panel等)隱藏屬性closable
TabPanel子窗口(如Ext.Panel,Ext.grid.GridPanel等)隱藏屬性closable:true/false //顯示/隱藏子窗口右上角的關閉按鈕
注:此屬性只有TabPanel子窗口才有效.
(13)Panel 的 tools 配置項
new Ext.Panel({...
tools:[{
id:'refresh', //必選項
qtip: 'Refresh form Data',
// hidden:true,
handler: function(event, toolEl, panel){ //必須項
// refresh logic
}
}]
...})
API詳見: http://www.tkk7.com/algz/articles/277819.html
(14)Extjs 首頁 "load..." 制作方法
http://www.tkk7.com/algz/articles/277844.html
(15)Extjs 漂亮的Panel折疊伸縮控件 layout:'accordion'
http://www.tkk7.com/algz/articles/278217.html
(16)Ext.grid.GridPanel 的columns屬性和Ext.data.Store的fields屬性均可為數組
columns:cm //cm=[....{...}...] cm=new Ext.Ext.grid.ColumnModel([...])
fields:f //f=[...] f=new Ext.data.Record.create([...])
(17)使用XTemplate動態加載panel等組件內容
//可以采用異步遠程取值
var board_data = {
title : "title",
content : ""
};
//可以是任意組件
var board_w = new Ext.Window({
id : "board_w",
title : "公告",
modal : true,
});
// 以下方法 Ext.fly("board_w");Ext.get("board_w")都錯
tpl.overwrite(Ext.getCmp("board_w").body, data);// 更新公告內容
]]>
正確: <script type="text/javascript" src="script/ext/ext-all.js"></script>
錯誤: <script type="text/javascript" src="/script/ext/ext-all.js"></script>
<script type="text/javascript" src="../script/ext/ext-all.js"></script>
2.gridpanel加態重新加載columnModel和store
//重新綁定grid
this.grid.reconfigure(newStore, new Ext.grid.ColumnModel(cm1));
//重新綁定分頁工具欄
this.pagingBar.bind(newStore);
//重新加載數據集
newStore.load({params:{start:0,limit:10}});
3.tabpanel判斷tab頁在不在
var tem=tabpanel.getItem("tabpage"); //判斷tab頁在不在.
if(tem)
Ext.Msg.alert("ok");
else
Ext.Msg.alert("not");
4.panel動態加載tbar(可擴展進行延伸控制任何DIV)
var pan=new Ext.Panel({tbar:new Ext.Toolbar({})....); //定義空對象容易在PANEL加載時沒加載tbar,所以會出現沒有高度或隱藏起來
var t=new Ext.Toolbar({...});
document.getElementById(pan.tbar.id).innerHTML = ""; //清空panel.tbar下的所有內容
t.render(pan.tbar); //toolpanel顯示到panel.tbar(div)下
5.Ext.data.Record 類 引用和賦值問題
var record=new Ext.data.Record({});
......
store.insert(0,record); //record值勤改變.store中的值也改變.
store.insert(0,record.copy); //record值改變,store中的值不變.record.copy()復制返回另一個記錄.
6.Ext.data.Store 設置baseParams方法
myStore.setBaseParam('foo', {bar:3});
]]>
解決方案:
ehcache-1.1.jar 包下的ehcache-failsafe.xml 文件復制到 src 目錄下(新建文件,復制內容).
二.錯誤信息提示:
log4j:WARN No appenders could be found for logger (org.springframework.web.context.ContextLoader).
log4j:WARN Please initialize the log4j system properly.
解決方案:
src 目錄下創建 log4j.properties 文件(具體內容,詳見log4j配置文件).
三.錯誤信息提示:
ERROR [main] (CGLIBLazyInitializer.java:130) - CGLIB Enhancement failed: item.common.hibernate.query.partsum.Partsum
java.lang.NoSuchMethodError: org.objectweb.asm.ClassVisitor.visit(IILjava/lang/String;Ljava/lang/String;[Ljava/lang/String;Ljava/lang/String;)V
WARN [main] (PojoEntityTuplizer.java:173) - could not create proxy factory for: item.common.hibernate.query.partsum.Partsum
org.hibernate.HibernateException: CGLIB Enhancement failed: item.common.hibernate.query.partsum.Partsum
Caused by: java.lang.NoSuchMethodError: org.objectweb.asm.ClassVisitor.visit(IILjava/lang/String;Ljava/lang/String;[Ljava/lang/String;Ljava/lang/String;)V
///////////////////////////////////////////////////////////////////////////////////////////
ERROR [main] (CGLIBLazyInitializer.java:130) - CGLIB Enhancement failed: item.common.hibernate.fourm.Fourm
java.lang.NoClassDefFoundError
WARN [main] (PojoEntityTuplizer.java:173) - could not create proxy factory for:item.common.hibernate.fourm.Fourm
org.hibernate.HibernateException: CGLIB Enhancement failed: item.common.hibernate.fourm.Fourm
Caused by: java.lang.NoClassDefFoundError
at org.hibernate.proxy.CGLIBLazyInitializer.getProxyFactory(CGLIBLazyInitializer.java:116)
////////////////////////////////////////////////////////////////////////////////////////////
ERROR [main] (CGLIBLazyInitializer.java:130) - CGLIB Enhancement failed: item.common.hibernate.picture
java.lang.NoClassDefFoundError
WARN [main] (PojoEntityTuplizer.java:173) - could not create proxy factory for:item.common.hibernate.picture
org.hibernate.HibernateException: CGLIB Enhancement failed: item.common.hibernate.picture
Caused by: java.lang.NoClassDefFoundError
at org.hibernate.proxy.CGLIBLazyInitializer.getProxyFactory(CGLIBLazyInitializer.java:116)
解決方案:
Spring 和 Hibernate 共用的一些 jar 文件發生了版本沖突, 刪除 WEB-INF/lib/asm-2.2.3.jar 然后重啟 Tomcat.
四.錯誤提示:
org.springframework.beans.factory.BeanCreationException: Error creating bean with name 'SessionFactory' defined in class path resource [applicationContext.xml]: Invocation of init method failed; nested exception is java.lang.NoSuchMethodError: org.objectweb.asm.ClassVisitor.visit(IILjava/lang/String;Ljava/lang/String;[Ljava/lang/String;Ljava/lang/String;)V
...
Caused by: java.lang.NoSuchMethodError: org.objectweb.asm.ClassVisitor.visit(IILjava/lang/String;Ljava/lang/String;[Ljava/lang/String;Ljava/lang/String;)V
解決方法:
并不是真正的bean name錯了,也不是找不到他的方法.是asm-2.2.3.jar與asm.jar沖突.
正確的刪除asm-2.2.3.jar方法是到項目的發布文件夾\WEB-INF\lib中刪除,不能用MyEclipse里刪除.因為他在發布時仍沒刪除.
五。
嚴重: Exception sending context initialized event to listener instance of class
org.springframework.web.context.ContextLoaderListener
org.springframework.beans.factory.BeanCreationException: Error creating bean with name 'sessionFactory' defined in
ServletContext resource [/WEB-INF/applicationContext.xml]: Invocation of init method failed; nested exception is
org.hibernate.DuplicateMappingException: Duplicate class/entity mapping Check
at org.springframework.beans.factory.support.AbstractAutowireCapableBeanFactory.initializeBean
(AbstractAutowireCapableBeanFactory.java:1336)
... 39 more
2009-8-21 11:52:37 org.apache.catalina.core.StandardContext start
<property name="mappingResources">
<list>
<value>com/dao/Check.hbm.xml</value>
<value>./Check.hbm.xml</value></list>
</property>
六。
<class catalog="page" name="com.dao.Check" table="check0908100816">
<id name="checkid" type="java.lang.Integer">
<column name="checkid"/>
<generator class="native"/>
</id>
嚴重: Exception sending context initialized event to listener instance of class
org.springframework.web.context.ContextLoaderListener
org.springframework.beans.factory.BeanCreationException: Error creating bean with name 'sessionFactory' defined in
ServletContext resource [/WEB-INF/applicationContext.xml]: Invocation of init method failed; nested exception is
org.hibernate.MappingException: entity class not found: Check
at org.springframework.beans.factory.support.AbstractAutowireCapableBeanFactory.initializeBean
... 52 more
2009-8-21 11:56:45 org.apache.catalina.core.StandardContext start
]]>
Fires when the node has been successfuly loaded.
JS:
//[{"identity":"","title":"車身部門","date":"","uiProvider":"col","author":"","children":[{"identity":"車身部門"......
treeload.on('load', function(This, node, response) { //事件的參數可查API, 參數的屬性可以用 firebug 跟蹤查詢.
var t = Ext.util.JSON.decode(response.responseText);
var n;
if (t[0].children.length == 0) //注: length不是JSON對象,僅僅是JS對象內置數組屬性.JS對象調用: t[0].children
n = n + 1;
]]>
int i = Integer.valueOf(my_str).intValue();
int i=Integer.parseInt(str);
如何將字串 String 轉換成Integer ?
Integer integer=Integer.valueOf(str);
如何將整數 int 轉換成字串 String ?
1.) String s = String.valueOf(i);
2.) String s = Integer.toString(i);
3.) String s = "" + i;
如何將整數 int 轉換成Integer ?
Integer integer=new Integer(i);
如何將Integer 轉換成字串 String ?
Integer integer=String
如何將Integer 轉換成 int ?
int num=Integer.intValue();
如何將String轉換成 BigDecimal ?
BigDecimal d_id = new BigDecimal(str);
如何將 String 轉換成 char ?
char[] ca="123".toCharArray();
如何將char轉換成String?
String s=ca.toString(); //任何類型都可以采用toString()轉換成String類型
//-----------------日期-------------------------
Calendar calendar=Calendar.getInstance();
int year=calendar.get(Calendar.YEAR);
int month=calendar.get(Calendar.MONTH)+1;
int day=calendar.get(Calendar.DATE);
獲取今天的日期字符串
String today=java.text.DateFormat.getDateInstance().format(new java.util.Date());
獲取今天的日期
new java.sql.Date(System.currentTimeMillis())
]]>
以下是轉載某位朋友的內容:
解決這個問題,可以有兩種解決辦法。
1.重新加tree的根節點,將所有的節點重新加載。即:tree.getRootNode().reload();
2.直接在前臺操作tree的節點。tree.getNodeById('0101');//該方法是tree通過節點的id查找并返回節點對象(有一個前提就是樹形必須全部展開否則找不到節點),找到相應的節點后通過節點的set方法(setText)改變節點的屬性。
]]>
ServletContext sc = request.getSession().getServletContext();
ApplicationContext ac = WebApplicationContextUtils
.getWebApplicationContext(sc);
FourmService fs = (FourmService) ac.getBean("fourmService");
String c = request.getParameter("command");
if (c == null)
return;
if (c.equals("notDetail")) { //論壇概述調用
out.print(fs.showfourm());
} else if (c.equals("isDetail")) { //論壇詳細內容調用
String title = request.getParameter("title");
String identity = request.getParameter("identity");
out.print(fs.showfourm(title, identity));
} else if (c.equals("insert")) {
String[] t = new String[4];
t[0] = "title";//request.getParameter("title");
t[1] = "底盤部門";//request.getParameter("identity");
t[2] = "底盤作者";//request.getParameter("author");
t[3] ="底盤詳細內容"; //request.getParameter("detail");
fs.insertjson(t);
out.print("{success:true,msg:'添加成功!'}"); //必須指定{success:true'},他傳回EXTJS調用成功,否則EXTJS卡住無法執行;如果沒有這行代碼即為報"SYNTAX ERROR:)"錯.他還能傳任意參數如MSG回EXTJS.
}
%>
]]>
* */
var memberAddWindow;
//文章標題
var articletitle = new Ext.form.TextField({
fieldLabel:'文章標題',
name:'memberName', //必須指名name屬性.用于將參數傳出去.參數名:name屬性值,如'memberName'.參數值:'memberName'對應的文本框的值.
allowBlank:false,
anchor:'90%'
});
//表單對象
var memberForm = new Ext.FormPanel({
title: '添加新文章信息',
url:'./member_manage.jsp?command=insert',
items: [articletitle],
buttons:[
{
text:'提交',
handler : function(){
if ( memberForm.getForm().isValid() ) //表單數據進行驗證
memberForm.getForm().submit({ //提交表單
waitMsg:'保存中,請稍后...', //表單提交等待過程中,出現的等待字符
success : function(re,v){ //表單提交成功后,調用的函數.參數分為兩個,一個是提交的表單對象,另一個是JSP返回的參數值對象
var jsonobject = Ext.util.JSON.decode(v.response.responseText); //將返回的JSON數據轉換成JSON對象,轉換失敗即報錯.
// Ext.Msg.alert("msg,oject",jsonobject.msg); //用JSON對象獲取JSON數據的值
memberForm.getForm().reset(); //表單中所有數據置空
memberAddWindow.hide(); //表單隱藏
bbscenter.getRootNode().reload(); // 重新加載樹結點.
}
failure : function(){
Ext.Msg.alert("msg,oject",jsonobject.msg); //返回失敗
});
}
},{
text:'取消',
handler : function(){
memberForm.getForm().reset();
memberAddWindow.hide();
}
}]
});
//窗體對象
function addarticle(){
if(!memberAddWindow){
memberAddWindow = new Ext.Window({
el:'window_win',
layout:'fit',
closable:true,
closeAction:'hide',
plain:true,
items: [memberForm]
});
}
memberAddWindow.show(Ext.get('newWindowButton'));
}
JSP:
out.print("{success:true , msg:'123'}") ; //只有指定success:true才能返回成功,succes:false或其他字符返回失敗.
//form的提交是對ajax請求做了封裝,要求必須是那咱格式返回響應,否則無法正確解析 ; Ajax.lib.request 沒有這規定.
]]>
<%@ page import="javax.servlet.ServletContext" %>
<%@ page import="org.springframework.context.ApplicationContext" %>
<%@ page import="org.springframework.web.context.support.WebApplicationContextUtils" %>
<%
//獲取ApplicationContext對象
ServletContext servletContext = request.getSession().getServletContext();
ApplicationContext ac = WebApplicationContextUtils.getWebApplicationContext(servletContext);
//獲取ApplicationContext.xml文件中定義的BEAN
PictureService ps=(PictureService)ac.getBean("pictureService");
]]>
<!--顯示數據的表格窗口-->
<div id="member_grid"></div>
<input type="button" id="button1" value="update">
......(二)JS:
Ext.onReady(function(){
......
var button = Ext.get('button1'); //獲得按鈕實例
button.on('click', function(){ //按鈕單擊事件
grid.store.reload(); //刷新GRID數據源 , 方法一
//store.reload(); //刷新GRID方法二
});
......
//設置數據源,獲取JSON數據賦值給變量store.
var store = new Ext.data.JsonStore({
......
var grid = new Ext.grid.EditorGridPanel({
......
]]>
發送AJAX請求:
Ext.Ajax.request({
method : 'POST', //(1)發送方式.'POST'或'GET',一般是'POST'
url: './member_manage.jsp', //(2)發送到頁面
success:function(request){ //(3)發送成功的回調函數
var message = request.responseText; //(4)取得從JSP文件out.print(...)傳來的文本
Ext.Msg.alert('信息',message); //(5)彈出對話框
store.reload(); //(6)重新讀入數據
//grid.getView().refresh();
},
failure:function(){ //(7)發送失敗的回調函數
Ext.Msg.alert("錯誤", "與后臺聯系的時候出現了問題");
},
params:{command:'save',members: Ext.encode(json)} //(8)發送名為command和members兩參數
});
(二)jsp:
(1)取得'POST'參數: String command = request.getParameter("command");
(2)把參數轉化成JSON形式:
JSONArray members = new JSONArray(params); //params= new String(command .getBytes("ISO-8859-1"),"UTF-8");
(3)把JSON數據傳入后臺:
頁面中以${對象.屬性}調用后臺數據
Member member = new Member();
member.doSave(members);
out.print("數據保存成功!");
(三)java:
(1)取出JSON對象數組(JSONArray)里的對象( JSONObject ) :
JSONObject member = members.optJSONObject(i);
(2)判斷JSON對象里的元素的值: if(member.has("id"))
(3)取出JSON對象里的元素的值存入數據庫:
s = c.prepareStatement("update Members m set m.realName=?,m.sex=?,m.age=?,m.birth=? where m.id=?");
s.setString(1, member.getString("name"));
s.addBatch();
s.executeBatch();
]]>
以下總結這段時間以來遇到的中文問題匯集:
注:以下“后臺”字眼,相當于在servlet內,或者某一個類內,或者struts的action內。
1.一字符串在后臺用system.out.println輸出正常,保存在session里到JSP頁面顯示亂碼
最初的亂碼問題.
原因:似乎是默認的JSP頁面采用8859-1編碼,顯示不了中文。
解決:在JSP頁面上方加個<%@ page contentType="text/html;charset=utf-8"%>解決。當然,也可以用charaset="gbk","gb2312"之類的編碼,不過建議還是用utf-8,詳細原因去看看jdon板橋里人的那篇《中文亂碼終極解決方法》。
*****************************************************************************
2.提交表單,在后臺讀取表單內容發現亂碼
原因:request的默認編碼問題,具體不甚清楚,沒看過tomcat源代碼。。。
解決:寫個fileter,具體如下:
package operator;
import java.io.IOException;
import javax.servlet.Filter;
import javax.servlet.FilterChain;
import javax.servlet.FilterConfig;
import javax.servlet.ServletException;
import javax.servlet.ServletRequest;
import javax.servlet.ServletResponse;
public class SetCharacterEncodingFilter implements Filter {
protected String encoding = null;
protected FilterConfig filterConfig = null;
public void init(FilterConfig filterConfig) throws ServletException {
this.filterConfig = filterConfig;
this.encoding = filterConfig.getInitParameter("encoding");
}
public void doFilter(ServletRequest request, ServletResponse response,
FilterChain chain) throws IOException, ServletException {
request.setCharacterEncoding("UTF-8");
chain.doFilter(request, response);
}
public void destroy() {
this.encoding = null;
this.filterConfig = null;
}
protected String selectEncoding(ServletRequest request) {
return (this.encoding);
}
}
web.xml配置:
在servlet-mapping后加入以下內容:
<filter>
<filter-name>Set Character Encoding</filter-name>
<filter-class>operator.SetCharacterEncodingFilter</filter-class>
<init-param>
<param-name>encoding</param-name>
<param-value>UTF-8</param-value>
</init-param>
</filter>
<filter-mapping>
<filter-name>Set Character Encoding</filter-name>
<url-pattern>/*</url-pattern>
</filter-mapping>
***********************************************************************
3.下載時,“另保存為”默認名字顯示亂碼
原因:不清楚。。。
在tomcat安裝目錄的config/sever.xml內的
<Connector
port="80" maxHttpHeaderSize="8192"
maxThreads="150" minSpareThreads="25" maxSpareThreads="75"
enableLookups="false" redirectPort="8443" acceptCount="100"
connectionTimeout="20000" disableUploadTimeout="true" URIEncoding="UTF-8" />
加進最后的“URIEncoding="UTF8"
4.在后臺用system.out.println()輸出正常,保存到mysql數據庫EMS顯示亂碼,讀回數據也是亂碼
原因:mysql默認采用的是latin1編碼;
解決:創建表的時候要修改成utf-8。如果已存在表,用EMS的話,直接修改table-property里面的default charater set就可以了,其他管理工具不知道,沒用過。
5.在后臺用system.out.println()輸出正常,保存到mysql數據庫EMS顯示亂碼,讀回數據時——居然正常了,直接往數據庫里插入正常的中文,讀出——居然亂碼了;
原因:EMS管理工具的默認顯示問題
解決:register數據庫時,client default charater set改utf-8
注:這該死的問題困擾了我好長一段時間,一直以為我程序有問題,檢查了N久,發現居然是工具顯示問題。。
6.COMMON-UPLOAD 上傳中文名文件時,顯示亂碼
原因:common-upload組件默認采用系統的編碼,而頁面傳過來的請求采用UTF-8編碼。
我的系統是簡體中文WINDOWS 2K3,系統編碼是GBK,當頁面請求過來時,UPLOAD就把UTF8編碼的流直接按GBK編碼了。。。如果用new String(oldStr.getBytes("gbk"),"utf8)可以發現,部分中文可以還原回去。
解決:網上的說法五花八門,甚至有歸罪于這是UPLOAD的BUG,其實只要在
DiskFileUpload fu = new DiskFileUpload();
后加一句:
fu.setHeaderEncoding("utf8");
就解決了。。。
看來有時候還是直接讀英文幫助手冊來得正確。。。
問題描述:
在inputtext中輸入中文,然后在輸出,顯示為亂碼。
解決方法:
1、自定義轉器
package util;
import java.util.Map;
import javax.faces.component.UIComponent;
import javax.faces.convert.Converter;
import javax.faces.context.FacesContext;
import javax.faces.convert.ConverterException;
public class StringConverter implements Converter {
public Object getAsObject(FacesContext context, UIComponent component,
String newValues) throws ConverterException {
String newstr = "";
if (newValues == null) {
newValues = "";
}
byte[] byte1 = null;
try {
byte1 = newValues.getBytes("ISO-8859-1");
newstr = new String(byte1, "GB2312");
UIInput input=(UIInput)component;//
input.setSubmittedValue(newstr);
} catch (UnsupportedEncodingException e) {
e.printStackTrace();
}
return newstr;
}
public String getAsString(FacesContext context, UIComponent component,
Object Values) throws ConverterException {
return (String) Values;
}
}
2、注冊轉換器
faces-config.xml片段
<converter>
<converter-id>stringconverter</converter-id>
<converter-class>util.StringConverter</converter-class>
</converter>
3、在頁面使用轉換器
<h:inputText id="account" value="#{util.account}" required="true" styleClass="input" >
<f:converter converterId="stringconverter"/> <!--注:這里不是EL表達式-->
JSF估計是天生就是這個毛病,凡是有jsf標簽生成的html代碼中有中文的(指從 backbean中提取出來的),在html源代碼中回出現類似:雨滴 這種“漢字內碼”,比如jsf的代碼如下:
<f:view>
<h:outputText value="#{testBean.testValue}"></h:outputText>
<br>
哈哈
</f:view>
<br>呵呵
瀏覽器顯示如下:
雨滴雨滴2
哈哈
呵呵
而查看html源代碼如下:
雨滴雨滴2
<br>
哈哈
<br>呵呵
我們發現用jsf標簽出來的有內碼,而不是jsf標簽的就沒事。(網頁服務器編碼等都是UTF-8統一的)。
那么有什么辦法呢?
第一個方法,寫一個自定義的Converter,在jsf中有這種功能,但是我測試了寫了一個converter,但是效果令我失望,因為我發現jsf的內在邏輯把漢字變成內碼的地方在converter以后,我在converter中添加什么東西,在html源代碼中還是內碼。于是放棄
第二種方法是在寫個Servlet的Filter過濾器,放到web.xml中,但是由于漢字內碼雨需要去掉前后墜,然后把這幾個數字變成char,在變成String。每個字都用這種方法變回來,這樣本身效率回很低,而且一個html文檔中用jsf顯示的內容占有比率有多有少,如果沒有標簽的也是用這個過濾器一個字一個字取解析,那么效率就更不敢恭維了。雖然這種方法一定可行(因為過濾器可以到輸出的最后一步),但是由于效率問題,我沒有取試。
第三種方法是我自己研究出來的,通過FacesContext類來作,方法如下:
首先,寫一個類
public class Converter {
public static void process(String str){
FacesContext fc=FacesContext.getCurrentInstance();
try {
fc.getResponseWriter().write(str);
} catch (IOException e) {
// TODO Auto-generated catch block
e.printStackTrace();
}
}
}
然后在每個backbean中需要getXXX方法中返回是String的方法中修改如下:
把 return XXX 改為 return ""
在return前面,也就是方法的最后一步,添加Converter.process(testValue),這個testValue是你要return的變量
ok,就這么簡單^_^。。。
在網上找了一天沒找到合理解決方法,用這個方法終于解決了。。
]]>
例如對于TUser類
1.實體查詢
String hql = " from User";
執行這條語句會返回User以及User子類的紀錄。
注: 如果 TUser 類具有外鍵, 查詢結果不會報錯,但結果中的外鍵為空值,訪問就報空指針錯誤!
解決方法: select 別名.屬性 from 類 as 別名. 沒有別名.屬性仍然報錯! //此方法不一定能解決,但不會錯.
hql = "from java.lang.Object"
會返回數據庫中所有庫表的紀錄。
where 語句,as可以省略
hql = "from User as user where user.name='yyy'"; //user.name為類的屬性
hql = "from User user where user.name='yyy'";
where子句中,我們可以通過比較運算符設定條件,如:
=, <>, >, <, >=, <=, between XX and XX, not between, in (xx,xx), not in, is, like %XX% 等。
2.屬性查詢
(1)List list = session.createQuery("select user.name, user.age from User user").list();
還可以在HQL中動態構造對象實例的方法,將數據封裝。
(2)List list = session.createQuery("select new User(user.name, user.age) from TUser as user").list();
Iterator it = list.iterator();
while(it.hasNext() ) {
User user = (User)it.next();
System.out.println(user.getName());
}
但是要注意這里的User對象只是對name和age屬性的封裝,其他狀態均未賦值,所以不能用它來進行更新操作。
也可以在HQL的Select子句中使用統計函數
"select count(*) ,min(user.age) from User as user"
也可以使用distinct關鍵字來刪除重復紀錄。
select distinct user.name from User as user;
3.實體的更新與刪除
hibernate 3中,提供了更靈活的方式(bulk(集體) delete/update)
更新:
Query query = session.createQuery("update User set age=18 where id=1"); //age==User.age
query.executeUpdate();
刪除:
session.createQuery("delete User where age>=18");
query.executeUpdate();
注:不支持聯表更新,即此處的User對象不能外鍵關聯.因為更新操作不允許多表聯接更新,只能更新一張表(SQL規定).
如:update TbPartaccount pa set inoutflag=9 where pa.equipmentaccount.id=:id instr(pa.equipmentaccount.id,'Z')=1
pa.equipmentaccount.inoutcode報錯, pa.equipmentaccount.id還是 TbPartaccount 的字段(外鍵關聯)
Hibernate 不能像我們想像的那樣轉換成以下方式,所以還是需要手工寫子查詢:
4.分組與排序
Order by子句:
from User user order by user.name, user.age desc
Group by子句和Having子句
"select count(user), user.age from User user group by user.age having count(user)>10"
5.參數邦定
通過順序占位符?來填充參數:
1)hibernate 2 中通過session.find方法來填充
session.find("from User user where user.name=?", "Erica", Hibernate.STRING);
多個參數的情況:
Object[] args = new Object[] {"Erica", new Integer(20)};
Type[] types = new Type{Hibernate.STRING, Hibernate.INTEGER};
session.find("from TUser user where user.name=? and user.age=?", args, types);
2)通過Query接口進行參數填充:
Query query = session.createQuery("from User user where user.name=? and user.age>?");
query.setString(0,"Erica");
query.setInteger(1, 20);
通過引用占位符來填充參數:
String hql = "from User where name=:name";
Query query = session.createQuery(hql);
query.setParameter("name","Erica");
甚至可以將查詢條件封裝為一個JavaBean
class UserQuery {
private String name;
private Integer age;
//getter and setter
}
String hql = "from TUser where name=:name and age=:age";
Query query = session.createQuery(hql);
UserQuery uq = new UserQuery();
uq.setName("Erica");
uq.setAge(new Integer(20));
query.setProperties(uq); //會調用里面的getter?
query.iterate();
6.聯合查詢
(org.hibernate.LazyInitializationException: could not initialize proxy - no Session 異常,可能是HQL語句沒有進行聯表查詢,產生訪問的屬性不存在.)
User表: id, name
Addresses表: user_id, addresses
(1)自然聯接(內聯接): inner join [fetch]
1.HQL: from User u inner join fetch u.addresses
SQL: select * from User表 u inner join Addresses a on u.id=a.user_id //u.id=a.user_id在XML中已配置,所以可以省略.
fetch: Addresses對象讀出后,立即填充到User對象對應的外鍵(集合)中.
2.HQL: from User u inner join u.addresses
不加fetch,則返回的結果集中的每一條記錄是一個Object數組,數組包括User和Addresses兩個對象, 并且User對象.addresses集合已被Addresses對象自動填充.
(2)左連接: left outer join [fetch]
同(1), 返回的結果不同而已.
(3)右連接: right out join
fetch無效,因為User對象可能為NULL,無法進行填充,但返回結果里的記錄是數組.
(4)笛卡爾交集: full join (使用很少)
同(3), 返回結果不同而已.
(5)笛卡爾集: 排列組合:form User, Address
聯合查詢如有不懂, 詳見SQL聯合語句:
SQL中的left outer join,inner join,right outer join用法: http://www.tkk7.com/algz/articles/228219.html
SQL中的各種JOIN(inner join,full outer join,left join,right join,cross join ):http://www.tkk7.com/algz/articles/228218.html
sql的left join 命令詳解 : http://www.tkk7.com/algz/articles/228220.html
]]>
序.畫流程圖.
一.創建數據庫.
注:
1.數據庫中設計INT(java.lang.Interger), VARCHAR(N)(java.lang.String), DATE(java.lang.Date)
2.1:N的情況下, 數據庫中設計外鍵(N方)和集合(一方).
2.hibernate 返向工程.
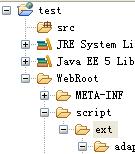
二.添加JSF, Spring, Hibernate 庫引用.
Spring 添加如下:
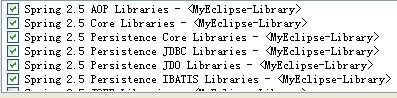
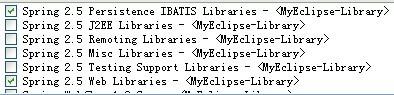
三. 為spring 配置 web.xml 和 faces-config.xml .
(1)web.xml
<context-param>
<param-name>contextConfigLocation</param-name>
<param-value>/WEB-INF/applicationContext.xml</param-value>
</context-param>
(2)web.xml
<listener>
<listener-class>org.springframework.web.context.ContextLoaderListener</listener-class>
</listener> //Servlet API 2.3以后
或:
<servlet>
<servlet-name>context</servlet-name>
<servlet-class>org.springframework.web.context.ContextLoaderServlet</servlet-class>
<load-on-startup>1</load-on-startup>
</servlet>
(3)faces-config.xml
<application>
<variable-resolver>org.springframework.web.jsf.DelegatingVariableResolver</variable-resolver>
</application>
(4)設置過濾器,解決亂碼問題
詳見:http://www.tkk7.com/algz/articles/201833.html 第二條
以上配置完成后.JSF就可以訪問SPRING管理的BEAN.
四.spring+hiberante集成時,asm-2.2.3.jar與asm.jar沖突:
org.springframework.beans.factory.BeanCreationException: Error creating bean with name 'SessionFactory' defined in class path resource [applicationContext.xml]: Invocation of init method failed; nested exception is java.lang.NoSuchMethodError: org.objectweb.asm.ClassVisitor.visit(IILjava/lang/String;Ljava/lang/String;[Ljava/lang/String;Ljava/lang/String;)V
...
Caused by: java.lang.NoSuchMethodError: org.objectweb.asm.ClassVisitor.visit(IILjava/lang/String;Ljava/lang/String;[Ljava/lang/String;Ljava/lang/String;)V
正確的解決方法:
是到項目的發布文件夾\WEB-INF\lib下刪除asm-2.2.3.jar,不能用MyEclipse里刪除.因為他在發布時仍沒刪除.
五.創建進行分類的包.
com.dao(數據訪問層), com.service(業務層), com.web(表示層)
六.創建類.(完成MODEL層設計).
*****************************(也可以利用MyEclipse反向ORM功能自動產生,但應注意自動配置引起的"類完全名"的錯誤)*******************
(一)數據訪問層(DAO)開發:
Spring 配置文件(附加)
(1)配置數據源 <bean id="dataSource" ...> //Myeclipse Hibernate自動反轉工具自動配置
(2)配置會話工廠 <bean id="sessionFactory" ...> //Myeclipse Hibernate自動反轉工具自動配置
(3)配置事務管理器 <bean id="transactionManager" ...>
(4)配置事務代理 www.tkk7.com/algz/articles/163236.html
(5)數據訪問層Bean作為屬性注入業務層Property中. (注:不要用NEW創建數據訪問層對象,否則得不到ServletContext而報錯.)
例:
/**數據訪問層Bean(Myeclipse Hibernate自動反轉工具配置)*/
<bean id="userDao" class="com.data.dao.impl.UserDaoImpl">
<property name="sessionFactory">
<ref local="sessionFactory" />
</property>
</bean>
/**業務層Bean(Myeclipse Spring配置文檔中可以配置,但需先定義好相關類)*/
<bean id="userService" class="com.model.service.impl.UserServiceImpl">
<property name="userDao">
<ref bean="userDao" />
</property>
</bean>
1. 創建 數據訪問層接口: 必須創建,詳見:http://www.tkk7.com/algz/articles/262893.html
public interface 數據訪問層接口 { //在類已存在的情況下,添加其接口:Refactor(重構)->Extract Interfaces提取接口
public String add...();
public String save...();
...... //update, delete, load
}
2 .創建數據訪問層實現類 //ORM反向功能自動配置
public class 數據訪問層實現類 extends HibernateDaoSupport implements 數據訪問層接口 {
...... //getHibernateTemplate().save(user)
}
在實現類的方法(throw DataAccessException)中封裝 getHibernateTemplate().save(user) 等Spring已封裝的持久化方法.(注:如果使用Hibernate API 要用try{...}catch{...}自行處理導常.)
3.注意事項: could not initialize proxy - no Session 異常, 可能是沒有聯表查詢.詳見: http://www.tkk7.com/algz/articles/191835.html
*****************************(也可以利用MyEclipse反向ORM功能自動產生)***********************************
(二)業務邏輯層(Service)開發:
1.創建業務邏輯層接口.
package com.service;
import com.dao.CheckDAO;
public interface ICheckService {
public abstract CheckDAO getCheckDAO();
public abstract void setCheckDAO(CheckDAO checkDAO);
public abstract String searchCheck();
}
2.創建業務邏輯層實現類
public class 業務邏輯層實現類 implements 業務邏輯層接口.
在實現類中. 引用的數據訪問層對象實例采用DI的設值方式注入
在業務邏輯方法(throw DataAccessException)中,使用數據訪問層對象實例來訪問數據庫.
package com.service;
import java.util.List;
import org.json.simple.JSONArray;
import org.json.simple.JSONObject;
import com.dao.Check;
import com.dao.CheckDAO;
import com.dao.ICheckDAO;
public class CheckService implements ICheckService {
private CheckDAO checkDAO;
public CheckDAO getCheckDAO() {
return checkDAO;
}
public void setCheckDAO(CheckDAO checkDAO) {
this.checkDAO = checkDAO;
}
public String searchCheck(){
List<Check> l=checkDAO.findAll();
JSONArray ja=new JSONArray();
JSONObject jo=new JSONObject();
for(Check c:l){
// jo.put("department", c.getDepartment());
// jo.put("checkid", c.getCheckid());
// jo.put("nam", c.getNam());
// jo.put("num", c.getNum());
// jo.put("ondutytime", c.getOndutytime());
// jo.put("offdutytime", c.getOffdutytime1());
// jo.put("registerdate", c.getRegisterdate());
// jo.put("overtime", c.getOvertime());
// ja.add(jo.clone());
// jo.clear();
}
return "";
}
}
3.數據訪問層Bean作為屬性注入業務邏輯層實現類的Property中. (注:不要用NEW創建數據訪問層對象,否則得不到ServletContext而報錯.)
例:
/**數據訪問層Bean(Hibernate自動反轉工具自動配置)*/
<bean id="userDao" class="com.data.dao.impl.UserDaoImpl">
<property name="sessionFactory">
<ref local="sessionFactory" />
</property>
</bean>
/**業務邏輯層Bean(Spring配置文檔中手動配置,但需先定義好相關類)*/
<bean id="userService" class="com.model.service.impl.UserServiceImpl">
<property name="userDao">
<ref bean="userDao" />
</property>
</bean>
(三).表示層開發
(1)在 faces-config.xml 中配置托管BEAN.(實現控制層層設計)
業務層bean作為屬性注入CONTROL層中.
package com.web;
import com.service.ICheckService;
public class SearchAll {
private ICheckService searchService;
private String searchData;
public SearchAll() {
}
public ICheckService getSearchService() {
return searchService;
}
public void setSearchService(ICheckService searchService) {
this.searchService = searchService;
}
public String getSearchData() {
searchData = searchService.searchCheck();
return searchData;
}
public void setSearchData(String searchData) {
this.searchData = searchData;
}
}
<managed-bean>
<managed-bean-name>userBean</managed-bean-name>
<managed-bean-class>com.web.SearchAll</managed-bean-class>
<managed-bean-scope>session</managed-bean-scope>
<managed-property>
<property-name>searchService</property-name>
<value> #{userService}</value> //直接引用spring定義的bean
</managed-property>
<managed-property>
<property-name>searchData</property-name> //頁面中 userBean.name訪問屬性的數據
<value>123</value> //屬性默認值
</managed-property>
</managed-bean>
(2)Bean訪問客戶端傳來的參數值
HttpServletRequest request=(HttpServletRequest) FacesContext.getCurrentInstance().getExternalContext().getRequest();
String s=request.getParameter("webnam");
七.頁面設計.(實現VIEW層設計)
index.faces:(共二行)
<%@ page language="java" pageEncoding="UTF-8"%> //解決EXTJS 接收數據中有中文出現"?????"等亂碼
${searchAll.searchData} //解決JS接收數據.Ext.store({url:index.faces,...})
頁面中訪問Bean的二種方法
方法一:直接在.faces頁面中使用${userBean.property} (推薦) //property:get/set methord
注,不能使用${userBean.method}
<f:view> //JSF標簽必須放在里面
名稱1: ${userBean.searchData} //正確
//#{userBean.searchData} //報錯
名稱2: <h:inputText value="#{userBean.searchData}"/> //正確
//<h:inputText value="${userBean.searchData}"/> //報錯
//<input value="#{userBean.searchData}"/> //報錯
名稱3: <input value="${userBean.searchData}"/> //正確,而且仍然可以使用JSF的ManagedBean
</f:view>
JSF表達式#{...}只能用在JSF標簽里,JSP表達式${...}也只能用JSP頁面里.
JSP EL的語法格式:${...} 不能放在<%...%>中.
方法二: 在.JSP頁面中,直接獲取業務層定義的BEAN
<%@ page import="javax.servlet.ServletContext" %>
<%@ page import="org.springframework.context.ApplicationContext" %>
<%@ page import="org.springframework.web.context.support.WebApplicationContextUtils" %>
<%
//獲取ApplicationContext對象
ServletContext servletContext = request.getSession().getServletContext();
ApplicationContext ac = WebApplicationContextUtils.getWebApplicationContext(servletContext);
//獲取ApplicationContext.xml文件中定義的BEAN
userServiceps=(userService)ac.getBean("userService");
八.導出war
File->Export->J2EE->WAR file
]]>