更多博客請查看:http://www.v5cn.cn在安裝好Sql Server2005后默認(rèn)是不支持JTA分布式事務(wù)的,要進(jìn)行一下額外的設(shè)置才可以支持JTA事務(wù)。
那么如何讓Sql Server2005具有JTA事務(wù)那,那大家就跟我一步一步做吧!
第一步:
下載Sql Server2005的JDBC驅(qū)動。下載完成后得到的是一個(gè)exe文件:“sqljdbc_1.0.809.102_chs.exe”。
雙擊打開:
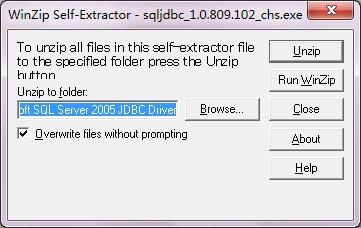
點(diǎn)擊Browse... 選擇要解壓的目錄。解壓后得到:
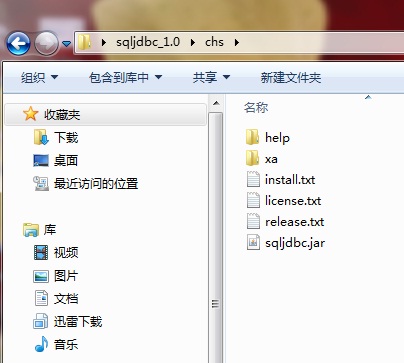
其中:sqljdbc.jar是Java連接Sql Server2005的驅(qū)動程序。
打開xa目錄:

可以看到x64目錄和x86目錄和xa_install.sql文件
我們這里選擇x86也就是32位的機(jī)器。打開可以看到sqljdbc_xa.dll文件
復(fù)制該文件到Sql Server2005的安裝目錄中的Binn文件夾下面。(Sql Server2005的安裝目錄下面有很多Binn,我也不知道那個(gè)復(fù)制那個(gè)不復(fù)制,所以我就都復(fù)制了。
有知道的朋友可以回復(fù)告訴大家和我!)
第二步:
打開操作系統(tǒng)win7和XP:
win7下面是:控制面板--> 系統(tǒng)和安全-->管理工具-->組件服務(wù)-->計(jì)算機(jī)-->Distributed Transaction Coordinator-->右鍵,【本地DTC】,【屬性】選擇【安全】勾選
啟用XA事務(wù),點(diǎn)擊確認(rèn)。服務(wù)會重啟。
XP:控制面板-->管理工具-->組件服務(wù)-->計(jì)算機(jī)-->我的電腦-->右鍵,【屬性】如圖:

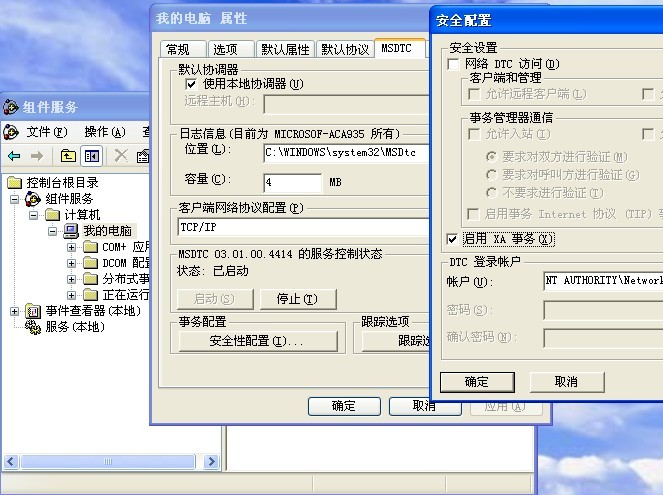
勾選【啟用XA事務(wù)】點(diǎn)擊確定完成。
第三步:
復(fù)制xa_install.sql到Sql Server2005的查詢分析器中執(zhí)行會創(chuàng)建一個(gè)角色:sqlJDBCXAUser
因?yàn)镾ql Server2005默認(rèn)的超級管理員sa無法綁定sqlJDBCXAUser,所以我們重新創(chuàng)建一個(gè)超級管理員名稱dba
然后把sqlJDBCXAUser授權(quán)給他就可以了:
1. 創(chuàng)建用戶和授權(quán):
a). 創(chuàng)建用戶:

b). 登錄名的基本配置:


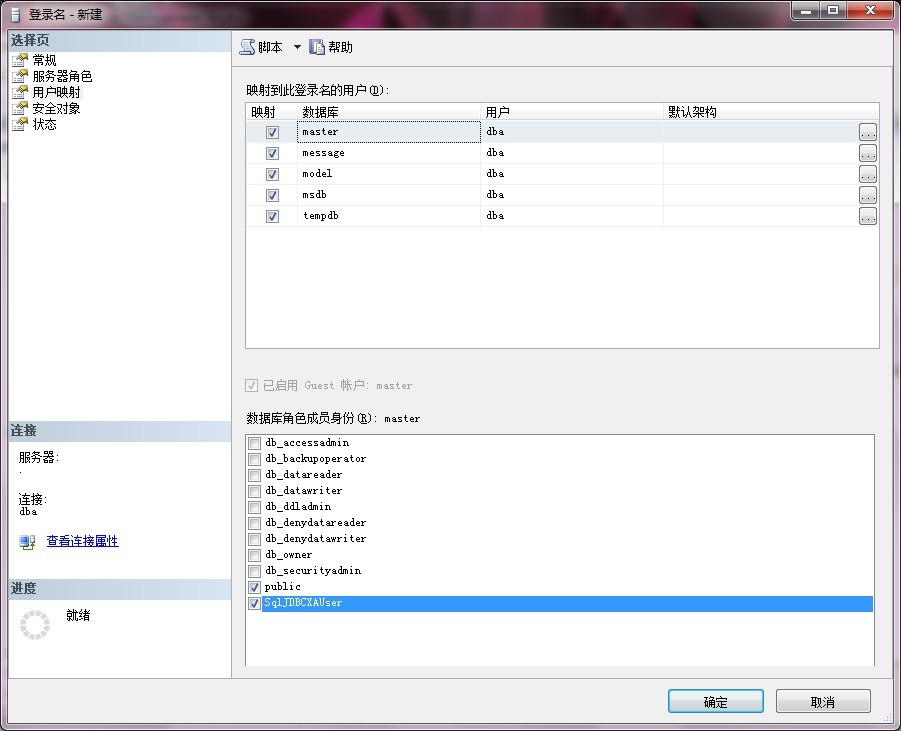
點(diǎn)擊確認(rèn)用戶創(chuàng)建成功!重啟數(shù)據(jù)庫服務(wù)。
使用剛創(chuàng)建的用戶登錄。使用JTA分布式事務(wù)時(shí)也使用該用戶登錄,就OK了!