<project default="run" name="build-project-with-ant">
<!-- 最終編譯后的jar包名稱 -->
<property name="jar.prefix-name" value="cms"></property>
<property name="jar.version" value="1.0"></property>
<property name="tomcat.version" value="6.0.18" />
<property name="mailhost" value="smtp.qq.com"></property>
<property name="username" value="**********" />
<property name="password" value="**********"></property>
<property name="mailfrom" value="184675420@qq.com" />
<property name="mailto" value="184675420@qq.com"></property>
<property name="mailsubject" value="使用Ant自助構建項目測試打包文檔"></property>
<!-- 項目構建時所需要的lib -->
<property name="project.lib.dir" value="${basedir}/WebRoot/WEB-INF/lib"></property>
<!-- 項目構建時tomcat的home目錄 -->
<property name="tomcat.download.url" value="http://archive.apache.org/dist/tomcat/tomcat-6/v${tomcat.version}/bin/apache-tomcat-${tomcat.version}.zip"></property>
<!-- 項目構建時下載tomcat的存放目錄 -->
<property name="tomcat.dir" value="${basedir}/dist/"></property>
<!-- 定義項目的當前目錄 -->
<property name="basedir" value="."/>
<!-- 定義項目源碼目錄 -->
<property name="src.dir" value="${basedir}/src"></property>
<!-- 定義項目源碼編譯后的目錄 -->
<property name="build.dir" value="${basedir}/classes"></property>
<!-- 定義項目最終編譯生成的目錄 -->
<property name="dist.dir" value="${basedir}/dist"></property>
<!-- 定義項目文檔的目錄 -->
<property name="doc.dir" value="${basedir}/doc"></property>
<!-- 定義項目文檔api的目錄 -->
<property name="doc.dir.api" value="${doc.dir}/api"></property>
<!-- 定義項目單元測試文檔的目錄 -->
<property name="junit.doc.dir" value="${basedir}/doc/api/junit"></property>
<!-- 定義項目單元測試源碼的目錄 -->
<property name="junit.src.dir" value="${basedir}/test"></property>
<!-- 定義項目單元測試編譯的目錄 -->
<property name="junit.dir" value="${basedir}/junit"></property>
<property name="junit.build.dir" value="${junit.dir}/classes"></property>
<!-- 定義項目單元測試測試報告的目錄 -->
<property name="junit.report.dir" value="${junit.dir}/report"></property>
<target name="init" description="init">
<echo>項目初始化設置</echo>
<delete dir="${build.dir}"></delete>
<delete dir="${dist.dir}"></delete>
<delete dir="${doc.dir}"></delete>
<delete dir="${junit.dir}"></delete>
<mkdir dir="${build.dir}"/>
<mkdir dir="${dist.dir}"/>
<mkdir dir="${doc.dir}"/>
<mkdir dir="${junit.build.dir}"/>
<mkdir dir="${junit.report.dir}"/>
</target>
<target name="compile" depends="init" description="compile source">
<echo>編譯源碼</echo>
<javac srcdir="${src.dir}" includeantruntime="false" destdir="${build.dir}" verbose="true">
<classpath>
<fileset dir="${project.lib.dir}">
<include name="*.jar"/>
</fileset>
</classpath>
</javac>
</target>
<target name="api-doc" depends="compile" description="build javadoc">
<echo>生成api-doc幫助文檔</echo>
<javadoc
destdir="${doc.dir.api}"
author="true"
version="true"
use="true"
windowtitle="${jar.prefix-name} API"
sourcepath="${src.dir}">
<doctitle><![CDATA[<h1>Test</h1>]]></doctitle>
<bottom><![CDATA[<i>Copyright © 2012 Dummy Corp. All Rights Reserved.</i>]]></bottom>
<classpath>
<fileset dir="${project.lib.dir}">
<include name="*.jar"/>
</fileset>
</classpath>
</javadoc>
</target>
<target name="junit-javac" depends="api-doc" description="junit test case compile">
<echo>編譯junit</echo>
<javac destdir="${junit.build.dir}" srcdir="${junit.src.dir}" fork="false" includeantruntime="false">
<classpath>
<fileset dir="${project.lib.dir}">
<include name="*.jar"/>
</fileset>
</classpath>
</javac>
</target>
<target name="junit-run" depends="junit-javac" description="junit test case execute">
<echo>運行單元測試</echo>
<junit printsummary="yes" haltonfailure="false">
<classpath>
<pathelement location="${junit.build.dir}"/>
<fileset dir="${project.lib.dir}">
<include name="*.jar"/>
</fileset>
</classpath>
<formatter type="xml"/>
<batchtest todir="${junit.report.dir}">
<fileset dir="${junit.src.dir}">
<include name="**/*Test.java"/>
</fileset>
</batchtest>
</junit>
</target>
<target name="junit-report" depends="junit-run" description="junit test case report">
<echo>生成單元測試報告</echo>
<junitreport todir="${junit.report.dir}">
<fileset dir="${junit.report.dir}">
<include name="**/*.xml"/>
</fileset>
<report format="frames" todir="${junit.report.dir}/html"/>
</junitreport>
</target>
<target name="junit-doc" depends="junit-report" description="build javadoc">
<echo>生成junit-doc幫助文檔</echo>
<javadoc
destdir="${junit.doc.dir}"
author="true"
version="true"
use="true"
windowtitle="Junit Test API"
sourcepath="${junit.src.dir}">
<classpath>
<fileset dir="${project.lib.dir}">
<include name="*.jar"/>
</fileset>
</classpath>
<doctitle><![CDATA[<h1>Test</h1>]]></doctitle>
<bottom><![CDATA[<i>Copyright © 2012 Dummy Corp. All Rights Reserved.</i>]]></bottom>
</javadoc>
</target>
<target name="package" depends="api-doc" description="package">
<echo>使用jar打包編譯后的class文件</echo>
<jar destfile="${dist.dir}/${jar.prefix-name}-${jar.version}.jar" includes="**/*.class" basedir="${build.dir}">
</jar>
<echo>使用zip打包源碼</echo>
<zip destfile="${dist.dir}/${jar.prefix-name}-source.zip" basedir="${src.dir}">
<exclude name="**/*.class"/>
</zip>
<echo>使用zip打包javadoc</echo>
<zip destfile="${dist.dir}/${jar.prefix-name}-doc.zip" basedir="${doc.dir.api}">
</zip>
<echo>使用war打war包</echo>
<war destfile="${dist.dir}/${jar.prefix-name}.war" webxml="${basedir}/WebRoot/WEB-INF/web.xml">
<fileset dir="${basedir}/WebRoot">
<include name="**/*.*"/>
</fileset>
<!--
<lib dir="${basedir}/WebRoot/WEB-INF/lib"></lib>
<classes dir="${basedir}/WebRoot/WEB-INF/classes"></classes>
-->
</war>
</target>
<target name="junit-package" depends="junit-doc" description="junit-package">
<echo>打包</echo>
<echo>使用jar打包編譯后的class文件</echo>
<jar destfile="${dist.dir}/${jar.prefix-name}-${jar.version}.jar" includes="**/*.class" basedir="${build.dir}">
</jar>
<echo>使用zip打包源碼</echo>
<zip destfile="${dist.dir}/${jar.prefix-name}-source.zip" basedir="${src.dir}">
<exclude name="**/*.class"/>
</zip>
<echo>使用zip打包javadoc</echo>
<zip destfile="${dist.dir}/${jar.prefix-name}-doc.zip" basedir="${doc.dir.api}">
</zip>
<echo>使用war打war包</echo>
<war destfile="${dist.dir}/${jar.prefix-name}.war" webxml="${basedir}/WebRoot/WEB-INF/web.xml">
<fileset dir="${basedir}/WebRoot">
<include name="**/*.*"/>
</fileset>
<!--
<lib dir="${basedir}/WebRoot/WEB-INF/lib"></lib>
<classes dir="${basedir}/WebRoot/WEB-INF/classes"></classes>
-->
</war>
<echo>使用jar打junit單元測試編譯好的class文件</echo>
<jar destfile="${dist.dir}/${jar.prefix-name}-junit-${jar.version}.jar" includes="**/*.class" basedir="${junit.build.dir}">
</jar>
<echo>使用zip打junit單元測試源文件</echo>
<zip destfile="${dist.dir}/${jar.prefix-name}-junit-source.zip" basedir="${junit.src.dir}">
<exclude name="**/*.class"/>
</zip>
<echo>使用zip打junit單元測試測試報告</echo>
<zip destfile="${dist.dir}/junit-report.zip" basedir="${junit.report.dir}/html">
</zip>
</target>
<target name="clean">
<echo>清理項目</echo>
<delete dir="${build.dir}" includeemptydirs="true"></delete>
<delete dir="${doc.dir}" includeemptydirs="true"></delete>
<delete dir="${junit.dir}" includeemptydirs="true"></delete>
</target>
<target name="mail" description="use java mail send mail message" depends="clean">
<echo>將打包的文件email發送</echo>
mailhost="${mailhost}"
mailport="25"
subject="${mailsubject}"
charset="utf-8"
user="${username}"
password="${password}"
>
<from address="${mailfrom}"/>
<to address="${mailto}"/>
<message>使用Ant自助構建項目測試打包文檔</message>
<attachments>
<fileset dir="${dist.dir}">
<include name="*.*"/>
</fileset>
</attachments>
</mail>
</target>
<target name="wget" depends="mail">
<echo>下載tomcat</echo>
<get dest="${tomcat.dir}" verbose="true">
<url url="${tomcat.download.url}"/>
</get>
</target>
<target name="unzip" depends="wget">
<echo>解壓tomcat</echo>
<unzip src="${tomcat.dir}/apache-tomcat-${tomcat.version}.zip" dest="${tomcat.dir}">
</unzip>
</target>
<target name="copy" depends="unzip">
<echo>拷貝war包到tomcat中部署</echo>
<copy file="${dist.dir}/${jar.prefix-name}.war" tofile="${tomcat.dir}/apache-tomcat-${tomcat.version}/webapps/${jar.prefix-name}.war"/>
</target>
<target name="startup" depends="copy">
<echo>啟動tomcat web容器</echo>
<exec executable="${tomcat.dir}/apache-tomcat-${tomcat.version}/bin/startup.bat">
<env key="CATALINA_HOME" path="${tomcat.dir}/apache-tomcat-${tomcat.version}/"/>
</exec>
</target>
<target name="run" depends="package,startup" description="不存在單元測試時執行的任務">
</target>
<target name="junitrun" depends="junit-package,startup" description="存在單元測試時執行的任務">
</target>
</project>
[echo] 項目初始化設置
[delete] Deleting directory D:\workspace\Ant1\classes
[delete] Deleting directory D:\workspace\Ant1\dist
[delete] Deleting directory D:\workspace\Ant1\doc
[delete] Deleting directory D:\workspace\Ant1\junit
[mkdir] Created dir: D:\workspace\Ant1\classes
[mkdir] Created dir: D:\workspace\Ant1\dist
[mkdir] Created dir: D:\workspace\Ant1\doc
[mkdir] Created dir: D:\workspace\Ant1\junit\classes
[mkdir] Created dir: D:\workspace\Ant1\junit\report
compile:
[echo] 編譯源碼
[javac] Compiling 3 source files to D:\workspace\Ant1\classes
junit-javac:
[echo] 編譯junit
[javac] Compiling 1 source file to D:\workspace\Ant1\junit\classes
junit-run:
[echo] 運行單元測試
[junit] Running com.junit.test.OtherTest
[junit] Tests run: 2, Failures: 0, Errors: 0, Time elapsed: 0.027 sec
junit-report:
[echo] 生成單元測試報告
[junitreport] Processing D:\workspace\Ant1\junit\report\TESTS-TestSuites.xml to C:\Users\scott\AppData\Local\Temp\null1056173236
[junitreport] Loading stylesheet jar:file:/E:/apache-ant-1.8.4/lib/ant-junit.jar!/org/apache/tools/ant/taskdefs/optional/junit/xsl/junit-frames.xsl
[junitreport] Transform time: 334ms
[junitreport] Deleting: C:\Users\scott\AppData\Local\Temp\null1056173236
doc:
[echo] 生成幫助文檔
[javadoc] Generating Javadoc
[javadoc] Javadoc execution
[javadoc] 正在創建目標目錄: "D:\workspace\Ant1\doc\api\"
[javadoc] 正在裝入軟件包 com.ant.lesson1 的源文件...
[javadoc] 正在構造 Javadoc 信息...
[javadoc] 標準 Doclet 版本 1.6.0_25
[javadoc] 正在構建所有軟件包和類的樹...
[javadoc] 正在生成 D:\workspace\Ant1\doc\api\com/ant/lesson1/\Main.html...
[javadoc] 正在生成 D:\workspace\Ant1\doc\api\com/ant/lesson1/\MyHttpServlet.html...
[javadoc] 正在生成 D:\workspace\Ant1\doc\api\com/ant/lesson1/\SimpleTask.html...
[javadoc] 正在生成 D:\workspace\Ant1\doc\api\com/ant/lesson1/\package-frame.html...
[javadoc] 正在生成 D:\workspace\Ant1\doc\api\com/ant/lesson1/\package-summary.html...
[javadoc] 正在生成 D:\workspace\Ant1\doc\api\com/ant/lesson1/\package-tree.html...
[javadoc] 正在生成 D:\workspace\Ant1\doc\api\constant-values.html...
[javadoc] 正在生成 D:\workspace\Ant1\doc\api\serialized-form.html...
[javadoc] 正在生成 D:\workspace\Ant1\doc\api\com/ant/lesson1/\class-use\SimpleTask.html...
[javadoc] 正在生成 D:\workspace\Ant1\doc\api\com/ant/lesson1/\class-use\MyHttpServlet.html...
[javadoc] 正在生成 D:\workspace\Ant1\doc\api\com/ant/lesson1/\class-use\Main.html...
[javadoc] 正在生成 D:\workspace\Ant1\doc\api\com/ant/lesson1/\package-use.html...
[javadoc] 正在構建所有軟件包和類的索引...
[javadoc] 正在生成 D:\workspace\Ant1\doc\api\overview-tree.html...
[javadoc] 正在生成 D:\workspace\Ant1\doc\api\index-all.html...
[javadoc] 正在生成 D:\workspace\Ant1\doc\api\deprecated-list.html...
[javadoc] 正在構建所有類的索引...
[javadoc] 正在生成 D:\workspace\Ant1\doc\api\allclasses-frame.html...
[javadoc] 正在生成 D:\workspace\Ant1\doc\api\allclasses-noframe.html...
[javadoc] 正在生成 D:\workspace\Ant1\doc\api\index.html...
[javadoc] 正在生成 D:\workspace\Ant1\doc\api\help-doc.html...
[javadoc] 正在生成 D:\workspace\Ant1\doc\api\stylesheet.css...
[javadoc] Generating Javadoc
[javadoc] Javadoc execution
[javadoc] 正在創建目標目錄: "D:\workspace\Ant1\doc\api\junit\"
[javadoc] 正在裝入軟件包 com.junit.test 的源文件...
[javadoc] 正在構造 Javadoc 信息...
[javadoc] 標準 Doclet 版本 1.6.0_25
[javadoc] 正在構建所有軟件包和類的樹...
[javadoc] 正在生成 D:\workspace\Ant1\doc\api\junit\com/junit/test/\OtherTest.html...
[javadoc] 正在生成 D:\workspace\Ant1\doc\api\junit\com/junit/test/\package-frame.html...
[javadoc] 正在生成 D:\workspace\Ant1\doc\api\junit\com/junit/test/\package-summary.html...
[javadoc] 正在生成 D:\workspace\Ant1\doc\api\junit\com/junit/test/\package-tree.html...
[javadoc] 正在生成 D:\workspace\Ant1\doc\api\junit\constant-values.html...
[javadoc] 正在生成 D:\workspace\Ant1\doc\api\junit\com/junit/test/\class-use\OtherTest.html...
[javadoc] 正在生成 D:\workspace\Ant1\doc\api\junit\com/junit/test/\package-use.html...
[javadoc] 正在構建所有軟件包和類的索引...
[javadoc] 正在生成 D:\workspace\Ant1\doc\api\junit\overview-tree.html...
[javadoc] 正在生成 D:\workspace\Ant1\doc\api\junit\index-all.html...
[javadoc] 正在生成 D:\workspace\Ant1\doc\api\junit\deprecated-list.html...
[javadoc] 正在構建所有類的索引...
[javadoc] 正在生成 D:\workspace\Ant1\doc\api\junit\allclasses-frame.html...
[javadoc] 正在生成 D:\workspace\Ant1\doc\api\junit\allclasses-noframe.html...
[javadoc] 正在生成 D:\workspace\Ant1\doc\api\junit\index.html...
[javadoc] 正在生成 D:\workspace\Ant1\doc\api\junit\help-doc.html...
[javadoc] 正在生成 D:\workspace\Ant1\doc\api\junit\stylesheet.css...
package:
[echo] 打包
[jar] Building jar: D:\workspace\Ant1\dist\cms-1.0.jar
[zip] Building zip: D:\workspace\Ant1\dist\cms-source.zip
[zip] Building zip: D:\workspace\Ant1\dist\cms-doc.zip
[jar] Building jar: D:\workspace\Ant1\dist\cms-junit-1.0.jar
[zip] Building zip: D:\workspace\Ant1\dist\cms-junit-source.zip
[zip] Building zip: D:\workspace\Ant1\dist\junit-report.zip
[war] Building war: D:\workspace\Ant1\dist\cms.war
clean:
[echo] 清理項目
[delete] Deleting directory D:\workspace\Ant1\classes
[delete] Deleting directory D:\workspace\Ant1\doc
[delete] Deleting directory D:\workspace\Ant1\junit
mail:
[echo] 將打包的文件email發送
[mail] Sending email: Test build

]]>
在線安裝地址:http://download.eclipse.org/egit/updates
]]>
]]>
使用Google Weather API查詢天氣預報 收藏Google Weather API 只支持美國地區使用郵政編碼進行查詢,例如:
http://www.google.com/ig/api?hl=zh-cn&weather=94043
(94043 為 山景城, 美國加州 的郵政編碼)
而除了美國以外的地區需要使用經緯度坐標作為參數才能執行 Google Weather API, 例如:
http://www.google.com/ig/api?hl=zh-cn&weather=,,,30670000,104019996
(30670000,104019996 為 成都, 中國大陸 的經緯度坐標)
當然,也可能通行城市名稱的漢語拼音來查詢,例如:以下是北京的天氣
http://www.google.com/ig/api?hl=zh-cn&weather=Beijing
要其它地區的經緯度坐標,可以通過 Google API 提供的國家代碼列表及相應的城市經緯度坐標列表可以查詢到,以下是 Google API 提供的查詢參數:
http://www.google.com/ig/countries?output=xml&hl=zh-cn
(查詢 Google 所支持的所有國家的代碼,并以 zh-cn 簡體中文顯示)
http://www.google.com/ig/cities?output=xml&hl=zh-cn&country=cn
http://www.google.com/ig/cities?country=cn
缺省返回的是英文, 可以增加一個參數來返回中文:
http://www.google.com/ig/api?weather=Nanjing&hl=zh-cn
取得中國的所有城市代碼:
http://www.google.com/ig/cities?country=cn
缺省返回是 JSON 格式.增加一個參數返回XML格式(Firefox 中不行)
http://www.google.com/ig/cities?country=cn&output=xml
]]>
Log4j XML Configuration Primer
Basic example
Below is a basic xml configuration file for log4j that will get you started:
<?xml version="1.0" encoding="UTF-8" ?>
<!DOCTYPE log4j:configuration SYSTEM "log4j.dtd">

<log4j:configuration xmlns:log4j="http://jakarta.apache.org/log4j/">
  <appender name="console" class="org.apache.log4j.ConsoleAppender">
    <param name="Target" value="System.out"/>
    <layout class="org.apache.log4j.PatternLayout">
      <param name="ConversionPattern" value="%-5p %c{1} - %m%n"/>
    </layout>
  </appender>

  <root>
    <priority value ="debug" />
    <appender-ref ref="console" />
  </root>

</log4j:configuration>
This will print all debug or higher messages to the console/screen. Items of note:
-
The appender is defined first, with a name (in this case "console"). A layout is defined for the appender (in this case PatternLayout ), and a pattern is defined for the layout. What is required for the layout is layout specific, so check the javadoc description for the layout class you choose to use ( PatternLayout is used most commonly).
- No loggers are defined in this example, but the configuration for the "root" logger is defined. It is configured to level debug, and the appender named "console" is attached to it. All loggers inherit from root, so in this example, all debug or higher messages from all loggers will be printed to the console appender.
XML Configuration Format
In order to better understand the more detailed examples, it is useful to understand the expected format for the xml configuration files. This is defined by the log4j.dtd which is located in the log4j distribution jar in the package org.apache.log4j.xml. The contents of this file will not be listed in its entirety, so please feel free to open/print the file yourself. If you are not familiar with xml dtd file formats, then you should go find a good book on that subject first.
Near the beginning of the file is the following declaration:
<!ELEMENT log4j:configuration (renderer*, appender*,(category|logger)*,root?, categoryFactory?)>
This element defines the expected structure of the xml configuration file: 0 or more renderer elements, followed by 0 or more appender elements, followed by 0 or more logger elements, followed by 0 or 1 root element, followed by 0 or 1 categoryFactory element. If this order is not followed, then errors will be printed by the xml parser at the time the xml file is read in. Also, as a note, the "category" element is the same as the logger element. Prior to log4j version 1.2, loggers were known as category. Much of the documentation still refers to category. Just understand that they are the same thing.
Further along in the log4j.dtd is the following declaration which defines the allowed attributes:
<!ATTLIST log4j:configuration
  xmlns:log4j              CDATA #FIXED "http://jakarta.apache.org/log4j/"
  threshold                (all|debug|info|warn|error|fatal|off|null) "null"
  debug                    (true|false|null)  "null"
>
-
debug - Probably the most important attribute for log4:configuration, setting it to "true" will print out information as the configuration file is read and used to configure the log4j environment. Very useful when trying to fiure out why your configuration file is not doing what you expect.
-
threshold - <yet to be described>
Understanding the expected structure of the xml configuration file makes it easier to concentrate on the specific elements one needs to configure.
Appender Configuration
One can instrument all the code one writes to output useful debug trace messages, but if log4j is not configured to have at least one appender, all will be for naught. None of the useful messages will be displayed anywhere.
Looking again to the log4j.dtd, appender elements are declared to be:
<!ELEMENT appender (errorHandler?, param*, layout?, filter*, appender-ref*)>
<!ATTLIST appender
  name          ID      #REQUIRED
  class         CDATA   #REQUIRED
>
An appender element must have name and class attributes. The name is the value used to reference the appender in the rest of the configuration file. The class attribute should be the fully qualified class name of the appender class to use (ie org.apache.log4j.ConsoleAppender ).
An appender element can also contain child elements:
-
0 or 1 errorHandler element - <yet to be described>
-
0 or more param elements - Each appender can be configured with setting specific to the functioning of the appender. This is implemented by getter and setter methods in the appender class. The param element is used to access the setter methods. The format for param elements is simple; they are atomic elements with a name attribute and a value attribute. The name attribute should be the name of the setter method with the "set" part of the method name omitted (ie method name "setTarget" would be "Target"). The value attribute is the value the setter method should be set with.
-
0 or 1 layout element - Not all appenders use or require a layout. For appenders that do, the layout element defines what layout class to use. The layout element has one attribute, class, which is the fully qualified class name of the layout class to use. Similar to the appender element, the layout element is allowed to have 0 or more param child elements. Again, the param elements are used to set specific values for the layout class, which varies based on what layout class is used.
-
0 or more filter elements - See the Filter Configuration section below for more details.
-
0 or more appender-ref elements - <yet to be described>
So, from the above, the simple example of the appender named "console" from the basic example starts to make more sense:
  <appender name="console" class="org.apache.log4j.ConsoleAppender">
    <param name="Target" value="System.out"/>
    <layout class="org.apache.log4j.PatternLayout">
      <param name="ConversionPattern" value="%-5p %c{1} - %m%n"/>
    </layout>
  </appender>
The name of of the appender is "console" and this is the name that is used to refer to the appender in the rest of the configuration file. The class to use for the appender is org.apache.log4j.ConsoleAppender .
The console appender has one param element defined. Looking at the javadoc for ConsoleAppender , the setTarget method is used to choose which console stream to print messages to, System.out or System.err. The example configures the appender to use System.out.
The console appender also has a layout element defined which uses org.apache.log4j.PatternLayout . Looking at the javadoc for PatternLayout , the setConversionPattern method takes a string describing the layout for messages. The details of this format can also be found in the javadoc.
The details of the configuration for a specific appender class vary from class to class. Your best bet is to review the javadoc for the appender class you want to use. Pay particular attention to the setter property methods and the values they expect. Each setter method can be accessed using the param element in the xml configuration.
Currently, the following appender classes exist:
-
org.apache.log4j.ConsoleAppender ConsoleAppender
-
org.apache.log4j.FileAppender FileAppender
-
org.apache.log4j.jdbc.JDBCAppender JDBCAppender
-
org.apache.log4j.AsyncAppender AsyncAppender
-
org.apache.log4j.net.JMSAppender JMSAppender
-
org.apache.log4j.lf5.LF5Appender LF5Appender
-
org.apache.log4j.nt.NTEventLogAppender NTEventLogAppender
-
org.apache.log4j.varia.NullAppender NullAppender
-
org.apache.log4j.net.SMTPAppender SMTPAppender
-
org.apache.log4j.net.SocketAppender SocketAppender
-
org.apache.log4j.net.SocketHubAppender SocketHubAppender
-
org.apache.log4j.net.SyslogAppender SyslogAppender
-
org.apache.log4j.net.TelnetAppender TelnetAppender
-
org.apache.log4j.WriterAppender WriterAppender
Logger Configuration
Now the appenders are configured. But how to configure loggers to output messages at a certain level? How to configure loggers to output to specific appender? Welcome to logger configuration.
The most important logger you need to configure is the root logger. From the simple example, this was done with the following configuration:
  <root>
    <priority value ="debug" />
    <appender-ref ref="console" />
  </root>
The root logger is configured to output log message at level "debug" or higher to the appender named "console". All loggers inherit their settings from the root logger, so with no other configuration settings, all loggers will output all of their messages to the "console" appender automatically. This may be fine for simple debugging, but eventually more specific logger configuration is going to be required.
Looking again to the log4j.dtd, logger elements are declared to be:
<!ELEMENT logger (level?,appender-ref*)>
<!ATTLIST logger
  name          ID      #REQUIRED
  additivity    (true|false) "true"
>
A logger element must have a name attribute. This is the name of the logger used when creating the Logger instance(usually the fully qualified class name). It can also have an optional additivity attribute. More on this later.
A logger element can also contain child elements:
-
0 or 1 level element - This defines the level of log messages that will be allowed to be logged for this logger. Normal usage has a value of "debug", "info", "warn", "error", or "fatal". Only that level or above will be reported to the log.
-
0 or more appender-ref elements - This references a defined appender that log messages from this logger should be directed to. Appender-ref elements are simple elements that have a ref attribute. The value for this attribute should be the name of the appender.
A typical logger configuration element would look similar to this:
<logger name="com.mycompany.apackage.MyClass">
  <level value="info"/>
</logger>
Logger Inheritance
<yet to be described>
Additivity
The output of a log statement of logger C will go to all the appenders in C and its ancestors. This is the meaning of the term "appender additivity".
However, if an ancestor of logger C, say P, has the additivity flag set to false, then C's output will be directed to all the appenders in C and it's ancestors upto and including P but not the appenders in any of the ancestors of P.
Loggers have their additivity flag set to true by default.
Example config;
<logger name="com.eatmutton.muttonsite.torque" additivity="false">
   <level value="info" />
   <appender-ref ref="local-torque" />
</logger>
Additivitiy section taken from http://logging.apache.org/log4j/docs/manual.html.
Converting Configuration Files To XML format
I have converted the configuration examples from the log4j manual to xml format. Hopefully people can use this to convert their own configuration files.
Example 1
# Set root logger level to DEBUG and its only appender to A1.
log4j.rootLogger=DEBUG, A1

# A1 is set to be a ConsoleAppender.
log4j.appender.A1=org.apache.log4j.ConsoleAppender

# A1 uses PatternLayout.
log4j.appender.A1.layout=org.apache.log4j.PatternLayout
log4j.appender.A1.layout.ConversionPattern=%-4r [%t] %-5p %c %x - %m%n
<?xml version="1.0" encoding="UTF-8" ?>
<!DOCTYPE log4j:configuration SYSTEM "log4j.dtd">
<log4j:configuration xmlns:log4j="http://jakarta.apache.org/log4j/">
  <!-- A1 is set to be a ConsoleAppender -->
  <appender name="A1" class="org.apache.log4j.ConsoleAppender">
    <!-- A1 uses PatternLayout -->
    <layout class="org.apache.log4j.PatternLayout">
      <param name="ConversionPattern" value="%-4r [%t] %-5p %c %x - %m%n"/>
    </layout>
  </appender>
  <root>
    <!-- Set root logger level to DEBUG and its only appender to A1 -->
    <priority value ="debug" />
    <appender-ref ref="A1" />
  </root>
</log4j:configuration>
Example 2
log4j.rootLogger=DEBUG, A1
log4j.appender.A1=org.apache.log4j.ConsoleAppender
log4j.appender.A1.layout=org.apache.log4j.PatternLayout

# Print the date in ISO 8601 format
log4j.appender.A1.layout.ConversionPattern=%d [%t] %-5p %c - %m%n

# Print only messages of level WARN or above in the package com.foo.
log4j.logger.com.foo=WARN
<?xml version="1.0" encoding="UTF-8" ?>
<!DOCTYPE log4j:configuration SYSTEM "log4j.dtd">
<log4j:configuration xmlns:log4j="http://jakarta.apache.org/log4j/">
  <appender name="A1" class="org.apache.log4j.ConsoleAppender">
    <layout class="org.apache.log4j.PatternLayout">
      <!-- Print the date in ISO 8601 format -->
      <param name="ConversionPattern" value="%d [%t] %-5p %c - %m%n"/>
    </layout>
  </appender>
  <logger name="com.foo">
    <!-- Print only messages of level warn or above in the package com.foo -->
    <level value="warn"/>
  </logger>
  <root>
    <priority value ="debug" />
    <appender-ref ref="A1" />
  </root>
</log4j:configuration>
Example 3
log4j.rootLogger=debug, stdout, R

log4j.appender.stdout=org.apache.log4j.ConsoleAppender
log4j.appender.stdout.layout=org.apache.log4j.PatternLayout

# Pattern to output the caller's file name and line number.
log4j.appender.stdout.layout.ConversionPattern=%5p [%t] (%F:%L) - %m%n

log4j.appender.R=org.apache.log4j.RollingFileAppender
log4j.appender.R.File=example.log

log4j.appender.R.MaxFileSize=100KB
# Keep one backup file
log4j.appender.R.MaxBackupIndex=1

log4j.appender.R.layout=org.apache.log4j.PatternLayout
log4j.appender.R.layout.ConversionPattern=%p %t %c - %m%n
<?xml version="1.0" encoding="UTF-8" ?>
<!DOCTYPE log4j:configuration SYSTEM "log4j.dtd">
<log4j:configuration xmlns:log4j="http://jakarta.apache.org/log4j/">
  <appender name="stdout" class="org.apache.log4j.ConsoleAppender">
    <layout class="org.apache.log4j.PatternLayout">
      <!-- Pattern to output the caller's file name and line number -->
      <param name="ConversionPattern" value="%5p [%t] (%F:%L) - %m%n"/>
    </layout>
  </appender>
  <appender name="R" class="org.apache.log4j.RollingFileAppender">
    <param name="file" value="example.log"/>
    <param name="MaxFileSize" value="100KB"/>
    <!-- Keep one backup file -->
    <param name="MaxBackupIndex" value="1"/>
    <layout class="org.apache.log4j.PatternLayout">
      <param name="ConversionPattern" value="%p %t %c - %m%n"/>
    </layout>
  </appender>
  <root>
    <priority value ="debug" />
    <appender-ref ref="stdout" />
    <appender-ref ref="R" />
  </root>
</log4j:configuration>
Filter Configuration
Filters can be defined at appender level. For example, to filter only certain levels, the LevelRangeFilter can be used like this:
        <appender name="TRACE" class="org.apache.log4j.ConsoleAppender">
                <layout class="org.apache.log4j.PatternLayout">
                        <param name="ConversionPattern" value="[%t] %-5p %c - %m%n" />
                </layout>
                <filter class="org.apache.log4j.varia.LevelRangeFilter">
                        <param name="levelMin" value="DEBUG" />
                        <param name="levelMax" value="DEBUG" />
                </filter>
        </appender>
Advanced Topics
<yet to be described>
More examples
(Please feel free to add your own configuration examples here)
Note that TimeBasedRollingPolicy can only be configured with xml, not log4j.properties
<?xml version="1.0" encoding="UTF-8" ?>
<!DOCTYPE log4j:configuration SYSTEM "log4j.dtd">

<!-- Note that this file is refreshed by the server every 60seconds, as specified in web.xml -->

<log4j:configuration debug="true">

        <appender name="ROLL" class="org.apache.log4j.rolling.RollingFileAppender">
                <!-- The active file to log to -->
                <param name="file" value="/applogs/myportal/portal.log" />
                <param name="append" value="true" />
                <param name="encoding" value="UTF-8" />

                <rollingPolicy class="org.apache.log4j.rolling.TimeBasedRollingPolicy">
                        <!-- The file to roll to, this is a fairly intelligent parameter, if the file
                        ends in .gz, it gzips it, based on the date stamp it rolls at that time,
                        default is yyyy-MM-dd, (rolls at midnight)
                        See: http://logging.apache.org/log4j/companions/extras/apidocs/org/apache/log4j/rolling/TimeBasedRollingPolicy.html -->
                        <param name="FileNamePattern" value="/applogs/myportal/portal.%d.log.gz" />
                </rollingPolicy>

                <layout class="org.apache.log4j.PatternLayout">
                        <!-- The log message pattern -->
                        <param name="ConversionPattern" value="%5p %d{ISO8601} [%t][%x] %c - %m%n" />
                </layout>
        </appender>

        <!-- Loggers to filter out various class paths -->

        <logger name="org.hibernate.engine.loading.LoadContexts" additivity="false">
                <level value="error"/>
                <appender-ref ref="ROLL" />
        </logger>

        <!-- Debugging loggers -->

        <!-- Uncomment to enable debug on calpoly code only -->
        <!--
        <logger name="edu.calpoly">
                <level value="debug"/>
                <appender-ref ref="ROLL" />
        </logger>
        -->

        <root>
                <priority value="info" />
                <appender-ref ref="ROLL" />
        </root>

</log4j:configuration>]]>
為什么要使用自定義標簽呢?主要是為了取代丑陋的 JSP 腳本。在 HTML 頁面中插入 JSP 腳本有如下幾個壞處:
- JSP 腳本非常丑陋,難以閱讀。
- JSP 腳本和 HTML 代碼混雜,維護成本高。
- HTML 頁面中嵌入 JSP 腳本,導致美工人員難以參與開發。
出于以上三點的考慮,我們需要一種可在頁面中使用的標簽,這種標簽具有和 HTML 標簽類似的語法,但由可以完成 JSP 腳本的功能——這種標簽就是 JSP 自定義標簽。
在 JSP1.1 規范中開發自定義標簽庫比較復雜,JSP 2 規范簡化了標簽庫的開發,在 JSP 2 中開發標簽庫只需如下幾個步驟:
- 開發自定義標簽處理類;
- 建立一個 *.tld 文件,每個 *.tld 文件對應一個標簽庫,每個標簽庫對應多個標簽;
- 在 JSP 文件中使用自定義標簽。
當我們在 JSP 頁面使用一個簡單的標簽時,底層實際上由標簽處理類提供支持,從而可以使用簡單的標簽來封裝復雜的功能,從而使團隊更好地協作開發(能讓美工人員更好地參與 JSP 頁面的開發)。
早期 JSP 自定義標簽類開發過程略微復雜一些,但 JSP 2 已經簡化了這個過程,它只要自定義標簽類都必須繼承一個父類:javax.servlet.jsp.tagext.SimpleTagSupport,除此之外,JSP 自定義標簽類還有如下要求。
- 如果標簽類包含屬性,每個屬性都有對應的 getter 和 setter 方法。
- 重寫 doTag() 方法,這個方法負責生成頁面內容。
下面開發一個最簡單的自定義標簽,該標簽負責在頁面上輸出 HelloWorld。
// 標簽處理類,繼承 SimpleTagSupport 父類
public class HelloWorldTag extends SimpleTagSupport
{
    // 重寫 doTag 方法,該方法在標簽結束生成頁面內容
    public void doTag()throws JspException,
        IOException
    {
        // 獲取頁面輸出流,并輸出字符串
        getJspContext().getOut().write("Hello World");
    }
}
|
上面這個標簽處理類非常簡單,它繼承了 SimpleTagSupport 父類,并重寫 doTag() 方法,而 doTag() 方法則負責輸出頁面內容。該標簽沒有屬性,因此無須提供 setter 和 getter 方法。
TLD 是 Tag Library Definition 的縮寫,即標簽庫定義,文件的后綴是 tld,每個 TLD 文件對應一個標簽庫,一個標簽庫中可包含多個標簽,TLD 文件也稱為標簽庫定義文件。
標簽庫定義文件的根元素是 taglib,它可以包含多個 tag 子元素,每個 tag 子元素都定義一個標簽。通常我們可以到 Web 容器下復制一個標簽庫定義文件,并在此基礎上進行修改即可。例如 Tomcat6.0,在 webapps\examples\WEB-INF\jsp2 路徑下包含了一個 jsp2-example-taglib.tld 文件,這就是示范用的標簽庫定義文件。
將該文件復制到 Web 應用的 WEB-INF/ 路徑,或 WEB-INF 的任意子路徑下,并對該文件進行簡單修改,修改后的 mytaglib.tld 文件代碼如下:
<?xml version="1.0" encoding="GBK"?>
<taglib xmlns="http://java.sun.com/xml/ns/j2ee"
    xmlns:xsi="http://www.w3.org/2001/XMLSchema-instance"
    xsi:schemaLocation="http://java.sun.com/xml/ns/j2ee web-jsptaglibrary_2_0.xsd"
    version="2.0">
    <tlib-version>1.0</tlib-version>
    <short-name>mytaglib</short-name>
    <!-- 定義該標簽庫的URI -->
    <uri>http://www.crazyit.org/mytaglib</uri>
    <!-- 定義第一個標簽 -->
    <tag>
        <!-- 定義標簽名 -->
        <name>helloWorld</name>
        <!-- 定義標簽處理類 -->
        <tag-class>lee.HelloWorldTag</tag-class>
        <!-- 定義標簽體為空 -->
        <body-content>empty</body-content>
    </tag>
</taglib>
|
上面標簽庫定義文件也是一個標準的 XML 文件,該 XML 文件的根元素是 taglib 元素,因此我們每次編寫標簽庫定義文件都直接添加該元素即可。
taglib 下有三個子元素:
- tlib-version:指定該標簽庫實現的版本,這是一個作為標識的內部版本號,對程序沒有太大的作用。
- short-name:該標簽庫的默認短名,該名稱通常也沒有太大的用處。
- uri:這個屬性非常重要,它指定該標簽庫的 URI,相當于指定該標簽庫的唯一標識。如上粗體字代碼所示,JSP 頁面中使用標簽庫時就是根據該 URI 屬性來定位標簽庫的。
除此之外,taglib 元素下可以包含多個 tag 元素,每個 tag 元素定義一個標簽,tag 元素下至少應包含如下三個子元素:
- name:該標簽庫的名稱,這個屬性很重要,JSP 頁面中就是根據該名稱來使用此標簽的。
- tag-class:指定標簽的處理類,毋庸置疑,這個屬性非常重要,指定了標簽由哪個 Java 類來處理。
- body-content:這個屬性也很重要,它指定標簽體內容。該元素的值可以是如下幾個:
- tagdependent:指定標簽處理類自己負責處理標簽體。
- empty:指定該標簽只能作用空標簽使用。
- scriptless:指定該標簽的標簽體可以是靜態 HTML 元素,表達式語言,但不允許出現 JSP 腳本。
- JSP:指定該標簽的標簽體可以使用 JSP 腳本。
實際上由于 JSP 2 規范不再推薦使用 JSP 腳本,所以 JSP 2 自定義標簽的標簽體中不能包含 JSP 腳本。所以實際上 body-content 元素的值不可以是 JSP。
定義了上面的標簽庫定義文件后,將標簽庫文件放在 Web 應用的 WEB-INF 路徑,或任意子路徑下,Java Web 規范會自動加載該文件,則該文件定義的標簽庫也將生效。
在 JSP 頁面中確定指定標簽需要 2 點:
- 標簽庫 URI:確定使用哪個標簽庫。
- 標簽名:確定使用哪個標簽。
使用標簽庫分成以下兩個步驟:
- 導入標簽庫:使用 taglib 編譯指令導入標簽庫,就是將標簽庫和指定前綴關聯起來。
- 使用標簽:在 JSP 頁面中使用自定義標簽。
taglib 的語法格式如下:
<%@ taglib uri="tagliburi" prefix="tagPrefix" %> |
其中 uri 屬性確定標簽庫的 URI,這個 URI 可以確定一個標簽庫。而 prefix 屬性指定標簽庫前綴,即所有使用該前綴的標簽將由此標簽庫處理。
使用標簽的語法格式如下:
<tagPrefix:tagName tagAttribute=”tagValue” … > <tagBody/> </tagPrefix:tagName> |
如果該標簽沒有標簽體,則可以使用如下語法格式:
<tagPrefix:tagName tagAttribute=”tagValue” … /> |
上面使用標簽的語法里都包含了設置屬性值,前面我們介紹的 HelloWorldTag 標簽沒有任何屬性,所以使用該標簽只需用 <mytag:helloWorld/> 即可。其中 mytag 是 taglib 指令為標簽庫指定的前綴,而 helloWorld 是標簽名。
下面是使用 helloWorld 標簽的 JSP 頁面代碼:
<%@ page contentType="text/html; charset=GBK"%> <!-- 導入標簽庫,指定mytag前綴的標簽, 由http://www.crazyit.org/mytaglib的標簽庫處理 --> <%@ taglib uri="http://www.crazyit.org/mytaglib" prefix="mytag"%> <html> <head> <title>自定義標簽示范</title> </head> <body bgcolor="#ffffc0"> <h2>下面顯示的是自定義標簽中的內容</h2> <!-- 使用標簽 ,其中mytag是標簽前綴,根據taglib的編譯指令, mytag前綴將由http://www.crazyit.org/mytaglib的標簽庫處理 --> <mytag:helloWorld/><BR> </body> </html> |
上面頁面中第一行粗體字代碼指定了 http://www.crazyit.org/mytaglib 標簽庫的前綴為 mytag,第二行粗體字代碼表明使用 mytag 前綴對應標簽庫里的 helloWorld 標簽。瀏覽該頁面將看到如圖 1 所示效果:
圖 1. 簡單標簽

前面的簡單標簽既沒有屬性,也沒有標簽體,用法、功能都比較簡單。實際上還有如下兩種常用的標簽:
- 帶屬性的標簽。
- 帶標簽體的標簽。
正如前面介紹的,帶屬性標簽必須為每個屬性提供對應的 setter 和 getter 方法。帶屬性標簽的配置方法與簡單標簽也略有差別,下面介紹一個帶屬性標簽的示例:
public class QueryTag extends SimpleTagSupport
{
    //標簽的屬性
    private String driver;
    private String url;
    private String user;
    private String pass;
    private String sql;
    //執行數據庫訪問的對象
    private Connection conn = null;
    private Statement stmt = null;
    private ResultSet rs = null;
    private ResultSetMetaData rsmd = null;
    //標簽屬性driver的setter方法
    public void setDriver(String driver) {
        this.driver = driver;
    }
        //標簽屬性url的setter方法
    public void setUrl(String url) {
        this.url = url;
    }
        //標簽屬性user的setter方法
    public void setUser(String user) {
        this.user = user;
    }
        //標簽屬性pass的setter方法
    public void setPass(String pass) {
        this.pass = pass;
    }
        //標簽屬性driver的getter方法
    public String getDriver() {
        return (this.driver);
    }
        //標簽屬性url的getter方法
    public String getUrl() {
        return (this.url);
    }
        //標簽屬性user的getter方法
    public String getUser() {
        return (this.user);
    }
        //標簽屬性pass的getter方法
    public String getPass() {
        return (this.pass);
    }
        //標簽屬性sql的getter方法
    public String getSql() {
        return (this.sql);
    }
        //標簽屬性sql的setter方法
    public void setSql(String sql) {
        this.sql = sql;
    }
    public void doTag()throws JspException,
        IOException
    {
           try
        {
            //注冊驅動
            Class.forName(driver);
            //獲取數據庫連接
            conn = DriverManager.getConnection(url,user,pass);
            //創建Statement對象
            stmt = conn.createStatement();
            //執行查詢
            rs = stmt.executeQuery(sql);
            rsmd = rs.getMetaData();
            //獲取列數目
            int columnCount = rsmd.getColumnCount();
            //獲取頁面輸出流
            Writer out = getJspContext().getOut();
            //在頁面輸出表格
            out.write("<table border='1' bgColor='9999cc' width='400'>");
            //遍歷結果集
            while (rs.next())
            {
                out.write("<tr>");
                //逐列輸出查詢到的數據
                for (int i = 1 ; i <= columnCount ; i++ )
                {
                    out.write("<td>");
                    out.write(rs.getString(i));
                    out.write("</td>");
                }
                out.write("</tr>");
            }
        }
        catch(ClassNotFoundException cnfe)
        {
            cnfe.printStackTrace();
            throw new JspException("自定義標簽錯誤" + cnfe.getMessage());
        }
        catch (SQLException ex)
        {
            ex.printStackTrace();
            throw new JspException("自定義標簽錯誤" + ex.getMessage());
        }
        finally
        {
            //關閉結果集
            try
            {
                if (rs != null)
                    rs.close();
                if (stmt != null)
                    stmt.close();
                if (conn != null)
                    conn.close();
            }
            catch (SQLException sqle)
            {
                sqle.printStackTrace();
            }
        }
    }
}
|
上面這個標簽稍微復雜一點,它包含了 5 個屬性,如程序中粗體字代碼所示,則程序需要為這 5 個屬性提供 setter 和 getter 方法。
該標簽輸出的內容依然由 doTag() 方法決定,該方法會根據 SQL 語句查詢數據庫,并將查詢結果顯示在當前頁面中。
對于有屬性的標簽,需要為 tag 元素增加 attribute 子元素,每個 attribute 子元素定義一個屬性,attribue 子元素通常還需要指定如下幾個子元素:
- name:設置屬性名,子元素的值是字符串內容。
- required:設置該屬性是否為不需屬性,該子元素的值是 true 或 false。
- fragment:設置該屬性是否支持 JSP 腳本、表達式等動態內容,子元素的值是 true 或 false。
為了配置上面的 QueryTag 標簽,我們需要在 mytaglib.tld 文件中增加如下配置片段:
<!-- 定義第二個標簽 -->
<tag>
    <!-- 定義標簽名 -->
    <name>query</name>
    <!-- 定義標簽處理類 -->
    <tag-class>lee.QueryTag</tag-class>
    <!-- 定義標簽體為空 -->
    <body-content>empty</body-content>
    <!-- 配置標簽屬性:driver -->
    <attribute>
        <name>driver</name>
        <required>true</required>
        <fragment>true</fragment>
    </attribute>
    <!-- 配置標簽屬性:url -->
    <attribute>
        <name>url</name>
        <required>true</required>
        <fragment>true</fragment>
    </attribute>
    <!-- 配置標簽屬性:user -->
    <attribute>
        <name>user</name>
        <required>true</required>
        <fragment>true</fragment>
    </attribute>
    <!-- 配置標簽屬性:pass -->
    <attribute>
        <name>pass</name>
        <required>true</required>
        <fragment>true</fragment>
    </attribute>
    <!-- 配置標簽屬性:sql -->
    <attribute>
        <name>sql</name>
        <required>true</required>
        <fragment>true</fragment>
    </attribute>
</tag>
|
上面 5 行粗體字代碼分別為該標簽配置了 driver、url、user、pass 和 sql 等 5 個屬性,并指定這 5 個屬性都是必填屬性、而且屬性值支持動態內容。
配置完畢后,就可在頁面中使用標簽,先導入標簽庫,然后使用標簽。使用標簽的 JSP 頁面片段如下:
<!-- 導入標簽庫,指定mytag前綴的標簽,
    由http://www.crazyit.org/mytaglib的標簽庫處理 -->
<%@ taglib uri="http://www.crazyit.org/mytaglib" prefix="mytag"%>
...
<!-- 其他HTML內容 -->
<!-- 使用標簽 ,其中mytag是標簽前綴,根據taglib的編譯指令,
    mytag前綴將由http://www.crazyit.org/mytaglib的標簽庫處理 -->
<mytag:query
    driver="com.mysql.jdbc.Driver"
    url="jdbc:mysql://localhost:3306/javaee"
    user="root"
    pass="32147"
    sql="select * from newsinf"/>
|
在瀏覽器中瀏覽該頁面,效果如圖 2 所示。
圖 2. 使用帶屬性的標簽執行查詢

圖 2 中看到從數據庫里查詢到 2 條記錄,當然這也需要底層 javaee 數據庫里包含 newsinf 數據表,且該數據表里包含這兩條記錄才行。
在 JSP 頁面中只需要使用簡單的標簽,即可完成“復雜”的功能:執行數據庫查詢,并將查詢結果在頁面上以表格形式顯示。這也正是自定義標簽庫的目的——以簡單的標簽,隱藏復雜的邏輯。
當然,并不推薦在標簽處理類中訪問數據庫,因為標簽庫是表現層組件,它不應該包含任何業務邏輯實現代碼,更不應該執行數據庫訪問,它只應該負責顯示邏輯。
帶標簽體的標簽,可以在標簽內嵌入其他內容(包括靜態的 HTML 內容和動態的 JSP 內容),通常用于完成一些邏輯運算,例如判斷和循環等。下面以一個迭代器標簽為示例,介紹帶標簽體標簽的開發過程。
一樣先定義一個標簽處理類,該標簽處理類的代碼如下:
public class IteratorTag extends SimpleTagSupport
{
    //標簽屬性,用于指定需要被迭代的集合
    private String collection;
    //標簽屬性,指定迭代集合元素,為集合元素指定的名稱
    private String item;
    //collection屬性的setter和getter方法
    public void setCollection(String collection)
    {
        this.collection = collection;
    }
    public String getCollection()
    {
        return this.collection;
    }
    //item屬性的setter和getter方法
    public void setItem(String item)
    {
        this.item = item;
    }
    public String getItem()
    {
        return this.item;
    }
    //標簽的處理方法,簡單標簽處理類只需要重寫doTag方法
    public void doTag() throws JspException, IOException
    {
        //從page scope中獲取屬性名為collection的集合
        Collection itemList = (Collection)getJspContext().
            getAttribute(collection);
        //遍歷集合
        for (Object s : itemList)
        {
            //將集合的元素設置到page 范圍
            getJspContext().setAttribute(item, s );
            //輸出標簽體
            getJspBody().invoke(null);
        }
    }
}
|
上面標簽處理類與前面處理類并沒有太大的不同,該處理類包含 2 個屬性,并為這兩個屬性提供了 setter 和 getter 方法。標簽處理類的 doTag 方法首先從 page 范圍內獲取了指定名稱的 Collection 對象,然后遍歷 Collection 對象的元素,每次遍歷都調用了 getJspBody() 方法,如程序中粗體字代碼所示,該方法返回該標簽所包含的標簽體:JspFragment 對象,執行該對象的 invoke() 方法,即可輸出標簽體內容。該標簽的作用是:遍歷指定集合,每遍歷一個集合元素,即輸出標簽體一次。
因為該標簽的標簽體不為空,配置該標簽時指定 body-content 為 scriptless,該標簽的配置代碼片段如下代碼所示:
<!-- 定義第三個標簽 -->
<tag>
    <!-- 定義標簽名 -->
    <name>iterator</name>
    <!-- 定義標簽處理類 -->
    <tag-class>lee.IteratorTag</tag-class>
    <!-- 定義標簽體支持JSP腳本 -->
    <body-content>scriptless</body-content>
    <!-- 配置標簽屬性:collection -->
    <attribute>
        <name>collection</name>
        <required>true</required>
        <fragment>true</fragment>
    </attribute>
    <!-- 配置標簽屬性:item -->
    <attribute>
        <name>item</name>
        <required>true</required>
        <fragment>true</fragment>
    </attribute>
</tag>
|
上面配置片段中粗體字代碼指定該標簽的標簽體可以是靜態 HTML 內容,也可以是表達式語言。
為了測試在 JSP 頁面中使用該標簽的效果,我們首先把一個 List 對象設置成 page 范圍的屬性,然后使用該標簽來迭代輸出 List 集合的全部元素。
JSP 頁面代碼如下:
<%@ page import="java.util.*"%>
<%@ page contentType="text/html; charset=GBK"%>
<!-- 導入標簽庫,指定mytag前綴的標簽,
    由http://www.crazyit.org/mytaglib的標簽庫處理 -->
<%@ taglib uri="http://www.crazyit.org/mytaglib" prefix="mytag"%>
<html>
    <head>
        <title>帶標簽體的標簽-迭代器標簽</title>
    </head>
    <body>
        <h2>帶標簽體的標簽-迭代器標簽</h2>
        <hr>
        <%
        //創建一個List對象
        List<String> a = new ArrayList<String>();
        a.add("hello");
        a.add("world");
        a.add("java");
        //將List對象放入page范圍內
        pageContext.setAttribute("a" , a);
        %>
        <table border="1" bgcolor="aaaadd" width="300">
        <!-- 使用迭代器標簽,對a集合進行迭代 -->
        <mytag:iterator collection="a" item="item">
            <tr>
                <td>${pageScope.item}</td>
            <tr>
        </mytag:iterator>
        </table>
    </body>
</html>
|
上面頁面代碼中粗體字代碼即可實現通過 iterator 標簽來遍歷指定集合,瀏覽該頁面即看到如圖 3 所示界面:
圖 3. 帶標簽體的標簽

圖 3 顯示了使用 iterator 標簽遍歷集合元素的效果,從 iteratorTag.jsp 頁面的代碼來看,使用 iterator 標簽遍歷集合元素比使用 JSP 腳本遍歷集合元素要優雅得多,這就是自定義標簽的魅力。
實際上 JSTL 標簽庫提供了一套功能非常強大標簽,例如普通的輸出標簽,像我們剛剛介紹的迭代器標簽,還有用于分支判斷的標簽等等,JSTL(JSP 標準標簽庫)都有非常完善的實現。除此之外,Apache 下還有一套 DisplayTags 的標簽庫實現,做得也非常不錯。
本文轉自:http://www.ibm.com/developerworks/cn/java/j-lo-jsp2tag/index.html
]]>
然后根據他初始化的信息結合一下博文即可輕松將項目托管到github
]]>
經常需要將一些受到版本控制的文件夾挪作他用,在用版本庫的同學都知道,里面的 .svn 文件夾不僅遍布整個文件夾的各個層級,而且里面東西很多,如果遇到要刪除的情況,手動一一刪除可就累了,小D就經常為了刪這些.svn文件夾而刪到手酸,吃過幾次苦之后決定找出批量刪除的方法… 還好,只要有需求就用解決方法,這就分享給大家吧,說不定哪天就能用上,適用于windows客戶端:
確定要刪除的是下面這樣的文件夾,此方面就適用于此,可別弄錯了:

安裝:建立一個文本文件,隨意起個名字,例如aaa.reg(擴展名由txt改為reg,可以在txt編輯的時候點另存為…類型所有、文件名aaa.reg、保存即可),內容如下:
Windows Registry Editor Version 5.00
[HKEY_LOCAL_MACHINE\SOFTWARE\Classes\Folder\shell\DeleteSVN]
@="Delete SVN Folders"
[HKEY_LOCAL_MACHINE\SOFTWARE\Classes\Folder\shell\DeleteSVN\command]
@="cmd.exe /c \"TITLE Removing SVN Folders in %1 && COLOR 9A && FOR /r \"%1\" %%f IN (.svn) DO RD /s /q \"%%f\" \""
保存之后,雙擊這個reg文件,會提示是否允許添加到注冊表,確定并提示成功后,在每一個文件夾上點擊右鍵都會有一個“Delete SVN Folders”的選項,點擊就可以刪除這個文件夾及子目錄里面所有的.svn文件了,很方便吧;

注:“Delete SVN Folders”可根據自己的喜好修改,將文件中@="Delete SVN Folders"雙引號內的內容修改成其他即可。
卸載:有同學又要問了:我這次用完了,很好!但我不想要了,點右鍵就出來影響美觀怎么辦?
小D考慮到了這點,現在就告訴你怎么刪,剛才是添加到了注冊表,那我們可以直接去注冊表刪:
運行 regedit 進入注冊表->依次打開:HKEY_LOCAL_MACHINE\SOFTWARE\Classes\Folder\shell\->看到DeleteSVN文件夾->刪除就可以了,也很簡單吧,但小D要提醒你,注冊表不要隨便改動,最好備份一下啊。

OK,分享完畢,感謝收聽。
本人轉自http://www.didiao.net/?p=455
]]>
]]>
二、Tomcat 6.0 配置多個端口,其實也就是給Tomcat增加幾個server,并設置對應目錄。下面以增加兩個端口號為例
第一步、修改server.xml[..\Tomcat 6.0\conf]
(1)Tomcat提供的如下:
<Connector port="8090" maxHttpHeaderSize="8192"
maxThreads="150" minSpareThreads="25" maxSpareThreads="75"
enableLookups="false" redirectPort="8443" acceptCount="100"
connectionTimeout="20000" disableUploadTimeout="true" />
<Connector port="8009"
enableLookups="false" redirectPort="8443" protocol="AJP/1.3" />
<Engine name="Catalina" defaultHost="localhost">
<Realm className="org.apache.catalina.realm.UserDatabaseRealm"
resourceName="UserDatabase"/>
<Host name="localhost" appBase="webapps"
unpackWARs="true" autoDeploy="true"
xmlValidation="false" xmlNamespaceAware="false">
</Host>
</Engine>
</Service>
(2)比著上面的葫蘆畫下面的瓢、新增兩個端口號,注意Service name、Engine name、appBase,當然了,端口號別忘了修改,以免重復。
<Connector port="8091" maxHttpHeaderSize="8192"
maxThreads="150" minSpareThreads="25" maxSpareThreads="75"
enableLookups="false" redirectPort="8443" acceptCount="100"
connectionTimeout="20000" disableUploadTimeout="true" />
<Connector port="8009"
enableLookups="false" redirectPort="8443" protocol="AJP/1.3" />
<Engine name="Catalina1" defaultHost="localhost">
<Realm className="org.apache.catalina.realm.UserDatabaseRealm"
resourceName="UserDatabase"/>
<Host name="localhost" appBase="webapps1"
unpackWARs="true" autoDeploy="true"
xmlValidation="false" xmlNamespaceAware="false">
</Host>
</Engine>
</Service>
<Connector port="8092" maxHttpHeaderSize="8192"
maxThreads="150" minSpareThreads="25" maxSpareThreads="75"
enableLookups="false" redirectPort="8443" acceptCount="100"
connectionTimeout="20000" disableUploadTimeout="true" />
<Connector port="8009"
enableLookups="false" redirectPort="8443" protocol="AJP/1.3" />
<Engine name="Catalina2" defaultHost="localhost">
<Realm className="org.apache.catalina.realm.UserDatabaseRealm"
resourceName="UserDatabase"/>
<Host name="localhost" appBase="webapps2"<!-- 這個地方很重要,我今天沒修改這個,導致webapps下的幾個應用都可以用多個端口訪問,結果只好將默認的webapps下的應用拷到其他地方,在${tomcat_home}/conf/下創建Catalina2/localhost/,并創建不同的xml文件將docBase指向應用所在的路徑-->
unpackWARs="true" autoDeploy="true"
xmlValidation="false" xmlNamespaceAware="false">
</Host>
</Engine>
</Service>
第二步、創建相應的部署目錄
..\Tomcat 6.0\webapps1
..\Tomcat 6.0\webapps2
同時可以將Tomcat 6.0\webapps下的有用的復制到新建的部署目錄
第三步、創建配置文件目錄和配置文件
..\Tomcat 6.0\conf\Catalina1\localhost
..\Tomcat 6.0\conf\Catalina2\localhost
host-manager.xml
manager.xml
配置文件的配置可參照..\Tomcat 6.0\conf\Catalina\localhost下的,只需要修改一下對應目錄即可
大概的配置步驟就是這些,現在可以把不同的war包放在不同的位置來訪問了
以上配置方法同樣適合Tomcat 5.5
]]>
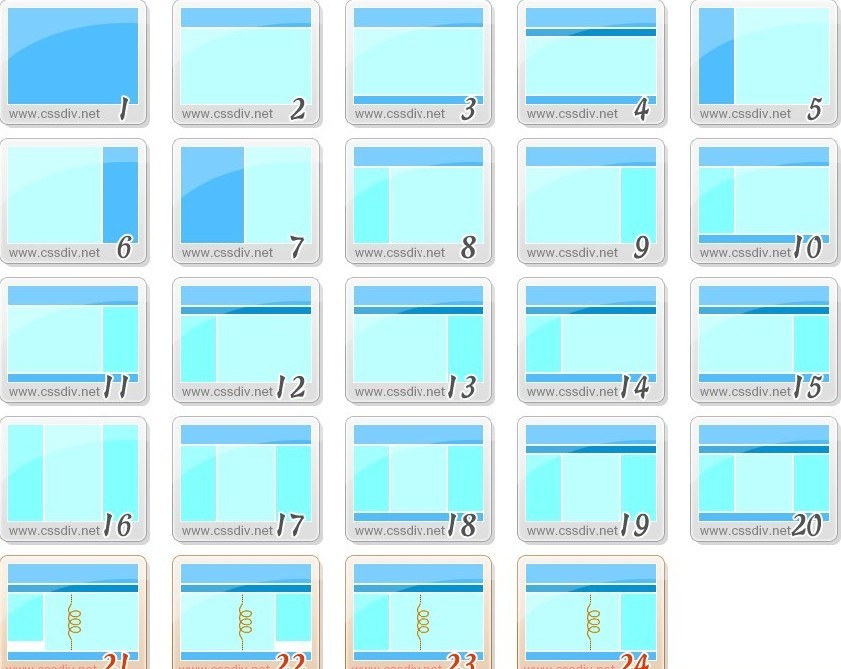
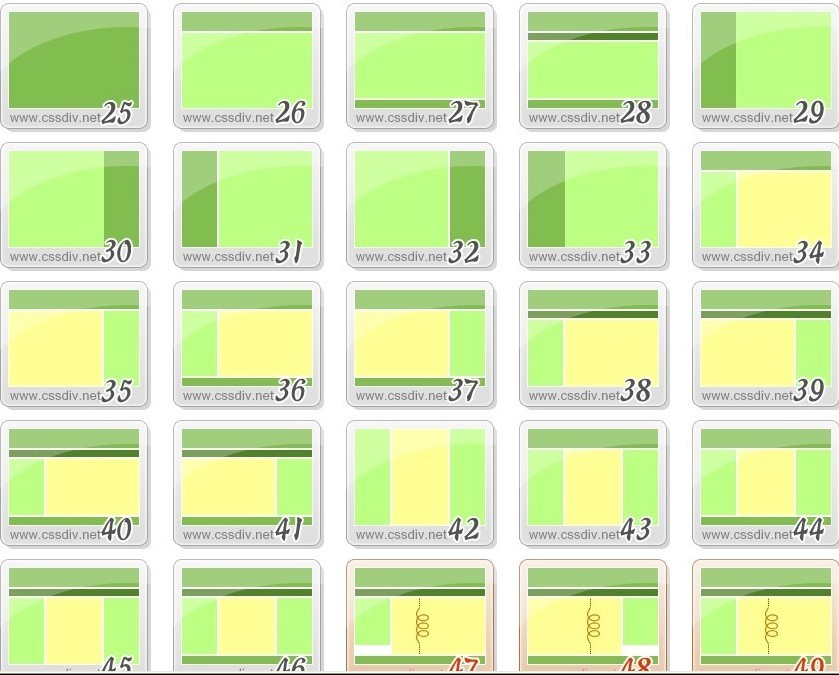
速查表是幫你記住東西的有效工具。Web設計師和開發者經常使用的快捷鍵簡表會使他們在網上的工作效率大大提高。
事實上,速查表就是來幫助我們把日常中最常用到的信息聚集起來,方便使用,使我們做工作時更有效率。有了它們,免去了你的大腦花額外時間去記憶它們的煩惱——你只需要打開簡表,馬上能查到你想要的信息。
這篇文章里,你可以看到最實用的HTML,CSS,JavaScript速查表,它們可以當作參考資料,備忘錄,能幫助你以最快的速度找到想要的信息。
看看這些簡表是不是你想要的,請在文章下面留下你的建議,謝謝!
HTML
HTML幫助手冊

HTML速查手冊

HTML特殊字符速查表

Dreamweaver
Dreamweaver快速參考指導

CSS
CSS 3 速查表

Blueprint CSS

YUI Grid CSS

CSS 速記簡表

CSS速查表(V2)

CSS速記表

CSS2參考指導(V2)

實用CSS速查表

Javascript
jQuery 1.4.2 直觀速查表

JavaScript 速查表

JavaScript參考單

JavaScript真經

常用DOM方法

JavaScript快速參考單

Mootools 1.2速查表

jQuery速查表

Prototype速查表

希望你能喜歡我收集到的這些速查表,并請分享給你的做開發工作的朋友們。
[英文出處]:Most Useful Cheat Sheet For HTML, CSS and Javascript
]]>
spring2.5.6
去jboss官方下載jboss服務器,http://www.jboss.org/jbossas/downloads/。建議下載jboss-4.2.3.GA這個版本的jboss,個人感覺還是這個版本的jboss比較穩定
解壓下載下來的jboss壓縮文件,筆者解壓到D:\jboss-4.2.3.GA
筆者以oracle數據庫來說明如何在jboss下配置jndi 以及整合spring
拷貝oracle-ds文件
去D:\jboss-4.2.3.GA\docs\examples\jca目錄下拷貝oracle-ds文件到D:\jboss-4.2.3.GA\server\default\deploy目錄下改名即可
大致內容如下:
<datasources>
<local-tx-datasource>
<jndi-name>KBSDS</jndi-name>
<connection-url>jdbc:oracle:thin:@192.168.4.243:1521:future</connection-url>
<driver-class>oracle.jdbc.driver.OracleDriver</driver-class>
<use-java-context>false</use-java-context>
<user-name>knowledge</user-name>
<password>knowledge</password>
<min-pool-size>5</min-pool-size>
<max-pool-size>20</max-pool-size>
<exception-sorter-class-name>org.jboss.resource.adapter.jdbc.vendor.OracleExceptionSorter</exception-sorter-class-name>
<metadata>
<type-mapping>Oracle9i</type-mapping>
</metadata>
</local-tx-datasource>
</datasources>
其他幾個屬性不做過多解釋
use-java-context:屬性默認為true,如未配置該屬性或該屬性配置為true,那么jboss在啟動的時候jndi的名稱前會加上java: 這里我們jndi的名稱為KBSDS,那么未配置該屬性或該屬性為true的話,你在spring中使用jndi時指定的jndiName就應該為java:KBSDS,若配置為false,那么jboss服務器不會為你加上java: 你在spring中jndiName應當配置為KBSDS,即與jndi-name屬性值等同。這里為了方便期間設置該屬性為false
拷貝oracle驅動
拷貝oracle驅動 class12.jar到jboss的如下目錄
D:\jboss-4.2.3.GA\lib
D:\jboss-4.2.3.GA\server\default\lib
切記數據庫驅動拷貝到D:\jboss-4.2.3.GA\server\default\lib目錄下,否則即使你jndi配置的再怎么正確都會報如下錯誤,該錯誤在jboss啟動的時候并不會報出,只有在正式遇數據庫進行交互的時候才會報此錯誤,大概錯誤是這樣的。此處花了好長時間才解決。
org.springframework.jdbc.datasource.DataSourceTransactionManager.doBegin(DataSourceTransactionManager.java:238)
org.springframework.transaction.support.AbstractPlatformTransactionManager.getTransaction(AbstractPlatformTransactionManager.java:374)
org.springframework.transaction.interceptor.TransactionAspectSupport.createTransactionIfNecessary(TransactionAspectSupport.java:263)
org.springframework.transaction.interceptor.TransactionInterceptor.invoke(TransactionInterceptor.java:101)
org.springframework.aop.framework.ReflectiveMethodInvocation.proceed(ReflectiveMethodInvocation.java:171)
org.springframework.aop.interceptor.ExposeInvocationInterceptor.invoke(ExposeInvocationInterceptor.java:89)
org.springframework.aop.framework.ReflectiveMethodInvocation.proceed(ReflectiveMethodInvocation.java:171)
org.springframework.aop.framework.JdkDynamicAopProxy.invoke(JdkDynamicAopProxy.java:204)
$Proxy67.managerLogin(Unknown Source)
com.future.knowledges.action.ManagerAction.execute(ManagerAction.java:62)
sun.reflect.NativeMethodAccessorImpl.invoke0(Native Method)
sun.reflect.NativeMethodAccessorImpl.invoke(NativeMethodAccessorImpl.java:39)
sun.reflect.DelegatingMethodAccessorImpl.invoke(DelegatingMethodAccessorImpl.java:25)
在applicationContext.xml中配置如下信息:
<property name="jndiName">
<value>KBSDS</value>
</property>
</bean>
<property name="jndiName">
<value>java:KBSDS</value>
</property>
</bean>
其實這里的配置主要是根據jboss服務器啟動時控制臺給出的信息來配置的
設置use-java-context為false時控制臺給出的jndi信息
11:13:34,359 INFO [WrapperDataSourceService] Bound ConnectionManager 'jboss.jca:service=DataSourceBinding,name=KBSDS' to JNDI name 'KBSDS'
11:13:34,406 INFO [TomcatDeployer] deploy, ctxPath=/KBS, warUrl=
 /deploy/KBS.war/
11:13:34,781 INFO [[/KBS]] Initializing Spring root WebApplicationContext
11:25:15,984 INFO [ConnectionFactoryBindingService] Bound ConnectionManager 'jboss.jca:service=DataSourceBinding,name=KBSDS' to JNDI name 'java:KBSDS'
11:25:16,031 INFO [TomcatDeployer] deploy, ctxPath=/KBS, warUrl=
/deploy/KBS.war/注意對比兩次控制臺分別打印的信息,從中很容易發現,其實就是use-java-context屬性的作用。關于該屬性,大家可以去參看jboss的官方文檔。這里就不細說了。
到此jboss下配置jndi 以及整合spring已經成功配置起來了,接下來就是一些細化了,大家可以去查詢jboss的關于jndi配置的文檔。
其實在jboss下配置jndi遠遠比在tomcat下配置jndi簡單的多。
總結下來就這幾步
拷貝jndi模板到server\default\deploy目錄下,并做修改,這里面模板文件均是以數據庫類型-ds.xml命名的。
拷貝數據庫驅動到\server\default\lib目錄和jboss安裝目錄\lib下即可。
]]>
jdk1.6
最近由于項目需求,開始學習OSGI,手頭參考資料則為林昊老師的OSGI原理與最佳實踐這本書。該書由于發行較早,使用3.6版本的eclipse會遇到各種錯誤。其中在采用Declarative Service 的方式來實現的時候按作者書上的步驟來則會報這么一個錯誤。和同事探討了一下午的時間,原來是缺少一個jar。
先看下異常信息:
at org.eclipse.osgi.framework.internal.core.AbstractBundle.getResolverError(AbstractBundle.java:1317)
at org.eclipse.osgi.framework.internal.core.AbstractBundle.getResolutionFailureException(AbstractBundle.java:1301)
at org.eclipse.osgi.framework.internal.core.BundleHost.startWorker(BundleHost.java:319)
at org.eclipse.osgi.framework.internal.core.AbstractBundle.resume(AbstractBundle.java:374)
at org.eclipse.osgi.framework.internal.core.Framework.resumeBundle(Framework.java:1067)
at org.eclipse.osgi.framework.internal.core.StartLevelManager.resumeBundles(StartLevelManager.java:561)
at org.eclipse.osgi.framework.internal.core.StartLevelManager.resumeBundles(StartLevelManager.java:546)
at org.eclipse.osgi.framework.internal.core.StartLevelManager.incFWSL(StartLevelManager.java:459)
at org.eclipse.osgi.framework.internal.core.StartLevelManager.doSetStartLevel(StartLevelManager.java:243)
at org.eclipse.osgi.framework.internal.core.StartLevelManager.dispatchEvent(StartLevelManager.java:440)
at org.eclipse.osgi.framework.eventmgr.EventManager.dispatchEvent(EventManager.java:227)
at org.eclipse.osgi.framework.eventmgr.EventManager$EventThread.run(EventManager.java:337)
!ENTRY org.eclipse.osgi 4 0 2010-09-07 08:35:43.000
!MESSAGE Bundle reference:file:/D:/eclipse/plugins/org.eclipse.equinox.ds_1.2.0.v20100507.jar was not resolved.
在eclipse的run configurations選項卡中勾選org.eclipse.equinox.util_1.0.200.v20100503.jar包即可,org.eclipse.equinox.util為固定部分,后者隨著eclipse版本的更新會有所變化。
最后完整的bundle應該是這樣的:
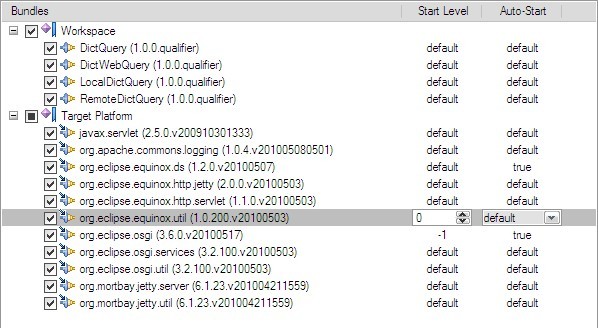
]]>
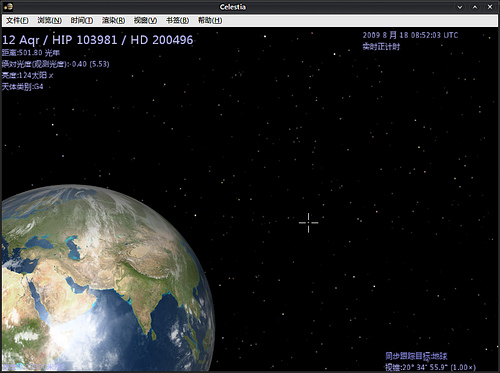
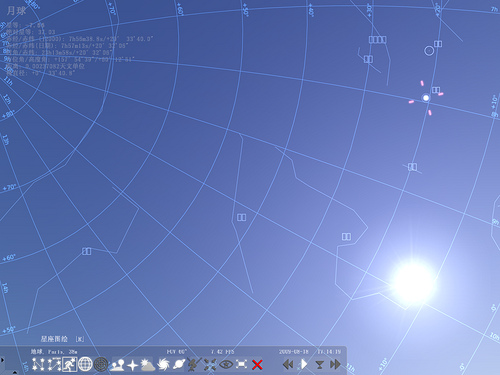
Celestia 是一款免費開放源代碼軟件。國內有軟件介紹把它稱作「宇宙穿梭機」或是「鳥瞰地球」,這都名副其實。Celestia 會通過檢測操作系統語言自動切換軟件語言,對中文支持良好。
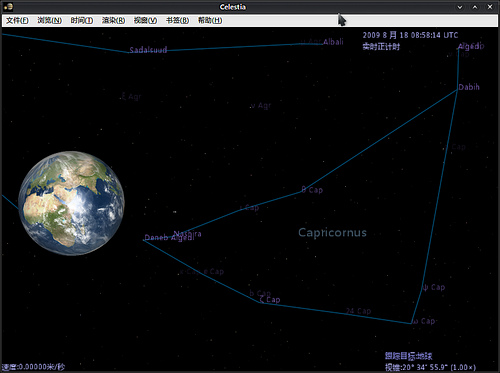
用十字指針指向一個星球,在 Celestia 左上角即顯示星球的信息。也可以像下圖一樣選擇顯示星座,就是在現實看見的同樣的星座,沒有連線,觀賞感受也是不同的。Celestia 的功能多以關鍵字執行,剛上手也許會感覺不知所措,一時了解不到其中的趣味,只要認識了 Celestia 的基本操作,就能發覺把玩 Celestia 是一件多么有趣的事。
同樣作為新手,波斯推薦一定要看 Celestia 的內置演示,就在幫助菜單可以找到。演示有字幕介紹星球的著名點,帶你用 Celestia 遨游太陽系,從地球到月球,再去逛土星……就像一個無影的導游在帶你進行太空旅行。剛打開 Celestia,我覺得它超悶,但是看了演示后,探索 Celestia 的熱情就被激發起來了。
Celestia 還能通過插件增強功能,不過目前插件還只有 1 個。(笑)
下載地址:http://www.shatters.net/celestia/download.html | 自用版本分流 | 35M。
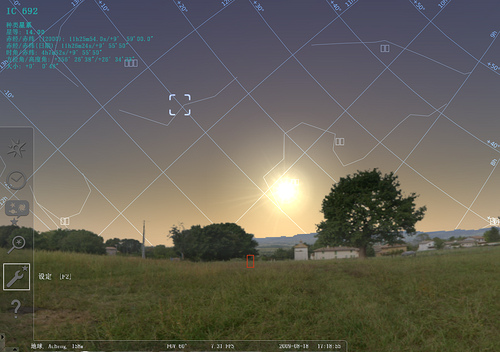
2. Stellarium – 從地球看星際
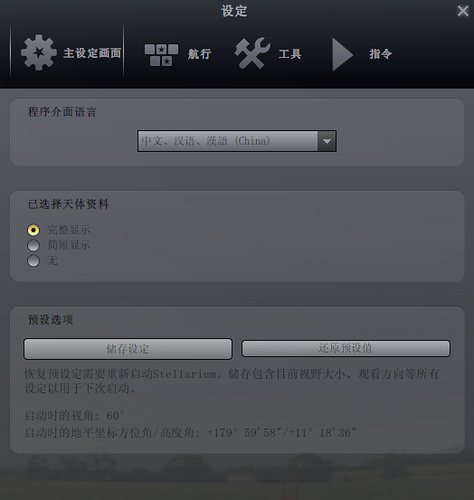
Stellarium 非常強悍地內置了非常多國語言,光是中文就有 3 種(為什么有 3 種?)。從設置上來說,可控制的比 Celestia 更多,當然在用途上也有所出入。最不同的是,Stellarium 給你一種從自家陽臺抬頭望天的觀賞感受,而這點 Celestia 是做不到的。Stellarium 也是免費開放源代碼軟件。
Stellarium 同樣能點擊星球顯示信息,顯示信息比 Celestia 的全面。在星座顯示上,還能顯示形象配圖。所見區域也能選擇地域而定,不過預設的中國區域太少了,找來找去才只有一個 Acheng, China。
用戶可以通過拖拽天空看到頭頂上的星際。默認是實時顯示,所以波斯的截圖就不是夜間版了,夜間版比較有說服力的說。背景的圖,就是下圖可見的樹木房屋之類都是可換的。
不過 Stellarium 貌似對字體有要求,也許是波斯換了語言后沒有設置好,如圖所見的本來應該顯示星球名稱的地方都變成了小方塊。不過跟 GDI++ 字體渲染沒有沖突。
Stellarium 在官方主頁有新手教學,比 Celestia 重視新人用戶培養呢。
下載地址:http://www.stellarium.org/zh/ | Windows 版本約 41M。
希望你也能從這兩款軟件找到你久違的星空吧!離題地說一句,大家要愛護環境,保護地球噢!
]]>
demo下載:點我下載
截圖:
]]>
mysql-5.0.22-win32
php-5.2.14-Win32
httpd-2.2.16-win32-x86-openssl-0.9.8o
WindowsXP sp3
眾說周知php好用,但環境很麻煩。雖然網上有一大堆php集成好的環境。但真正使用起來還不是很好使。這里本人花了一兩個小時,親自實踐搭建了php的環境。以防遺忘,特做成文檔。在此分享出來。之所以做成文檔,一方面,在搭建過程抓去了大量的圖片,而在blog上傳圖片,確實是一件體力活,再者,近來本人發現blog剽竊很是猖狂。別人辛辛苦苦,寫好久,他一個Ctrl+C,Ctrl+V就出自他筆了。很不尊重別人的勞動成果。只是希望在轉載的時候注明原作者及出處。
相信此文檔可以算是有史以來最為詳細的關于php環境搭建的教程了,每一個操作步驟,都有圖為證。文檔達到34頁,照著步驟一步一步來,保你順利搭建php環境。不信你來瞧瞧。
點我下載word文檔
點我下載pdf文檔
]]>
Email:sxyx2008@163.com
]]>