深圳下了一周的雨,天陰沉陰沉的,好想曬曬陽光,心情快被發(fā)霉了。這周運(yùn)氣很好,bugzilla和TestLink安裝很順利,mysql數(shù)據(jù)庫的備份和恢復(fù)、bugzilla和testlink升級順利。
在這好心情的日子里,讓實(shí)習(xí)生把做測試時(shí),經(jīng)常要用sql命令進(jìn)行一些數(shù)據(jù)檢查測試的都集中整理放上來,那天要用直接上來看就行了,分享給大家,特別是剛做測試的新手。
一、mysql數(shù)據(jù)庫日常操作。
1.啟動mysql:/etc/init.d/mysql start (前面為mysql的安裝路徑)
2.重啟mysql: /etc/init.d/mysql restart (前面為mysql的安裝路徑)
3.關(guān)閉mysql: /etc/init.d/mysql stop(前面為mysql的安裝路徑)
4.連接本機(jī)上的mysql:
mysql -u 用戶名 –p (按回車,再輸入密碼)
例:mysql –u root –p
5.退出mysql:exit
6.修改mysql密碼:
(1)mysqladmin -u用戶名 -p舊密碼 password 新密碼
例:mysqladmin –u root –p 123456 password 654321
(2)進(jìn)入mysql命令行SET PASSWORD FOR 用戶名@主機(jī)=PASSWORD("root");
例:set password for root@localhost=password(“123456”);
(3)修改自己的密碼:
set password=password(“123456”);
7.增加新用戶:
grant 操作 on 數(shù)據(jù)庫.* to 用戶名@登錄主機(jī) identified by "密碼"
例:grant select on yingyu to qiu@localhost indentify by “123456”;
8.建庫:
create database 庫名;
例:create database yingyu;
9.顯示數(shù)據(jù)庫列表: show databases;
10.打開數(shù)據(jù)庫:
use 數(shù)據(jù)庫;
例:use yingyu;
11.刪庫:
drop database 庫名;
例:drop database yingyu;
12.顯示庫中的數(shù)據(jù)表:
show tables;
13.顯示數(shù)據(jù)表的結(jié)構(gòu):
describe 表名;
例:describe student;
14.編碼的修改:
(1)改變整個(gè)mysql的編碼格式:
啟動mysql的時(shí)候,mysqld_safe命令行加入
--default-character-set=編碼格式
例:--default-character-set=UTF-8
(2)改變某個(gè)庫的編碼格式:
在mysql提示符后輸入命令:
alter database 數(shù)據(jù)庫 default character set 編碼格式;
例:alter database student default character set UTF-8;
二、sql常用命令
1.建表:
create table 表名(字段設(shè)定列表);
例:create table student
(stuid char(10) primary key,
name char(20),
grade int(3),
age int(3)
);
2.刪表:
drop table 表名;
例:drop table student;
3.將表中記錄清空:
delete from 表名;
例:delete from student;
4.顯示表中的記錄:
select * from 表名;
例:select * from student;
5.給表改名:
rename table 舊表名 to 新表名;
例:rename table student to people;
6.修改字段屬性:
(1)alter table 表名 change 字段名稱 字段名稱 字段類型 [是否允許非空];
例:alter table student change name newname char(20) null;
(2)alter table 表名稱 modify 字段名稱 字段類型 [是否允許非空];
例:alter table student modify name char(20) null;
7.修改表設(shè)置默認(rèn)字段:
(1)alter table 表名 modify 字段名稱 字段類型 default 默認(rèn)值;
例:alter table student modify name char(10) defalt 7;
(2)alter table 表名 alter 字段名稱 set default value;
例:alter table student alter name set default 7;
8.增加表的一個(gè)字段:
alter table 表名 add column 字段名稱 字段類型 (default 默認(rèn)值);
例:alter table student add column sex char(10) (default 1);
9.刪除表的一個(gè)字段
alter table 表名 drop column 字段名稱;
例:alter table student drop column name;
10.刪除表主鍵
alter table 表名 drop primary key;
例:alter table student drop primary key;
11.添加新主鍵:
alter table 表名 add primary key(字段);
例:alter table student add primary key(stuid);
12.往表里插入一行數(shù)據(jù):
insert into 表名 values(字段數(shù)據(jù)1,字段數(shù)據(jù)2,•••)
例:insert into student values(‘123’,‘qqqq’,‘80’);
13.往表里插入多行數(shù)據(jù):
insert into 表名 values(字段數(shù)據(jù)1,字段數(shù)據(jù)2,•••) ,(字段數(shù)據(jù)1,字段數(shù)據(jù)2,•••),•••;
例:insert into student values(‘123’,‘qqqq’,‘80’),(‘124’,‘yyyy’,‘90’);
14. 修改表的數(shù)據(jù):
update 表名 set 字段名=value where 范圍
例:update student set name=‘qqq1111’ where stuid=‘123’;
15.模糊查詢
select * from 表名 where 字段 like ’%value1%’;
例:select * from student where name like ‘q%’;
16.排序查詢:
select * from 表名 order by 字段名1,字段名2 [desc]
例:selec * from student order by grade;(升序)
select * from student order by grade desc;(降序)
17.左連接查詢:
select 表1.字段1,表1.字段2,表2.字段1,表2.字段2 from 表1 left (outer) join 表2 on 表1.字段=表2.字段;
例:select student.num,student.name,people.name,people.age from student left (outer) join people on student.name=people.name;
18.右連接查詢:
select 表1.字段1,表1.字段2,表2.字段1,表2.字段2 from 表1 right (outer) join 表2 on 表1.字段=表2.字段;
例:select student.num,student.name,people.name,people.age from student right (outer) join people on student.name=people.name;
19.全連接查詢(mySql不支持全連接,所以用左連接union右連接)
select 表1.*,表2.* from 表1 left (outer) join 表2 on 表1.字段=表2.字段 union select表1.*,表2.* from 表1 right (outer) join 表2 on 表1.字段=表2.字段;
例:select s.*,p.* from student s left join people p on s.name = p.name union select s.*,p.* from student s right join people p on s.name = p.name;
20.關(guān)于年份的查詢
例:查詢在1990-1993年之間出生的學(xué)生的全部信息
select * from student where year(Sbirthday)between 1990 and 1993;
查詢在1990年12月5日之前出生的學(xué)生的全部信息
select * from student where birthday < date(‘1990-12-05’);
三、備份與還原
1.備份數(shù)據(jù)庫:
mysqldump –u 用戶名 –p 數(shù)據(jù)庫名 > 保存路徑+文件名;
例:mysqldump –u root –p yingyu > /home/yingyu/yingyu.sql;
2.還原數(shù)據(jù)庫:
mysql –u 用戶名 –p 數(shù)據(jù)庫名 < 文件路徑+文件名;
例:mysql –u root –p yingyu < /home/yingyu/yingyu.sql;
3.直接將MySQL數(shù)據(jù)庫壓縮備份
mysqldump –u 用戶名 –p 數(shù)據(jù)庫名 | gzip > 保存路徑+文件名
例:mysqldump –u root –p yingyu | gzip > /home/yingyu/yingyu.sql.gz;
4.還原壓縮的Mysql數(shù)據(jù)庫
gunzip < 文件路徑+文件名 | mysql –u 用戶名 –p 數(shù)據(jù)庫名
例:gunzip < /home/yingyu/yingyu.sql.gz | mysql –u root –p yingyu;
5.備份數(shù)據(jù)庫中的某些表:
mysqldump –u 用戶名 –p 數(shù)據(jù)庫名 表名1 表名2 > 保存路徑+文件名
例:mysqldump –u root –p yingyu student > /home/yingyu/yingyu.sql;
6.備份數(shù)據(jù)庫中的某些數(shù)據(jù)庫:
mysqldump –u 用戶名 –p –B 庫1 庫2 > 保存路徑+文件名
例:mysqldump –u root –p –B yingyu1 yingyu2>/home/yingyu/yingyu.sql;
7.還原數(shù)據(jù)庫中的某些數(shù)據(jù)庫:
mysqldump –u 用戶名 –p –D 庫1 庫2 < 文件路徑 + 文件名;
例:mysqldump–u root –p–D qiuyingyu yingyu</home/yingyu/yingyu.sql;
8.還原數(shù)據(jù)庫中的某些表:
mysql –u 用戶名 –p 數(shù)據(jù)庫名 < 保存路徑+表文件名
例:mysql –u root –p yingyu < /home/yingyu/yingyu.sql;
]]>
一、 備份Bugzilla 4.0.1數(shù)據(jù)庫
使用如下命令備份Bugzilla 4.0.1的mysql數(shù)據(jù)庫
# mysqldump -u root -p bugs | gzip > /tmp/llj/bugzilla_20121206.sql.gz
bugs是數(shù)據(jù)庫名字
/tmp/llj/bugzilla_20121206.sql.gz 是備份存儲的路徑
二、 導(dǎo)入Bugzilla 4.0.1數(shù)據(jù)庫
創(chuàng)建新的數(shù)據(jù)庫用于導(dǎo)入備份的數(shù)據(jù)庫,命令如下:
# mysql –u root –p
輸入密碼后進(jìn)入mysql操作界面
輸入:create database bugzilla_new
使用如下命令導(dǎo)入備份的Bugzilla 4.0.1的mysql數(shù)據(jù)庫,從新命名數(shù)據(jù)庫名
# gunzip < bugzilla_20121206.sql.gz | mysql –u root –p bugzilla_new
三、 安裝Bugzilla 4.2.3程序包
安裝步驟具體見:http://www.tkk7.com/lijun_li/archive/2012/11/29/392220.html
四、 更新導(dǎo)入的Bugzilla 4.2.3數(shù)據(jù)庫表結(jié)構(gòu)
創(chuàng)建bugzilla_new數(shù)據(jù)庫用戶
# mysql –u root –p
# use bugzilla_new
grant select,insert,update,delete,index,alter,create,lock tables,drop,references on bugzilla_new.* to
bugs@localhost identified by '123456';
flush privileges;
修改bugzilla配置
#cd /data/apache2/htdocs/bugzilla
#vi localconfig
根據(jù)數(shù)據(jù)庫的實(shí)際情況修改如下參數(shù):
$db_name = 'bugzilla_new';
$db_user = 'bugs';
$db_pass = '123456';
$db_port = 3306;
$db_sock = '/var/lib/mysql/mysqld.sock';
$index_html = 1;
更新bugzilla_new數(shù)據(jù)庫表
進(jìn)入新安裝的bugzilla 4.2.3文件目錄
#cd /data/apache2/htdocs/bugzilla
#./checksetup.pl
自動更新bugzilla_new數(shù)據(jù)庫表內(nèi)容
在瀏覽器訪問新版本bugzilla,使用之前的老用戶賬戶登錄,能成功登錄進(jìn)去并看到之前的bug組件和內(nèi)容,恭喜你成功了。^_^。
到這里,更新完畢,轉(zhuǎn)帖的同行記得要寫上此貼出處。
]]>
一、 備份TestLink 1.8.4數(shù)據(jù)庫
使用如下命令備份TestLink 1.8.4的mysql數(shù)據(jù)庫
# mysqldump -u root -p testlink | gzip > /tmp/llj/testlink_20121205.sql.gz
Testlink是數(shù)據(jù)庫名字
/tmp/llj/testlink_20121205.sql.gz 是備份存儲的路徑
二、 導(dǎo)入TestLink 1.8.4數(shù)據(jù)庫
創(chuàng)建新的數(shù)據(jù)庫用于導(dǎo)入備份的數(shù)據(jù)庫,命令如下:
# mysql –u root –p
輸入密碼后進(jìn)入mysql操作界面
輸入:create database testlink_new
使用如下命令導(dǎo)入備份的TestLink 1.8.4的mysql數(shù)據(jù)庫,從新命名數(shù)據(jù)庫名
# Gunzip < testlink_20121205.sql.gz | mysql –u root –p testlink_new
三、 安裝TestLink 1.9.4程序包
安裝步驟具體見:http://www.tkk7.com/lijun_li/archive/2012/11/29/392224.html
四、 更新導(dǎo)入的Testlink1.8.4數(shù)據(jù)庫表結(jié)構(gòu)
記錄testlink的數(shù)據(jù)庫更新sql文件存放地方進(jìn)行數(shù)據(jù)庫表升級
# cd /data/apache2/htdocs/Testlink/install/sql/alter_tables/
# ll
會顯示Testlink各版本的更新數(shù)據(jù)庫sql文件,從1.9依次升級到1.9.4
進(jìn)入mysql執(zhí)行如下命令
# mysql –u root –p
# use testlink_new
# source /data/apache2/htdocs/Testlink/install/sql/alter_tables/1.9/mysql/DB.1.3/step1/db_schema_update.sql
# source /data/apache2/htdocs/Testlink/install/sql/alter_tables/1.9/mysql/DB.1.3/stepZ/z_final_step.sql
# source /data/apache2/htdocs/Testlink/install/sql/alter_tables/1.9.1/mysql/DB.1.4/step1/db_schema_update.sql
# source /data/apache2/htdocs/Testlink/install/sql/alter_tables/1.9.1/mysql/DB.1.4/stepZ/z_final_step.sql
# source /data/apache2/htdocs/Testlink/install/sql/alter_tables/1.9.4/mysql/DB.1.5/step1/db_schema_update.sql
# source /data/apache2/htdocs/Testlink/install/sql/alter_tables/1.9.4/mysql/DB.1.5/stepZ/z_final_step.sql
# commit;
五、 更新TestLink1.9.4配置文件
進(jìn)入新安裝的TestLink1.9.4數(shù)據(jù)庫配置文件,更新鏈接的數(shù)據(jù)庫鏈接到testlink_new.
# cd /data/apache2/htdocs/Testlink
# vi config_db.inc.php
修改’DB_NAME’ 的值為:testlink_new
保存后在瀏覽器訪問testlink,使用之前的老用戶賬戶登錄,能成功登錄進(jìn)去并看到之前的測試用例和測試計(jì)劃,恭喜你成功了。^_^。
六、 更新缺失的數(shù)據(jù)庫表
對比備份的TestLink 1.8.4和新安裝的TestLink 1.9.4數(shù)據(jù)庫表,發(fā)現(xiàn)還需要做如下操作。
需要在testlink_new增加如下表:
last_executions
last_executions_by_platform
tcversions_last_active_bare_bones
需要在testlink_new刪除如下表:
text_templates
具體操作如下:
# mysql –u root –p
# use testlink_new
# drop table text_templates;
# create table Last_executions
(tcversion_id int(10) unsigned NOT NULL Default 0,
testplan_id int(10) unsigned NOT NULL Default 0,
platform_id int(10) unsigned NOT NULL Default 0,
Build_id int(10) NOT NULL Default 0,
id int(10) unsigned default NULL );
# create table Last_executions_by_platform
(tcversion_id int(10) unsigned NOT NULL Default 0,
testplan_id int(10) unsigned NOT NULL Default 0,
platform_id int(10) unsigned NOT NULL Default 0,
id int(10) unsigned default NULL );
# create table Tcversions_last_active_bare_bones
(tcase_id int(10) unsigned default NULL,tcversion_id int(10) unsigned default NULL);
到這里,更新完畢,轉(zhuǎn)帖的同行記得要寫上此貼出處。^_^。
]]>
參考資料:http://www.btschina.com/home/index.php/the-bugzilla-install-and-configure.html
http://www.ishow.me/2012/09/11/929.html
Buzilla 4.2.3郵箱配置
Bugzilla自帶有SMTP服務(wù),只需開啟和設(shè)置就可以使用,不需要sendmail支持。配置方法如下:
1.修改bugzilla的params文件內(nèi)容
進(jìn)入Bugzilla安裝目錄
# cd /data/apache2/htdocs/bugzilla
修改params文件
# vi params
配置其中的
maintainer : test@test.com
mail_delivery_method : SMTP
mailfrom : test@test.com
smtpserver : smtp.test.com
smtp_username: test@test.com
smtp_password : **********
注意:maintainer、mailfrom必須相同!smtp_username郵箱必須是存在的真實(shí)的郵箱,smtp_password是郵箱的密碼(要與你所登陸郵箱時(shí)的密碼相同)!
2.登錄bugzilla進(jìn)行params參數(shù)核對
訪問:http://localhost/bugzilla/
用管理員賬戶和密碼登錄
登錄后選擇“Administartor”-》“Parameters”-》“Email”
查看并核對各參數(shù)是否正確。
3.錄入一個(gè)新bug,到郵箱查看新接收到的bug郵件,如能收到就恭喜你,OK啦。^_^。
TestLink 1.9.4 郵箱配置
進(jìn)入TestLink安裝目錄文件,修改config.inc.php配置文件內(nèi)容
# cd /data/apache2/htdocs/TestLink
# vi config.inc.php
$g_smtp_host = ‘[smtp.testlink.com]‘;修改為
$g_smtp_host = ‘公司smtp郵箱域名‘;
# Configure using custom_config.inc.php 以下這三處不能有中括號,一般保持一致即可。
$g_tl_admin_email = ‘testlink@testlink.com’; # for problem/error notification
$g_from_email = ‘testlink@testlink.com’; # email sender
$g_return_path_email = ‘testlink@testlink.com’;
/** Configure only if SMTP server requires authentication */
$g_smtp_username = ‘testlink’; # user #賬號和密碼,有的需要加上域名有的不需要,最好加上域名。
$g_smtp_password = ’123123123′; # password
保存后,再次登錄testlink:http://localhost/TestLink/,重置某一用戶的密碼,到該用戶郵箱中查收郵件,能收到郵件就恭喜你,OK啦。^_^。
]]>
安裝環(huán)境:redhat enterprise linux 5 + mysql-5.5.27+httpd-2.2.23+php-5.3.19+TestLink-1.9.4
安裝方法:編譯安裝
安裝步驟:
一、安裝程序包下載
下載php的安裝包:php-5.3.19.tar.gz
下載TestLink的安裝包:testlink-1.9.4.tar.gz
Mysql的安裝具體見blog:《Bugzilla 4.2.3 for Linux redhat 5 安裝介紹》
二、安裝PHP
1.安裝php包
# tar zxvf php-5.3.19.tar.gz
# cd php-5.3.19
# ./configure –with-mysql=/data/msyql –with-apxs2=/data/apache2/bin/apxs
# make
# make test
# make install
# cp php.ini-development /usr/local/lib/php.ini
2.httpd配置
# cd /data/apache2/conf/
# vi httpd.conf
在LoadModule處增加一行:
LoadModule php5_module modules/libphp5.so
在AddType處添加內(nèi)容為:
AddType application/x-httpd-php .php .phtml
保存后重啟httpd服務(wù)
# cd /data/apache2/bin/
# ./apachectl restart
備注:查找文件命令是 # find / -name 查找的文件名字
3.php配置
# vi php.ini
修改max_execution_time=120
取消掉;extension=php_gd2.dll 前面的;號,讓其生效
修改;date.timezone的值為:date.timezone=”Asia/Shanghai”,并去掉前面的;號,讓其生效
修改mysql.default_port=3306
修改mysql.default_socket=/var/lib/mysql/mysqld.sock (注意:是mysql安裝時(shí)設(shè)置的路徑)
保存后重啟httpd服務(wù)
# cd /data/apache2/bin/
# ./apachectl restart
三、安裝配置TestLink
1.解壓文件包
# tar zxvf testlink-1.9.4.tar.gz
# mv testlink-ga-testlink-code /data/apache2/htdocs/TestLink
# cd /data/apache2/htdocs/
# chmod 777 –R testlink
2.修改testlink配置文件
# cd /data/apache2/htdocs/TestLink
# vi config.inc.php
修改如下內(nèi)容:
$tlCfg->default_language = 'en_GB';改為$tlCfg->default_language = 'zh_CN';
$tlCfg->log_path=’/data/apache2/htdocs/TestLink/logs/’
$g_repositoryPath=’ /data/apache2/htdocs/TestLink/upload_area/’
修改完畢保存
3.訪問TestLink
在URL中輸入:http://localhost/TestLink/install/index.php
在界面中輸入數(shù)據(jù)庫的用戶名:root;密碼:123456
成功后出現(xiàn)TestLink的登錄頁面,用用戶名:admin;密碼:admin 登錄即可。
到此,TestLink安裝完畢,后續(xù)還需要進(jìn)行郵箱配置。
]]>
參考資料:http://blog.chinaunix.net/uid-10697776-id-3080243.html
http://hi.baidu.com/widebright/item/2f28cd0da72b9210addc70a7
問:dell的optiplex 360或者optiplex 380機(jī)器,broadcom網(wǎng)卡如何在redhat enterprise linux 5系統(tǒng)下識別和安裝驅(qū)動?
答案如下:
首先看網(wǎng)卡是否已經(jīng)正確連接到計(jì)算機(jī),使用的命令是lspci。redhat上使用lspci的輸出:
[root@localhost ~]# lspci
00:00.0 Host bridge: Intel Corporation Eaglelake DRAM Controller (rev 03)
00:01.0 PCI bridge: Intel Corporation Eaglelake PCI Express Root Port (rev 03)
00:02.0 VGA compatible controller: Intel Corporation Eaglelake Integrated Graphics Controller (rev 03)
00:02.1 Display controller: Intel Corporation Eaglelake Integrated Graphics Controller (rev 03)
00:1b.0 Audio device: Intel Corporation 82801G (ICH7 Family) High Definition Audio Controller (rev 01)
00:1c.0 PCI bridge: Intel Corporation 82801G (ICH7 Family) PCI Express Port 1 (rev 01)
00:1d.0 USB Controller: Intel Corporation 82801G (ICH7 Family) USB UHCI Controller #1 (rev 01)
00:1d.1 USB Controller: Intel Corporation 82801G (ICH7 Family) USB UHCI Controller #2 (rev 01)
00:1d.2 USB Controller: Intel Corporation 82801G (ICH7 Family) USB UHCI Controller #3 (rev 01)
00:1d.3 USB Controller: Intel Corporation 82801G (ICH7 Family) USB UHCI Controller #4 (rev 01)
00:1d.7 USB Controller: Intel Corporation 82801G (ICH7 Family) USB2 EHCI Controller (rev 01)
00:1e.0 PCI bridge: Intel Corporation 82801 PCI Bridge (rev e1)
00:1f.0 ISA bridge: Intel Corporation 82801GB/GR (ICH7 Family) LPC Interface Bridge (rev 01)
00:1f.1 IDE interface: Intel Corporation 82801G (ICH7 Family) IDE Controller (rev 01)
00:1f.2 IDE interface: Intel Corporation 82801GB/GR/GH (ICH7 Family) SATA IDE Controller (rev 01)
00:1f.3 SMBus: Intel Corporation 82801G (ICH7 Family) SMBus Controller (rev 01)
會發(fā)現(xiàn)系統(tǒng)識別不到這個(gè)網(wǎng)卡的設(shè)備,需要更新網(wǎng)卡設(shè)備讀取文件,具體是:
用update-pciids 命令先更新一下 系統(tǒng)的pci.ids文件,這個(gè)最新的應(yīng)該有人維護(hù)的在http://pciids.sourceforge.net/ 可以找得到。
或者像我這樣直接手工更新一下/usr/share/hwdata/pci.ids 文件的內(nèi)容。
把pci.ids文件放到tmp目錄
Redhat上使用命令:cp /tmp/pci.ids /usr/share/hwdata/pci.ids;回車后回復(fù)yes
再次執(zhí)行l(wèi)spci,結(jié)果如下,成功識別。
[root@localhost ~]# cp /tmp/llj/pci.ids /usr/share/hwdata/pci.ids
cp:是否覆蓋“/usr/share/hwdata/pci.ids”? yes
[root@localhost ~]# lspci
00:00.0 Host bridge: Intel Corporation 4 Series Chipset DRAM Controller (rev 03)
00:01.0 PCI bridge: Intel Corporation 4 Series Chipset PCI Express Root Port (rev 03)
00:02.0 VGA compatible controller: Intel Corporation 4 Series Chipset Integrated Graphics Controller (rev 03)
00:02.1 Display controller: Intel Corporation 4 Series Chipset Integrated Graphics Controller (rev 03)
00:1b.0 Audio device: Intel Corporation NM10/ICH7 Family High Definition Audio Controller (rev 01)
00:1c.0 PCI bridge: Intel Corporation NM10/ICH7 Family PCI Express Port 1 (rev 01)
00:1d.0 USB controller: Intel Corporation NM10/ICH7 Family USB UHCI Controller #1 (rev 01)
00:1d.1 USB controller: Intel Corporation NM10/ICH7 Family USB UHCI Controller #2 (rev 01)
00:1d.2 USB controller: Intel Corporation NM10/ICH7 Family USB UHCI Controller #3 (rev 01)
00:1d.3 USB controller: Intel Corporation NM10/ICH7 Family USB UHCI Controller #4 (rev 01)
00:1d.7 USB controller: Intel Corporation NM10/ICH7 Family USB2 EHCI Controller (rev 01)
00:1e.0 PCI bridge: Intel Corporation 82801 PCI Bridge (rev e1)
00:1f.0 ISA bridge: Intel Corporation 82801GB/GR (ICH7 Family) LPC Interface Bridge (rev 01)
00:1f.1 IDE interface: Intel Corporation 82801G (ICH7 Family) IDE Controller (rev 01)
00:1f.2 IDE interface: Intel Corporation NM10/ICH7 Family SATA Controller [IDE mode] (rev 01)
00:1f.3 SMBus: Intel Corporation NM10/ICH7 Family SMBus Controller (rev 01)
02:00.0 Ethernet controller: Broadcom Corporation NetLink BCM57780 Gigabit Ethernet PCIe (rev 01)
網(wǎng)卡成功識別后,使用ifconfig命令看網(wǎng)卡信息,發(fā)現(xiàn)沒有eth0,需要進(jìn)行如下操作:
下載網(wǎng)卡驅(qū)動安裝包:
kernel-2.6.18-92.el5.i686.rpm
kernel-devel-2.6.18-92.el5.i686.rpm
kernel-xen-2.6.18-92.el5.i686.rpm
kernel-xen-devel-2.6.18-92.el5.i686.rpm
tg3-3.122n-1.src.rpm
使用rpm –ivh 命令安裝上面的kernel包
Tg3包安裝步驟如下:
[root@localhost llj]# rpm -ivh tg3-3.122n-1.src.rpm
1:tg3 ########################################### [100%]
[root@localhost llj]# cd /usr/src/redhat/
[root@localhost redhat]# rpmbuild -bb SPECS/tg3.spec
[root@localhost redhat]# rpm -ivh RPMS/i386/tg3-3.122n-1.i386.rpm
Preparing... ########################################### [100%]
1:tg3 ########################################### [100%]
[root@localhost redhat]# modprobe tg3
打開網(wǎng)絡(luò)設(shè)備:[root@linpcl root]#ifconfig eth0 up
使用命令ifconfig查看可看見eth0
到此Dell optiplex 380 broadcom網(wǎng)卡在redhat 5下網(wǎng)卡識別和安裝驅(qū)動完畢。^_^。
]]>
編寫背景:
這幾天開始梳理和總結(jié)測試環(huán)境維護(hù)管理方面的工作,bugzilla和Testlink也該升級了,找了臺機(jī)器重新安裝這兩個(gè)軟件,先試試;順帶整理相關(guān)安裝文檔給測試人員進(jìn)行安裝學(xué)習(xí)并錄像,便于以后要用或培訓(xùn)時(shí)可以拿出來分享。放在這里希望對測試新手有幫助。
參考資料:http://3708841.blog.51cto.com/3698841/1020932
安裝環(huán)境:redhat enterprise linux 5 + mysql-5.5.27+httpd-2.2.23+bugzilla-4.2.3
安裝方法:編譯安裝
安裝步驟:
一、安裝程序包下載
下載mysql-5.5.27所需的如下安裝文件:
libevent-2.0.20-stable.tar.gz
cmake-2.8.9tar.gz
下載mysql-5.5.27的安裝包:mysql-5.5.27.tar.gz
下載httpd-2.2.23的安裝包:httpd-2.2.23.tar.bz2
下載bugzilla-4.2.3的安裝包:bugzilla-4.2.3.tar.gz
下載bugzilla安裝的相關(guān)組件包:DBD-mysql-4.0.22.tar.gz
二、卸載linux安裝后自動安裝上的mysql和httpd所有相關(guān)包,具體如下:
1. 用下面命令查看系統(tǒng)自動安裝的mysql和http相關(guān)的包有哪些
rpm –qa|grep mysql
rpm –qa|grep http
2. 用下面命令刪除系統(tǒng)自動安裝的mysql和http的包
3. rpm -e –nodeps mysql已經(jīng)安裝的文件包名
三、安裝mysql并創(chuàng)建bugzilla數(shù)據(jù)庫
1. 安裝libevent
# tar zxvf libevent-2.0.20-stable.tar.gz
# cd libevent-2.0.20-stable
# ./configure
# make
# make install
# ln -s /usr/local/lib/libevent-2.0.so.5 /usr/lib/libevent-2.0.so.5
2. 安裝cmake
安裝前確認(rèn)系統(tǒng)是否安裝了ncurses包,具體如下:
#rpm -qa|grep ncurses
ncurses-5.5-24.20060715
ncurses-devel-5.5-24.20060715
# tar zxvf cmake-2.8.9tar.gz
# cd cmake-2.8.9
# ./bootstrap
# make
# make install
3. 安裝mysql
1)建立mysql用戶
# groupadd mysql
# useradd -g mysql -s /sbin/nologin mysql
# mkdir -p /data/db/mysql_data
# mkdir -p /data/mysql
# mkdir -p /etc/mysql
# mkdir /data/db/innodb_data/ -p
# mkdir /data/db/mysql_logs/binary_log -p
# mkdir /data/db/mysql_logs/innodb_log -p
# mkdir /data/db/mysql_logs/query_log -p
# mkdir /data/db/mysql_logs/slow_query_log -p
# mkdir /data/db/mysql_logs/error_log -p
# chown mysql. /data/db/* -R
2)安裝配置
# tar zxvf mysql-5.5.27.tar.gz
#cd mysql-5.5.27
# cmake . -DCMAKE_INSTALL_PREFIX=/data/mysql/ -DMYSQL_DATADIR=/data/db/mysql_data -DDEFAULT_CHARSET=utf8 -DDEFAULT_COLLATION=utf8_general_ci -DEXTRA_CHARSETS=all -DWITH_SSL=bundled -DWITH_ZLIB=system -DWITH_EMBEDDED_SERVER=1 -DENABLED_LOCAL_INFILE=1 -DWITH_MYISAM_STORAGE_ENGINE=1 -DSYSCONFDIR=/etc/mysql -DMYSQL_TCP_PORT=3306 -DWITH_DEBUG=0 -DMYSQL_UNIX_ADDR=/var/lib/mysql/mysqld.sock -DWITH_INNOBASE_STORAGE_ENGINE=1 -DWITH_ARCHIVE_STORAGE_ENGINE=1 -DWITH_BLACKHOLE_STORAGE_ENGINE=1 -DWITH_FEDERATED_STORAGE_ENGINE=1 -DWITH_PARTITION_STORAGE_ENGINE=1
# make && make install
3)初始化數(shù)據(jù)庫
# /data/mysql/scripts/mysql_install_db --basedir=/data/mysql/ --user=mysql --datadir=/data/db/mysql_data/
4)創(chuàng)建配置文件
#vi /etc/mysql/my.cnf
[client]
#password = [your_password]
port = 3306
socket = /tmp/mysqld.sock
default-character-set=utf8
[mysqld]
wait_timeout=7200
port = 3306
socket = /tmp/mysqld.sock
character_set_server=utf8
basedir=/data/mysql
datadir=/data/db/mysql_data
back_log = 500
log-error=/data/db/mysql_logs/error_log/server.err
max_connections = 1024
max_connect_errors = 10
table_open_cache = 2048
max_allowed_packet = 16M
binlog_cache_size = 1M
max_heap_table_size = 64M
read_buffer_size = 2M
read_rnd_buffer_size = 16M
join_buffer_size = 8M
thread_cache_size = 128
thread_concurrency = 8
query_cache_size = 64M
query_cache_limit = 2M
ft_min_word_len = 4
#default-storage-engine = MYISAM
default-storage-engine = innodb
thread_stack = 192K
transaction_isolation = REPEATABLE-READ
tmp_table_size = 64M
log-bin=/data/db/mysql_logs/binary_log/db-bin
expire_logs_days=10
binlog_format=mixed
#general_log=1
#general_log_file=/data/db/mysql_logs/query_log/query.log
slow_query_log=1
long_query_time = 2
slow_query_log_file=/data/db/mysql_logs/slow_query_log/slow_query.log
server-id = 1
key_buffer_size = 200M
bulk_insert_buffer_size = 64M
myisam_sort_buffer_size = 128M
myisam_max_sort_file_size = 10G
myisam_repair_threads = 1
myisam_recover
innodb_additional_mem_pool_size = 16M
innodb_buffer_pool_size = 300M
innodb_data_file_path = ibdata1:100M;ibdata2:100M;ibdata3:100M;ibdata4:100M:autoextend
innodb_data_home_dir=/data/db/innodb_data/
innodb_write_io_threads = 8
innodb_read_io_threads = 8
innodb_thread_concurrency = 16
innodb_flush_log_at_trx_commit = 1
innodb_log_buffer_size = 8M
innodb_log_file_size = 256M
innodb_log_files_in_group = 3
innodb_log_group_home_dir=/data/db/mysql_logs/innodb_log
innodb_max_dirty_pages_pct = 90
innodb_lock_wait_timeout = 120
[mysqldump]
quick
max_allowed_packet = 16M
[mysql]
no-auto-rehash
[myisamchk]
key_buffer_size = 512M
sort_buffer_size = 512M
read_buffer = 8M
write_buffer = 8M
[mysqlhotcopy]
interactive-timeout
[mysqld_safe]
open-files-limit = 8192
5)后臺啟動
# cp support-files/mysql.server /etc/init.d/mysqld
# chmod 755 /etc/init.d/mysqld
# vim /etc/init.d/mysqld
basedir=/data/mysql
datadir=/data/db/mysql_data
# /etc/init.d/mysqld start
Starting MySQL……………..[ OK ]
# netstat -an |grep 3306
tcp 0 0 0.0.0.0:3306 0.0.0.0:* LISTEN
# vim /etc/profile
用#注釋掉之前的export內(nèi)容,追加如下內(nèi)容
export PATH=$PATH:/data/mysql/bin
# source /etc/profile
# mysql
Welcome to the MySQL monitor. Commands end with ; or \g.
Your MySQL connection id is 2
Server version: 5.5.27-log Source distribution
Copyright (c) 2000, 2012, Oracle and/or its affiliates. All rights reserved.
Oracle is a registered trademark of Oracle Corporation and/or its
affiliates. Other names may be trademarks of their respective owners.
Type 'help;' or '\h' for help. Type '\c' to clear the current input statement.
6)添加Mysql自啟動服務(wù)
# ln -sf /data/mysql/bin/mysql /sbin/mysql
# ln -sf /data/mysql/bin/mysqladmin /sbin/mysqladmin
# chkconfig mysqld on
# chkconfig --level 24 mysqld off
# chkconfig --list mysqld
mysqld 0:off 1:off 2:off 3:on 4:off 5:on 6:off
# vi /etc/ld.so.conf
用#注釋掉文件內(nèi)容,增加如下內(nèi)容
/data/mysql/lib
# ldconfig -v |grep mysql
/data/mysql/lib:
libmysqlclient.so.18 -> libmysqlclient_r.so.18.0.0
7)為mysql數(shù)據(jù)庫root用戶設(shè)置密碼
# mysqladmin -uroot password "qwe123"
# mysql –uroot –p
use mysql
Grant all privileges on *.* to 'root'@'%' identified by 'qwe123' with grant option;
flush privileges;
select host, user, password from user;
增加遠(yuǎn)程登錄權(quán)限
刪除匿名用戶:
delete from user where user=' ';
設(shè)置所有root密碼
update user set password=password( "qwe123") where user= "root";
4. 創(chuàng)建bugzilla數(shù)據(jù)庫和用戶
1)創(chuàng)建數(shù)據(jù)庫bugs
create database bugs;
show databases;
use bugs;
2)創(chuàng)建用戶bugs
grant select,insert,update,delete,index,alter,create,lock tables,drop,references on bugs.* to bugs@localhost identified by '123456';
flush privileges;
四、安裝httpd
1. 安裝apache
# tar jxvf httpd-2.2.23.tar.bz2
# cd httpd-2.2.23
# ./configure --prefix=/data/apache2 --enable-so --enable-rewrite --enable-vhost-alias=shared --enable-cache=shared --enable-file-cache=shared --enable-disk-cache=shared --enable-mem-cache=shared --enable-proxy=shared --enable-proxy-http=shared --enable-proxy-ajp=shared --enable-proxy-balancer=shared --enable-proxy-connect=shared --enable-dav --enable-dav-fs --disable-proxy-ftp --disable-userdir --disable-asis --enable-ssl --with-mpm=worker
# make
# make install
2. 添加apache自啟動腳本
#cp /data/apache2/bin/apachectl /etc/init.d/httpd
#vi /etc/init.d/httpd
在第三行添加以下兩行內(nèi)容
#chkconfig:345 85 15
#description: Start and stops the Apache HTTP Server.
[root@localhost opt]#chkconfig httpd on
3. 啟動HTTP服務(wù)
[root@localhost opt]#service httpd start
安裝完畢,啟動httpd,輸入“http://ip”能看到“it works”證明成功。
五、安裝bugzilla
1. 安裝bugzilla
# tar zxvf bugzilla-4.2.3.tar.gz
# mv bugzilla-4.2.3 /data/apache2/htdocs/bugzilla
#chmod 777 /data/apache2/htdocs/bugzilla –R
2. 安裝bugzilla所需模塊
由于默認(rèn)的perl安裝包缺少一些bugzilla需要的模塊,所以需要補(bǔ)充一些模塊,最好是在線進(jìn)行,不要一個(gè)一個(gè)的自己安裝。以root身份運(yùn)行在聯(lián)網(wǎng)情況下用以下命令安裝所需的最少perl模塊:
#perl -MCPAN -e 'install "Bundle::Bugzilla"'
Are you ready for manual configuration? [yes] no
of modules we are processing right now? [yes] 敲回車,以后都敲回車!
#/usr/bin/perl install-module.pl -all
# perl -MCPAN -e 'install "mod_perl2"'
安裝需要把Apache的apxs路徑:/data/apache2/bin/apxs
#cd /data/apache2/htdocs/bugzilla
#./checksetup.pl
再次執(zhí)行安裝相關(guān)包命令
# /usr/bin/perl install-module.pl –all
安裝DBD-mysql-4.0.22.tar.gz
# tar zxvf DBD-mysql-4.0.22.tar.gz
# cd DBD-mysql-4.0.22
# perl Makefile.PL --mysql_config=/usr/local/mysql/bin/mysql_config
# make
# make install
# perl -MCPAN -e 'install "mod_perl2"'
安裝需要把Apache的apxs路徑:/data/apache2/bin/apxs
3. 配置bugzilla
#cd /data/apache2/htdocs/bugzilla
#vi localconfig
根據(jù)數(shù)據(jù)庫的實(shí)際情況修改如下參數(shù):
$db_name = 'bugs';
$db_user = 'bugs';
$db_pass = '123456';
$db_port = 3306;
$db_sock = '/var/lib/mysql/mysqld.sock';
$index_html = 1;
4. 配置啟動apache
在 httpd.conf 中添加(或者去除注釋)以下這一行:
AddHandler cgi-scrīpt .cgi
到 httpd.conf 中 DirectoryIndex 那一行,修改為:
DirectoryIndex index.html index.html.var index.cgi
指定Bugzilla的訪問目錄,在最后添加:
<Directory /data/apache2/htdocs/bugzilla>
AddHandler cgi-script .cgi
Options +Indexes +ExecCGI
DirectoryIndex index.cgi
AllowOverride Limit FileInfo Indexes
</Directory>
5. 安裝bugzilla數(shù)據(jù)庫配置和文件權(quán)限設(shè)置
#cd /data/apache2/htdocs/bugzilla
#./checksetup.pl
開始自動安裝bugzilla數(shù)據(jù)庫表并設(shè)置管理員賬號
# cd /data/apache2/htdocs/
# chmod 777-R bugzilla
編輯hosts文件:
# vi /etc/hosts
增加如下一行
127.0.0.1 localhost.localdomain localhost MYHOST
在瀏覽器輸入:http://XXX.XXX.XXX.XXX/bugzilla,用剛才設(shè)置的管理員賬號登陸即可。
]]>
這周要開始搭建測試管理系統(tǒng)bugzilla,第一步是裝操作系統(tǒng)。由于使用的機(jī)器配置非常的老,機(jī)器有4塊硬盤,每個(gè)硬盤17G;第一次遇到這樣的情況,裝上操作系統(tǒng)后,如何掛接硬盤還真是不會,在網(wǎng)上找了不少資料看,對資料進(jìn)行歸類總結(jié),在此收錄保存同時(shí)供大家需要時(shí)查看。
Redhat Linux 硬盤掛載方法!!!
參考資料網(wǎng)址:http://www.chinalinuxpub.com/read.php?wid=1080
硬盤掛載操作工作步驟:
1、先查看目前機(jī)器上有幾塊硬盤,查看命令有兩種:
命令1:# fdisk –l
命令2:# dmesg | grep sd
其中:fdisk命令說明如下:
fdisk命令用途:觀察硬盤的實(shí)體使用情形與分割硬盤用。
fdisk命令使用方法:
一、在 console 上輸入 fdisk -l ,觀察硬盤之實(shí)體使用情形。
二、在 console 上輸入 fdisk /dev/sda(具體磁盤名稱),可進(jìn)入分割硬盤模式。
Ø 輸入 m 顯示所有命令列示。
Ø 輸入 p 顯示硬盤分割情形。
Ø 輸入 a 設(shè)定硬盤啟動區(qū)。
Ø 輸入 n 設(shè)定新的硬盤分割區(qū)。
Ø 輸入 e 硬盤為[延伸]分割區(qū)(extend)。
Ø 輸入 p 硬盤為[主要]分割區(qū)(primary)。
Ø 輸入 t 改變硬盤分割區(qū)屬性。
Ø 輸入 d 刪除硬盤分割區(qū)屬性。
Ø 輸入 q 結(jié)束不存入硬盤分割區(qū)屬性。
Ø 輸入 w 結(jié)束并寫入硬盤分割區(qū)屬性。
dmesg命令說明如下:
功能說明:顯示開機(jī)信息。
語 法:dmesg [-cn][-s ]
補(bǔ)充說明:kernel會將開機(jī)信息存儲在ring buffer中。您若是開機(jī)時(shí)來不及查看信息,可利用dmesg來查看。開機(jī)信息亦保存在/var/log目錄中,名稱為dmesg的文檔里。
參 數(shù):
-c 顯示信息后,清除ring buffer中的內(nèi)容。
-s 預(yù)配置為8196,剛好等于ring buffer的大小。
-n 配置記錄信息的層級。
2、對要掛載的硬盤創(chuàng)建磁盤分區(qū)
創(chuàng)建磁盤分區(qū)步驟舉例如下:
# fdisk /dev/sdb
進(jìn)入fdisk模式:
Command (m for help):m //查看fdisk命令幫助
Command (m for help):n //創(chuàng)建新分區(qū)
Command action:
e extended //輸入e為創(chuàng)建擴(kuò)展分區(qū)
p primary partition (1-4) //輸入p為創(chuàng)建主分區(qū),這里我們選擇p
Partion number(1-4):1 //第一個(gè)擴(kuò)展分區(qū),按需求可以最多分4個(gè)主分區(qū)
First Cylinder(1-1014,default 1): 1 //第一個(gè)主分區(qū)起始的磁盤塊數(shù),可以選擇默認(rèn)值
Last cylindet or +siza or +sizeM or +sizeK: +1024MB //可以是以MB為單位的數(shù)字或者
以磁盤塊數(shù),這 里我們輸入+1024MB表示分區(qū)大小為1G
這樣我們就創(chuàng)建完一個(gè)分區(qū),如果要?jiǎng)?chuàng)建更多分區(qū)可以照上面的步驟繼續(xù)創(chuàng)建。所有分區(qū)創(chuàng)建完后用w保存分區(qū)。
Command (m for help): w
The partition table has been altered!
保存完成后重啟服務(wù)器,可以用#fdisk -l 命令檢查剛剛所建分區(qū),可以在返回結(jié)果中確認(rèn)/dev/sdb1的信息。
3、對要掛載的分區(qū)進(jìn)行格式化
用如下命令將新建的分區(qū)格式化為ext3
# mkfs -t ext3 -c /dev/sdb1
mkfs 命令說明如下:
功能說明:建立各種文件系統(tǒng)。
語法:mkfs [-vV][fs][-f <文件系統(tǒng)類型>][設(shè)備名稱][區(qū)塊數(shù)]
補(bǔ)充說明:mkfs本身并不執(zhí)行建立文件系統(tǒng)的工作,而是去調(diào)用相關(guān)的程序來執(zhí)行。
參數(shù):
fs 指定建立文件系統(tǒng)時(shí)的參數(shù)。
-t<文件系統(tǒng)類型> 指定要建立何種文件系統(tǒng)。
-v 顯示版本信息與詳細(xì)的使用方法。
-V 顯示簡要的使用方法。
4、掛載分區(qū)
格式化完后我們需要進(jìn)行掛載分區(qū),舉例如下:
# mkdir /test
# mount /dev/sdb1 /test
# df //用df命令進(jìn)行查看
Filesystem 1K-blocks Used Available Use% Mounted on
/dev/sda1 101089 9463 86407 10% /boot
none 62988 0 62988 0% /dev/shm
/dev/sdb1 485906 8239 452580 2% /test //新掛載的分區(qū)
為了在每次系統(tǒng)啟動時(shí)自動掛載新分區(qū),需要修改/etc/fstab文件來進(jìn)行自動掛載。在文件的末位加入如下一行:
/dev/sdb1 /test ext3 defaults 1 2
這樣服務(wù)器每次啟動都會自動掛載此分區(qū),到此硬盤掛載工作就結(jié)束了。
mkdir命令說明如下:
功能:創(chuàng)建一個(gè)目錄(類似MSDOS下的md命令)。
語法:mkdir [選項(xiàng)] dir-name
說明:該命令創(chuàng)建由dir-name命名的目錄。要求創(chuàng)建目錄的用戶在當(dāng)前目錄中(dir-name的父目錄中)具有寫權(quán)限,并且dir-name不能是當(dāng)前目錄中已有的目錄或文件名稱。
參數(shù):
- m 對新建目錄設(shè)置存取權(quán)限。也可以用chmod命令設(shè)置。
- p 可以是一個(gè)路徑名稱。此時(shí)若路徑中的某些目錄尚不存在,加上此選項(xiàng)后,系統(tǒng)將自動建立好那些尚不存在的目錄,即一次可以建立多個(gè)目錄。
mount命令說明如下:
功能:加載指定的文件系統(tǒng)。
語法:mount [-afFhnrvVw] [-L<標(biāo)簽>] [-o<選項(xiàng)>] [-t<文件系統(tǒng)類型>] [設(shè)備名] [加載點(diǎn)]
用法說明:mount可將指定設(shè)備中指定的文件系統(tǒng)加載到Linux目錄下(也就是裝載點(diǎn))。可將經(jīng)常使用的設(shè)備寫入文件/etc/fastab,以使系統(tǒng)在每次啟動時(shí)自動加載。mount加載設(shè)備的信息記錄在/etc/mtab文件中。使用umount命令卸載設(shè)備時(shí),記錄將被清除。
參數(shù)說明:
描述內(nèi)容比較多,在這里就不記錄了。
具體可訪問這個(gè)網(wǎng)址:http://blog.chinaunix.net/u1/55764/showart_1145424.html
df命令說明如下:
功能:查看Linux 文件系統(tǒng)的狀態(tài)信息,顯示各個(gè)分區(qū)的容量、已使用量、未使用量及掛載點(diǎn)等信息。
語法:df [選項(xiàng)]... [文件]...
參數(shù)說明:
-a, --all 包括大小為 0 個(gè)塊的文件系統(tǒng)
-B, --block-size=大小塊以指定<大小>的字節(jié)為單位
-h, --human-readable 以容易理解的格式印出文件系統(tǒng)大小 (例如 1K 234M 2G)
-H, --si 類似 -h,但取 1000 的次方而不是 1024
-i, --inodes 顯示 inode 信息而非塊使用量
-k 即 --block-size=1K
-l, --local 只顯示本機(jī)的文件系統(tǒng)
--no-sync 取得使用量數(shù)據(jù)前不進(jìn)行 sync 動作 (默認(rèn))
-P, --portability 使用 POSIX 輸出格式
--sync 取得使用量數(shù)據(jù)前先進(jìn)行 sync 動作
-t, --type=類型 只印出指定<類型>的文件系統(tǒng)信息
-T, --print-type 印出文件系統(tǒng)類型
-x, --exclude-type=類型 只印出不是指定<類型>的文件系統(tǒng)信息
-v (此選項(xiàng)不作處理)
--help 顯示此幫助信息并離開
--version 顯示版本信息并離開
常用操作:
df -k 以千字節(jié)KB 為單位顯示各分區(qū)的信息
df -a 顯示所有分區(qū)包括大小為0 的分區(qū)
df -T 顯示分區(qū)類型EXT2 或EXT3 等
]]>
在測試機(jī)器上成功安裝了redhat enterprise Linux 5.0后,發(fā)現(xiàn)不能上網(wǎng),原來網(wǎng)卡沒有被識別,也沒有網(wǎng)卡驅(qū)動,這回可費(fèi)勁了,家里可沒有遇到這樣的問題;在Google上搜了1天,也沒有搜出個(gè)結(jié)果,只有零零散散的資料,靠自己拼湊;功夫不負(fù)有心人,終于在痛苦的1天過后,成功的搞定了。在這里記錄記錄,對網(wǎng)上那些還沒有找到這個(gè)答案的人會得到解脫。
redhat enterprise Linux 5.0如何識別網(wǎng)卡和安裝驅(qū)動r8169
問題一:如何查看機(jī)器上的網(wǎng)卡型號
答:進(jìn)入linux命令終端界面,使用命令
[root@wapdbrac1 ~]# kudzu --probe --class=network
界面上就會顯示網(wǎng)卡的型號以及機(jī)器上都有幾個(gè)網(wǎng)卡
我的測試機(jī)器網(wǎng)卡型號是:realtek 8169
問題二:有了網(wǎng)卡,如何安裝網(wǎng)卡驅(qū)動,讓系統(tǒng)啟動時(shí)能識別上網(wǎng)卡
答案如下,比較長要耐心看:
第一步:在網(wǎng)上下載這個(gè)網(wǎng)卡型號的linux版本驅(qū)動程序,下載地址找了半天,好不容易找到,可惜沒把具體地址給保存,想要就給我發(fā)郵件獲取吧,下次看到在帖上來了。
第二步:使用命令查看kernel包是否都裝全了,具體如下:
[root@localhost kernel]# rpm -qa | grep kernel
如果裝全了,會顯示如下幾個(gè)包:
kernel-xen-devel-2.6.18-8.el5
kernel-devel-2.6.18-8.el5
kernel-2.6.18-8.el5
kernel-xen-2.6.18-8.el5
kernel-headers-2.6.18-8.el5
如果沒有裝全,就在redhat enterprise Linux 5.0第一個(gè)ISO的Server文件目錄下可以找到對應(yīng)的包,拷貝到某一具體目錄下,進(jìn)入目錄后,用如下命令就可以進(jìn)行安裝:
[root@localhost kernel]# rpm -ivh kernel-devel-2.6.18-8.el5.x86_64.rpm
注意:如果不裝全這些包,在網(wǎng)卡編譯時(shí)就會報(bào)錯(cuò)說找不到src目錄文件。
用如下命令查看GCC是否安裝,通常都裝上的,還是檢查一下比較好。
[root@localhost 2.6.18-8.el5]# whereis -b gcc
gcc : /usr/bin/gcc /usr/lib/gcc /usr/libexec/gcc
第三步:把下載的r8169驅(qū)動文件拷貝到某一目錄下,我放在了tmp目錄下,解壓:
tar jxvf r8169-6.003.00.tar.bz2
第四步:進(jìn)入解壓到驅(qū)動程序目錄,命令:cd r8169-6.003.00
進(jìn)入src目錄,命令:cd src
查看目前是否有網(wǎng)卡驅(qū)動模塊,命令:lsmod|grep r8169,通常都無
執(zhí)行清除網(wǎng)卡驅(qū)動命令:make clean
執(zhí)行安裝網(wǎng)卡模塊命令:make modules
接著安裝:make install
接著掛接:depmod –a
掛驅(qū)動:insmod ./r8168.ko
查看是否成功:lsmod | grep r8169,如顯示有信息則成功
注意:在上面一系列命令操作過程中,如無error,則就OK了,之前我在裝的過程中,在make install這一步老報(bào)錯(cuò),說找不到src目錄,后來才知道是上面的kernel包少裝的緣故。
第五步:重新啟動系統(tǒng),進(jìn)去后,在圖形界面,工具欄下選擇network,進(jìn)入網(wǎng)絡(luò)配置圖形界面,就會看到硬件下多了個(gè)網(wǎng)卡,這時(shí),在圖形界面下操作,創(chuàng)建個(gè)網(wǎng)絡(luò)配置鏈接就OK了。具體的圖形配置我在網(wǎng)上也沒有看到有,我呢又懶得截圖了,因?yàn)閳D上說的比較清楚。到此我的測試環(huán)境基本好了,系統(tǒng)裝上了,網(wǎng)也可以上了,接下來就是安裝mysql、oracle、bugzilla、testlink等東西了,這些就比較簡單了。^_^。
]]>
上周已經(jīng)把這幾年來做項(xiàng)目的測試工作經(jīng)驗(yàn)整理成PPT,估計(jì)年后會拿到測試時(shí)代和測試同行分享,希望對測試新人有所幫助,也算是實(shí)現(xiàn)自己的一個(gè)心愿。在整理的過程中,最后發(fā)現(xiàn)原來就是這么幾個(gè)點(diǎn),壓縮壓縮在壓縮。
上回在自己家的機(jī)器上成功安裝了redhat enterprise 5.0,最近也想在公司的測試機(jī)器上裝上試試,順便整理測試環(huán)境管理的一些工具文檔。可惜發(fā)現(xiàn)在公司的測試機(jī)器上裝起來還是蠻費(fèi)勁的,這次解決的問題對自己有這么一點(diǎn)小收獲,在此記錄記錄。也許會對測試同行有所幫助。
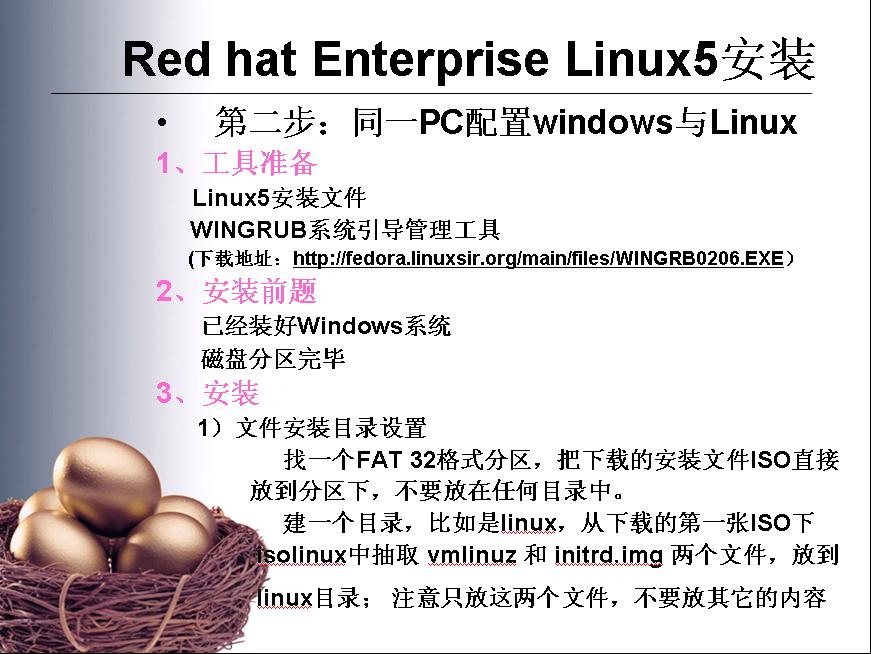
redhat enterprise Linux 5.0硬盤安裝
我的機(jī)器情況如下:
1、硬盤分3個(gè)區(qū):C盤NTFS格式(裝的是XP系統(tǒng)),D盤FAT32格式,E盤分區(qū)但沒有格式化。
2、沒有光驅(qū),網(wǎng)卡不是集成的,是R8169系列。
3、沒有DOS啟動盤
安裝辦法:
按照上次自己在家里的安裝方法,先安裝GRUB。
出現(xiàn)問題:
發(fā)現(xiàn)不能成功安裝GRUB,原因是C盤是NTFS格式。
解決辦法:
在網(wǎng)上搜索了半天,終于找到了如下兩個(gè)資料地址,進(jìn)行安裝。
http://www.dbablog.org/index.php/archives/576
http://www.tkk7.com/iamlibo/archive/2008/07/05/183960.html
可惜,第一個(gè)資料里面的包在裝的過程中還是進(jìn)入不了引導(dǎo)驅(qū)動。最后經(jīng)過幾次來回實(shí)驗(yàn)終于成功了,下面是我的具體操作步驟:
一、準(zhǔn)備好redhat enterprise 5.0的ISO安裝文件
二、到這個(gè)網(wǎng)址:www.dbablog.org/wp-content/uploads/2008/10/grldr.rar
下載grldr.rar包,把這個(gè)包解壓縮,里面有一個(gè)文件夾:grub、一個(gè)文件:grldr
三、在C盤建立一個(gè)文件夾:C:\boot,然后把解壓縮后的grub文件夾整個(gè)的拷貝到C:\boot文件夾下
四、到這個(gè)網(wǎng)址:http://www.tkk7.com/Files/iamlibo/menu.zip
下載menu壓縮包,把這個(gè)包解壓縮,里面有兩個(gè)文件:grldr、menu.lst
五、在C盤,打開C:\boot\grub下的menu.lst文件,會看到里面有如下內(nèi)容:
title DOS/Win9x/Me/NT/2K/XP
root (hd0,0)
chainloader +1
打開上面步驟四中的menu.lst文件,把下面的內(nèi)容替換上面的內(nèi)容
title RedHat Enterprise 5.0
find --set-root /RedHat.Enterprise.Linux.5.Update.1-XiSO.iso
kernel /vmlinuz boot=casper find_iso=/RedHat.Enterprise.Linux.5.Update.1-XiSO.iso
initrd /initrd.img
然后保存
六、把步驟四中的grldr文件放到C盤根目錄下,C:\
七、修改C盤的“boot.ini”文件(xp系統(tǒng)的啟動支持文件)在最下面加上一行:
C:\grldr=”install Red Hat Enterprise Linux AS 5”然后保存
注:boot.ini文件是被隱藏的,修改C盤下顯示隱藏文件為可見,就可以看見該文件了。
八、把redhat enterprise 5.0的ISO安裝文件拷貝到D盤根目錄
九、在D盤根目錄新建立文件夾linux,從下載的第一張ISO下isolinux文件夾中抽取vmlinuz和initrd.img兩個(gè)文件放到Linux目錄下,即:D:\linux文件夾下。
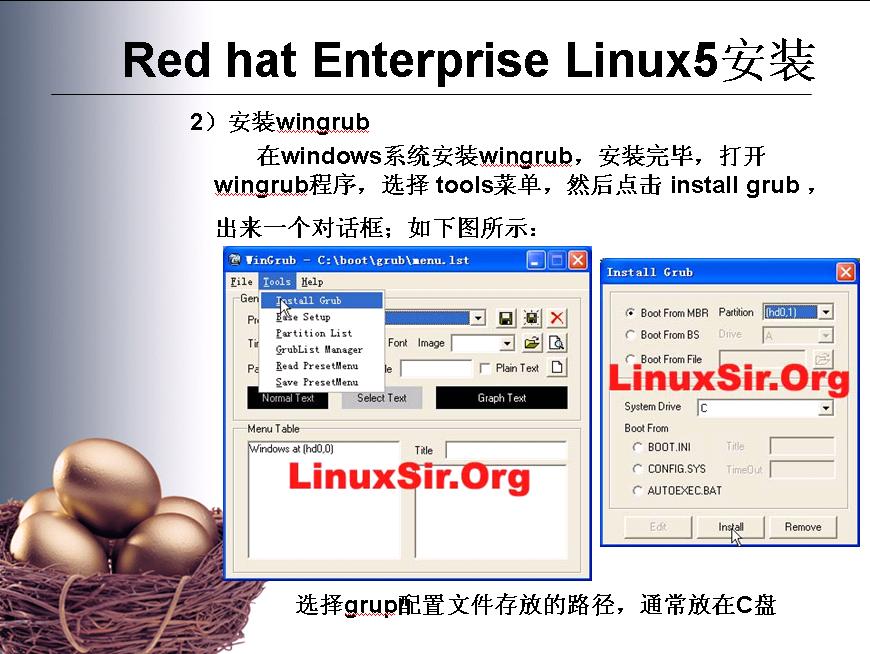
十、下載wingrub程序,安裝到D盤,運(yùn)行wingrub.exe程序,選擇Tool-》partioinlist(分區(qū)列表),查看分區(qū)號,我的測試機(jī)器分區(qū)號是:C盤(hd0,0);D盤(hd0,4);E盤(hd0,5)。
十一、 重新啟動操作系統(tǒng),會出現(xiàn)兩個(gè)選項(xiàng):windowsXP和install Red Hat Enterprise Linux AS 5,選擇install Red Hat Enterprise Linux AS 5,進(jìn)入頁面會有grup語句執(zhí)行的提示,具體如下:
find --set-root /RedHat.Enterprise.Linux.5.Update.1-XiSO.iso
kernel /vmlinuz boot=casper find_iso=/RedHat.Enterprise.Linux.5.Update.1-XiSO.iso
initrd /initrd.img
光標(biāo)移到find這一行,敲擊鍵盤e,進(jìn)入編輯頁面,刪除信息
從新輸入grup命令:root (hd0,4) 然后回車
光標(biāo)移到kernel這一行,敲擊鍵盤e,進(jìn)入編輯頁面,刪除信息
從新輸入grup命令:kernel (hd0,4)/linux/vmlinuz 然后回車
光標(biāo)移到initrd這一行,敲擊鍵盤e,進(jìn)入編輯頁面,刪除信息
從新輸入grup命令:initrd (hd0,4)/linux/initrd.img 然后回車
然后敲擊鍵盤b,系統(tǒng)就開始啟動安裝,進(jìn)入圖形安裝界面,下面的就好辦了,按照圖形說明一步一步的裝就OK了,上次的圖形安裝flash說明忘記在那個(gè)地方下載了,需要的給我郵件,我轉(zhuǎn)給大家就OK了。
最后,費(fèi)了1個(gè)工作日時(shí)間,我終于在自己的測試機(jī)器上裝上了,很有成就感啊!!!!
]]>
測試環(huán)境遷移的工作已經(jīng)過了60%,在遷移完畢后,在數(shù)據(jù)庫上遇到了一些問題和現(xiàn)象;花費(fèi)了不少時(shí)間,最終問題給解決了,非常有必要記錄下來,因?yàn)?br /> 通過GOOGLE搜索來的信息,沒有發(fā)現(xiàn)一個(gè)是有效指導(dǎo)如何解決問題的辦法。自己必須要記錄下來,萬一那天要用,就不用搜索了。錯(cuò)誤日志比Google寶貝是此次解
決mysql數(shù)據(jù)庫中的問題得到的最大感想。
錯(cuò)誤日志比GOOGLE寶貝!!!!
問題及現(xiàn)象1:
在home目錄下安裝了一個(gè)mysql,此mysql保存了一部分測試數(shù)據(jù),現(xiàn)在需要把線上的測試數(shù)據(jù)導(dǎo)入到mysql數(shù)據(jù)庫中,發(fā)現(xiàn)數(shù)據(jù)文件非常的大,
導(dǎo)入會占滿空間,現(xiàn)在,需要把home目錄下的mysql移動到一個(gè)大的目錄文件home1,確保home空間可足夠運(yùn)行。
解決辦法:
1、停止mysql服務(wù),具體是:yinst stop mysql_server
2、把/home/y/share/mysql 目錄文件拷貝到新的目錄文件 /home1/y/share/mysql
3、把/home/y/logs/mysql 目錄文件拷貝到新的目錄文件/home1/y/logs/mysql
修改/home1/y/logs/ 中的mysql目錄權(quán)限的擁有者是mysql,用戶組是users,文件權(quán)限是775
修改命令是:sudo chown -R mysql mysql/ ;sudo chgrp -R users mysql/ ;sudo chmod 775 mysql/
4、把/home/y/var/mysql 目錄文件拷貝到新的目錄文件 /home1/y/var/mysql ,
修改/home1/y/var/ 中的mysql目錄權(quán)限的擁有者是mysql,用戶組是users,文件權(quán)限是775
修改命令是:sudo chown -R mysql mysql/ ;sudo chgrp -R users mysql/ ;sudo chmod 775 mysql/
5、把/home/y/conf/mysql 目錄文件拷貝到新的目錄文件 /home1/y/conf/mysql ,
修改/home1/y/conf/ 中的mysql目錄權(quán)限的擁有者是mysql,用戶組是mysql,文件權(quán)限是775
修改命令是:sudo chown -R mysql mysql/ ;sudo chgrp -R mysql mysql/ ;sudo chmod 775 mysql/
6、在home1目錄下創(chuàng)建目錄tmp,tmp目錄文件操作權(quán)限是:777;sudo chmod 777 /home1/tmp
7、修改mysql的my.cnf配置文件,把文件中的home名改成home1
8、啟動mysql服務(wù),具體是:yinst start mysql_server
9、進(jìn)入數(shù)據(jù)庫,把大量的測試數(shù)據(jù)導(dǎo)入數(shù)據(jù)庫中
問題及現(xiàn)象2:
在測試機(jī)器上,有一個(gè)mysql裝在了home目錄,另一個(gè)mysql被移動到home1,home的磁盤空間比較小,測試數(shù)據(jù)少,mysql數(shù)據(jù)主要用于功能測試;home1上的
磁盤空間比較大,測試數(shù)據(jù)大,mysql數(shù)據(jù)主要用于性能測試;問題:當(dāng)作功能測試時(shí),如何設(shè)置目前使用的數(shù)據(jù)庫是home目錄下的;當(dāng)作性能測試時(shí),如何設(shè)
置目前使用的數(shù)據(jù)庫是home1目錄下的。
解決辦法:
1、復(fù)制home目錄mysql的my.cnf文件,具體路徑是:/etc/my.cnf,新命名為my_new.cnf文件
2、修改my_new.cnf文件中的信息,把文件中的home名改成home1,保存到目錄文件:/home/y/etc/
3、當(dāng)要用功能測試數(shù)據(jù)庫時(shí),停止mysql服務(wù),執(zhí)行命令:sudo ln -s /home/y/etc/my.cnf my.cnf;執(zhí)行完畢,啟動mysql服務(wù)
4、當(dāng)要用性能測試數(shù)據(jù)庫時(shí),停止mysql服務(wù),執(zhí)行命令:sudo ln -s /home/y/etc/my_new.cnf my.cnf;執(zhí)行完畢,啟動mysql服務(wù)
備注和說明:
在處理上面的兩個(gè)問題中,遇到了很多問題,其中就有一個(gè):發(fā)現(xiàn)數(shù)據(jù)庫服務(wù)啟動不起來;mysql.sock文件找不到,這時(shí)可查看mysql的錯(cuò)誤日志進(jìn)行分析,比在
GOOGLE中輸入“mysql.sock文件”的搜索結(jié)果看解決辦法快,并且定位準(zhǔn)確。通過錯(cuò)誤日志分析,最后確定是把/home/y/var/mysql 目錄文件拷貝到新的目錄
文/home1/y/var/mysql 后,沒有給目錄文件授權(quán)為mysql,導(dǎo)致mysql服務(wù)啟動時(shí),無法初始化創(chuàng)建mysql.sock文件。
具體mysql的log日志文件地址,可以在my.cnf文件中查看到,常用的日志文件有:mysql.log、mysqld.err。
問題及現(xiàn)象3:
需要把mysql數(shù)據(jù)庫中的某一張表導(dǎo)入到另一個(gè)數(shù)據(jù)庫中
解決辦法:
1、導(dǎo)出數(shù)據(jù)庫表文件,具體操作命令:mysqldump -u root ncp2 alimama_member >/tmp/alimama_member.sql
2、導(dǎo)入數(shù)據(jù)庫表文件,具體操作命令:mysql -uroot aliads<~/alimama_member.sql
最后總結(jié):在日常所測試的軟件,一定要打印錯(cuò)誤日志,通過錯(cuò)誤日志,可以分析程序是那個(gè)地方出了問題。在查找問題原因時(shí),如果日志不管用,可以加調(diào)試信息
打印出來用于調(diào)試程序。這個(gè)也非常管用,我在大學(xué)編程時(shí)經(jīng)常用這一辦法。
]]>
周末抽了個(gè)半小時(shí)在51testing的新手專區(qū)溜達(dá)、溜達(dá);看看能收到些啥信息,發(fā)現(xiàn)了jackei曾經(jīng)寫的一篇文章:軟件測試實(shí)踐之測試環(huán)境的規(guī)劃與管理;剛好這次也想起草一個(gè)測試環(huán)境管理規(guī)范文檔,根據(jù)當(dāng)前情況,參照這個(gè)文檔進(jìn)行了部分修改,放在這里和大家分享,希望大家能再次對這文檔提供一些新的意見,好進(jìn)一步完善和改良。參考的文章URL地址是:http://www.cnblogs.com/jackei/archive/2005/10/02/248141.html
測試環(huán)境管理規(guī)范
版本:V1.0
1. 測試環(huán)境重要性及意義
1、穩(wěn)定、可控的測試環(huán)境,可使測試人員花費(fèi)較少時(shí)間完成測試用例的執(zhí)行;
2、 可保證每一個(gè)被提交的缺陷被準(zhǔn)確的重現(xiàn);
3、經(jīng)過良好規(guī)劃和管理的測試環(huán)境,可以盡可能的減少環(huán)境的變動對測試工作的不利影響,并可以對測試工作的效率和質(zhì)量的提高產(chǎn)生積極的作用。
2. 測試環(huán)境搭建原則
測試環(huán)境搭建之前,需要明確以下問題:
1、所需計(jì)算機(jī)數(shù)量,以及對每臺計(jì)算機(jī)的硬件配置要求,包括CPU的速度、內(nèi)存和硬盤的容量、網(wǎng)卡所支持的速度等;
2、部署被測應(yīng)用的服務(wù)器所必需的操作系統(tǒng)、數(shù)據(jù)庫管理系統(tǒng)、中間件、WEB服務(wù)器以及其他必需組件的名稱、版本,以及所要用到的相關(guān)補(bǔ)丁的版本;
3、用來執(zhí)行測試工作的計(jì)算機(jī)所必需的操作系統(tǒng)、數(shù)據(jù)庫管理系統(tǒng)、中間件、WEB服務(wù)器以及其他必需組件的名稱、版本,以及所要用到的相關(guān)補(bǔ)丁的版本;
4、是否需要專門的計(jì)算機(jī)用于被測應(yīng)用的服務(wù)器環(huán)境和測試管理服務(wù)器的環(huán)境的備份;
5、測試中所需要使用的網(wǎng)絡(luò)環(huán)境;
6、執(zhí)行測試工作所需要使用的文檔編寫工具、測試管理系統(tǒng)、性能測試工具、缺陷跟蹤管理系統(tǒng)等軟件的名稱、版本、License數(shù)量,以及所要用到的相關(guān)補(bǔ)丁的版本。對于性能測試工具,則還應(yīng)當(dāng)特別關(guān)注所選擇的工具是否支持被測應(yīng)用所使用的協(xié)議;
7、測試數(shù)據(jù)的備份與恢復(fù)是否需要;
8、模擬實(shí)際生產(chǎn)環(huán)境或用戶環(huán)境搭建。
3. 測試環(huán)境管理
一、設(shè)置專門的測試環(huán)境管理員
每條業(yè)務(wù)線或測試小組應(yīng)配備一名專門的測試環(huán)境管理員,其職責(zé)包括:
ü 測試環(huán)境搭建。包括操作系統(tǒng)、數(shù)據(jù)庫、中間件、WEB服務(wù)器等必須軟件的安裝,配置,并做好各項(xiàng)安裝、配置手冊編寫;
ü 記錄組成測試環(huán)境的各臺機(jī)器硬件配置、IP地址、端口配置、機(jī)器的具體用途,以及當(dāng)前網(wǎng)絡(luò)環(huán)境的情況;
ü 完成被測應(yīng)用的部署,并做好發(fā)布文檔的編寫;
ü 測試環(huán)境各項(xiàng)變更的執(zhí)行及記錄;
ü 測試環(huán)境的備份及恢復(fù);
ü 操作系統(tǒng)、數(shù)據(jù)庫、中間件、WEB服務(wù)器以及被測應(yīng)用中所需的各用戶名、密碼以及權(quán)限的管理;
ü 當(dāng)測試組內(nèi)多名成員需要占用服務(wù)器并且相互之間存在沖突時(shí)(例如在執(zhí)行性能測試時(shí),在同一時(shí)刻應(yīng)當(dāng)只有一個(gè)場景在運(yùn)行),負(fù)責(zé)對服務(wù)器時(shí)間進(jìn)行分配和管理。
二、測試環(huán)境文檔管理
需要維護(hù)如下文檔是最新版本:
ü 組成測試環(huán)境的各臺計(jì)算機(jī)上各項(xiàng)軟件的安裝配置手冊,記錄各項(xiàng)軟件的名稱、版本、安裝過程、相關(guān)參數(shù)的配置方法等,并記錄好歷次軟件環(huán)境的變更情況;
ü 組成測試環(huán)境的各臺機(jī)器的硬件環(huán)境文檔,記錄各臺機(jī)器的硬件配置(CPU/內(nèi)存/硬盤/網(wǎng)卡)、IP地址、具體用途以及歷次的變更情況;
ü 被測軟件或產(chǎn)品的發(fā)布手冊,記錄被測軟件或產(chǎn)品的發(fā)布/安裝方法,包括數(shù)據(jù)庫表的創(chuàng)建、數(shù)據(jù)的導(dǎo)入、應(yīng)用層的安裝等。另外,還需要記錄歷次被測軟件或產(chǎn)品的發(fā)布情況,對版本差異進(jìn)行描述;
ü 測試環(huán)境的備份和恢復(fù)方法手冊,并記錄每次備份的時(shí)間、備份人、備份原因(與上次備份相比發(fā)生的變化)以及所形成的備份文件的文件名和獲取方式;
ü 用戶權(quán)限管理文檔,記錄訪問操作系統(tǒng)、數(shù)據(jù)庫、中間件、WEB服務(wù)器以及被測軟件或產(chǎn)品所需的各種用戶名、密碼以及各用戶的權(quán)限,并對每次變更進(jìn)行記錄。
三、測試環(huán)境訪問權(quán)限管理
按照如下要求維護(hù)測試環(huán)境權(quán)限:
ü 訪問操作系統(tǒng)、數(shù)據(jù)庫、中間件、WEB服務(wù)器以及被測軟件或產(chǎn)品等所需的各種用戶名、密碼、權(quán)限,由測試環(huán)境管理員統(tǒng)一管理;
ü 測試環(huán)境管理員擁有全部的權(quán)限;
ü 除對被測軟件或產(chǎn)品的訪問權(quán)限外,一般不授予開發(fā)人員對測試環(huán)境其他部分的訪問權(quán)限。如的確有必要(例如查看系統(tǒng)日志),則只授予只讀權(quán)限(user權(quán)限);
ü 除測試環(huán)境管理員外,其他測試組成員不授予刪除權(quán)限;
ü 用戶及權(quán)限的各項(xiàng)維護(hù)、變更,需要記錄到相應(yīng)的“用戶權(quán)限管理文檔”中。
四、測試環(huán)境變更管理
確保每次變更是可追溯和可控:
ü 測試環(huán)境的變更申請由測試人員提出郵件申請,由測試環(huán)境管理員負(fù)責(zé)執(zhí)行。測試環(huán)境管理員不接受非正式的變更申請(例如口頭申請);
ü 對測試環(huán)境的任何變更,測試負(fù)責(zé)人均應(yīng)記入相應(yīng)的文檔;
ü 每次變更相關(guān)的變更申請文檔、軟件、腳本等均應(yīng)保留原始備份,作為配置項(xiàng)進(jìn)行管理;
ü 對于被測軟件或產(chǎn)品的發(fā)布,開發(fā)人員負(fù)責(zé)打包、測試人員核對發(fā)布包。
五、測試環(huán)境備份與恢復(fù)
1、確保測試環(huán)境程序版本、數(shù)據(jù)是可恢復(fù);
2、對于功能或性能測試,測試數(shù)據(jù)需定期進(jìn)行備份或從生產(chǎn)環(huán)境導(dǎo)入測試數(shù)據(jù);
3、通過備份軟件工具備份數(shù)據(jù),同時(shí)保障備份數(shù)據(jù)可快速恢復(fù)。
4. 測試環(huán)境維護(hù)執(zhí)行流程附件
1、測試機(jī)器申請流程
2、測試機(jī)器維護(hù)列表格式
3、測試環(huán)境部署文檔維護(hù)列表格式
4、發(fā)布手冊維護(hù)列表格
]]>
由于開發(fā)人員也不知道該如何解決,通過搜索來的一些資料進(jìn)行分析后解決了問題,為此整理了該文檔。
據(jù)庫圖片/1.JPG)
據(jù)庫圖片/2.JPG)
據(jù)庫圖片/3.JPG)
據(jù)庫圖片/4.JPG)
據(jù)庫圖片/5.JPG)
據(jù)庫圖片/6.JPG)
據(jù)庫圖片/7.JPG)
據(jù)庫圖片/8.JPG)
據(jù)庫圖片/9.JPG)
據(jù)庫圖片/10.JPG)
據(jù)庫圖片/11.JPG)
據(jù)庫圖片/12.JPG)
]]>
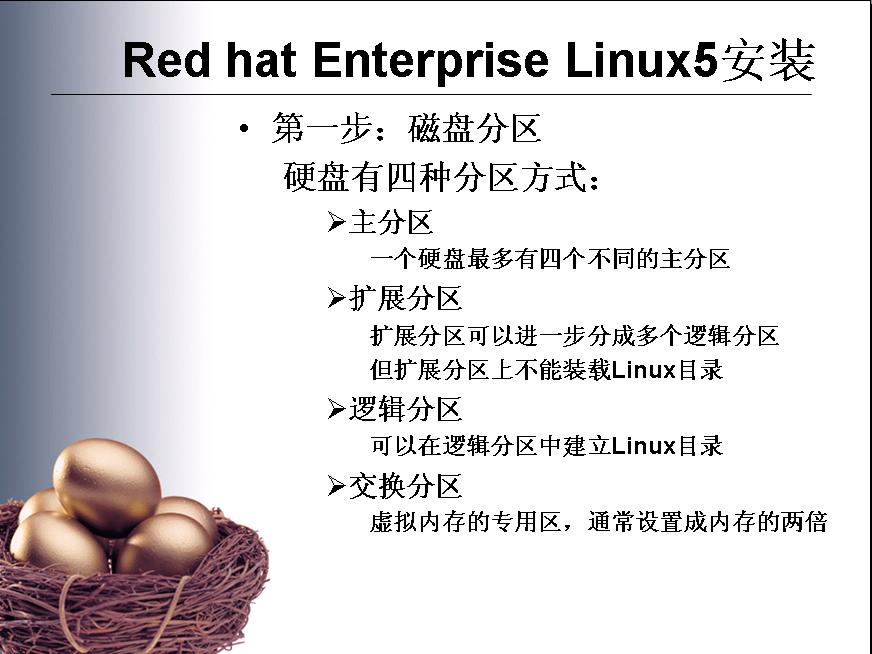
電腦買回來已經(jīng)有快一個(gè)月了,在充分利用了GOOGLE工具的情況下,終于自己搞定了Red hat Enterprise Linux 5的安裝,當(dāng)然代價(jià)很慘重,那就是過年回家拍的照片沒了,因?yàn)榘惭b的時(shí)候磁盤分區(qū)搞錯(cuò)了。幸運(yùn)的是,與馬云拍的照片在另一個(gè)地方還存有。為此,特整理了這么個(gè)文檔,供自己工作的同事及看我blog的測試新手做參考,希望對大家有幫助。


]]>
編寫背景:
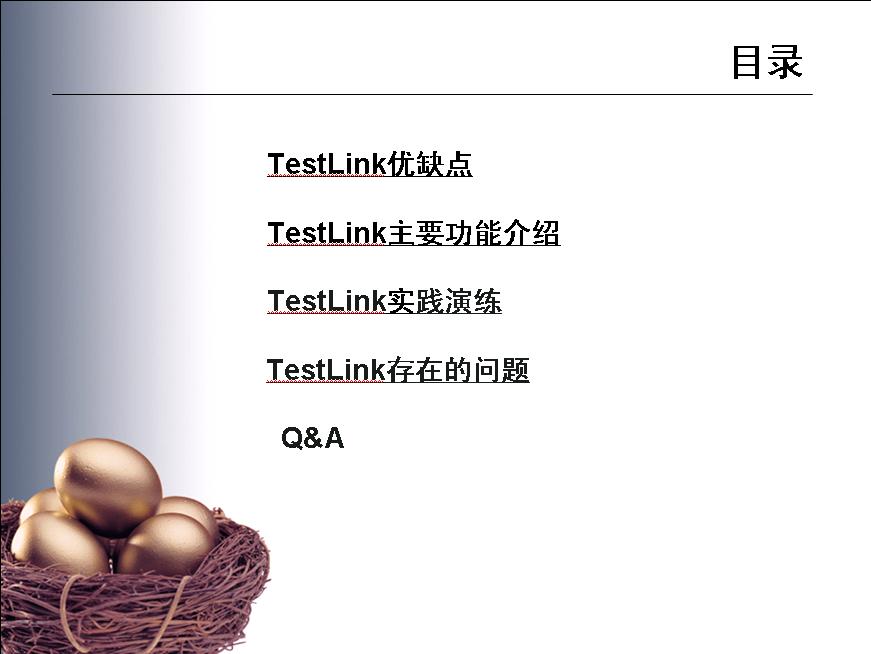
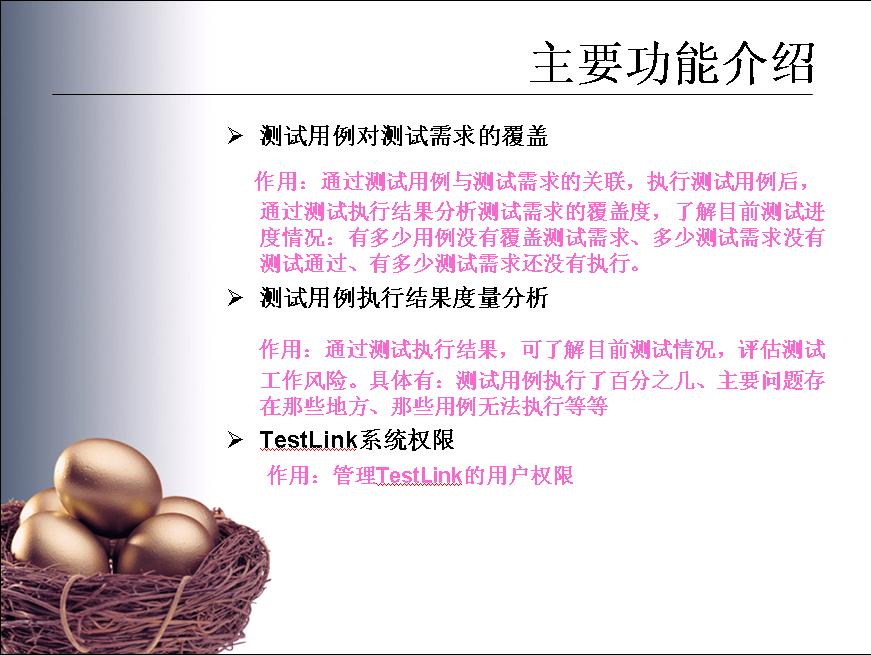
前段時(shí)間,使用TestLink應(yīng)用到測試工作中的3個(gè)測試任務(wù);感覺有些東西需要總結(jié)和大家一起分享,剛好下周要給部門內(nèi)部做分享,今天也拿出來給大家分享,算是08年開春,送給自己blog的第一份禮物。
工作快5年了,同學(xué)一直在嘲笑我,搞IT的連屬于自己的一臺電腦都沒有,這月發(fā)了工資打算給自己買臺電腦,把這幾年的測試心得和資料好好整理整理。
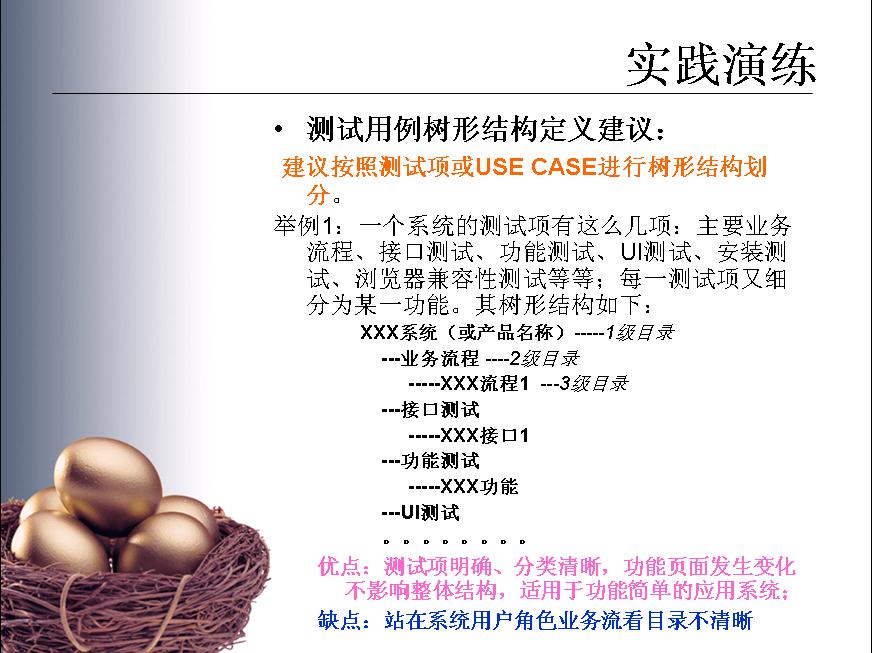
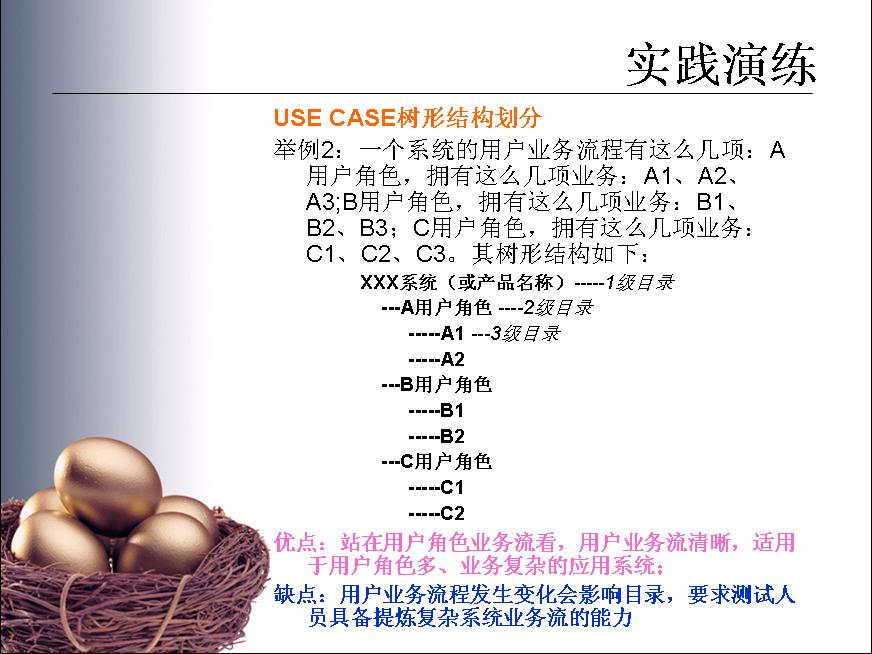
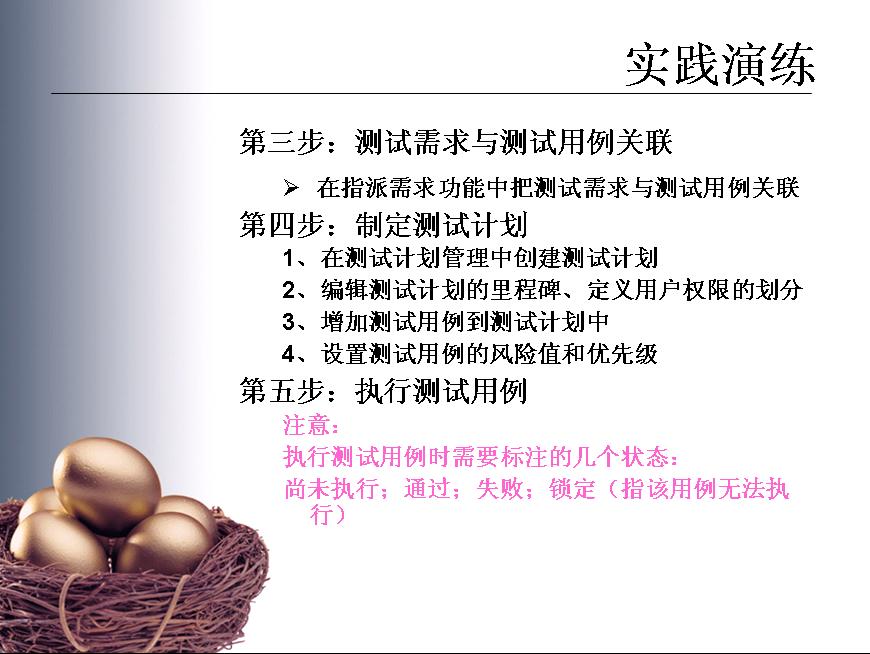
這篇隨筆只是記錄了使用TestLink的一些心得,不是具體的使用幫助手冊,希望對大家有所幫助,很多東西都還在學(xué)習(xí)和摸索中。


]]>